60. Japanese Matcha Green Tea Mochi – Gluten Free

Mochi are like no other cake I’ve ever tasted. At first I thought I didn’t like them, with their chewy jelly exterior and smooth paste interior, that’s just not as sweet as I’m used to in my sugar spiked desserts. However once you get past your preconceptions of what a cake should taste and feel like, you’re going to love Mochi. I can guarantee it.

Matcha Mochi

Matcha Mochi

The first time I experimented with Mochi was on a food adventure around Hong Kong. (Although they are a traditional Japanese sweet treat.) My friend Bobo and her Mam took us on a whistle stop tour of the real Hong Kong. Rolling from Dumpling Soup and Dim Sum, to Duck and Eel banquets. Sampling Chinese Milk Tea, Egg Tarts and Pineapple Cakes and everything in between. Including impressive dry ice tapioca desserts presented with a flourish of icy smoke clouds. This was my kind of trip! Although I must admit I didn’t manage to eat noodles for breakfast. A regret I still carry with me today. Unfortunately I’m much more of a tea and toast kinda gal!

But Mochi were something else. Deceptively bland on the outside in their floury cloak.  When you tentatively choose your mochi you immediately realise how soft and squidgey they really are . Take a bite and there’s a perfect balance of sweet bean paste to rice gel dough. I always thought that Mochi would be difficult to make at home, when in fact they are possibly one of the quickest bakes I’ve ever made! The assembly is the trickiest bit and even then it’s a bit like playing with Play Doh so it’s actually quite fun!

My Mochi Mountain at Confidential Canapé Collective

My Mochi Mountain at Confidential Canapé Collective

You can apparently buy red bean paste (also called Anko) pre made (if you can find it!). I couldn’t find any so made my own, and as per usual, made it up as I went along! I chose dried Aduki beans from my local health food shop. These beans are also know as Azuki or Adzuki beans. They are much smaller than kidney beans and apparently rather good for you. They’re classed as a ‘superfood’ which is a bonus. (Just in case you’re interested they are high in soluble fibre, and rich in other nutrients such as B vitamins, potassium, magnesium, zinc, iron, copper and manganese.)

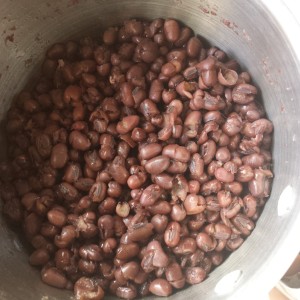
Tender Aduki Beans after 2 hours simmering

Tender Aduki Beans after 2 hours simmering

You do need to plan this one in advance if using dried aduki beans. You must soak them overnight in cold water. Change the water the next day, then bring them to the boil and simmer them for 2 hours. Once they are tender they’re ready to make into a paste. I didn’t realise that you’re supposed to remove the skins by passing them through a sieve, so I ended up with rather more textured paste than some Japanese confectionery would use… This is called Tsuban (red bean paste). If you sieve your beans you’ll end up with smooth Koshian paste. Once you’ve mastered Anko making, you can use it to fill lots of other Japanese desserts such as Dorayaki (Japanese Red Bean Pancake) or Red Bean Ice Cream (I’m adding these to my list right now!).

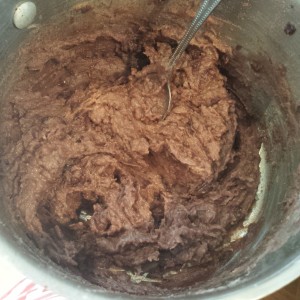
The Aduki Sweet Red Bean paste

Anko – Aduki Sweet Red Bean paste

Once your beans are tender, drain the water and stir in the sugar. Then add a splash of water (half a cup) and allow to simmer . As the water evaporates the paste thickens. When you can draw a line along the bottom of the pan with a spoon the paste is ready. Allow it to cool and blend with a hand blender to a smooth paste. If you make too much you can freeze it for future use.

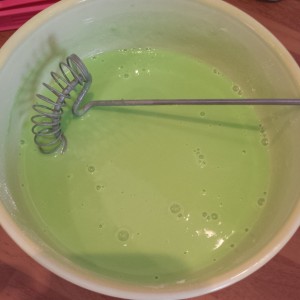
The very runny rice flour sugar and water batter ready for microwaving

The very runny rice flour sugar and water batter ready for microwaving

Technically this is a non-bake bake. You only need to microwave the glutinous rice flour, sugar and water for 3 minutes 30 seconds to produce a wonderfully gelatinous dough! It’s amazing how many Mochi you can eek out of the small amount of flour, water and sugar.
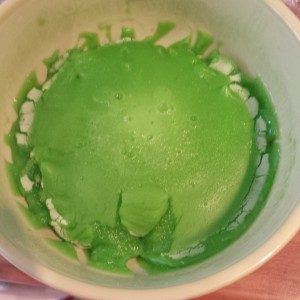
The very hot and thick gel dough. You can see my fingermarks where I tried to remove the piping hot dough out of the bowl with my bare hands. Be careful!

The very hot and thick gel dough. You can see my fingermarks where I tried to remove the piping hot dough out of the bowl with my bare hands. Be careful!

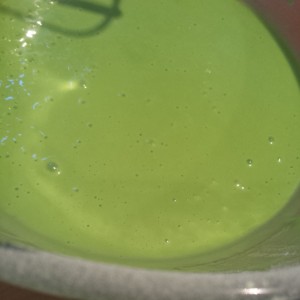
Sift one cup of glutionous rice flour (I used my left over Pandan flavoured flour from my Pandan Chiffon Cake. It’s got to be glutinous rice flour as this is the sticky kind. It’s still gluten free despite it glutinous qualities.), followed by 1/4 cup of sugar, 2 tsp of matcha green tea powder, and 1 cup of cold water into a microwave safe bowl. Whisk gently until you have a very smooth thin batter. You could choose other flavourings or colours such as jasmine, taro or coconut. Add your preferred flavouring before cooking!

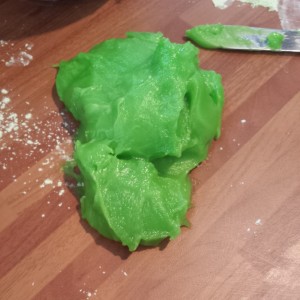
Cover the bowl with cling film and microwave on high for 3 mins 30 secs. The dough will thicken and inflate. Check it and then microwave for a further 30 seconds if it needed to be a bit firmer.  Et voila you have a extremely green jelly dough ready to shape!

The bright green dough scooped safely out of the bowl with a knife

The bright green dough scooped safely out of the bowl with a knife

IT WILL BE VERY HOT when you take it out of the microwave! Most recipes tell you to shape it whilst it’s hot. I can assure you it’s much easier to work with when cool and less likely to sizzle your hands, so be careful.

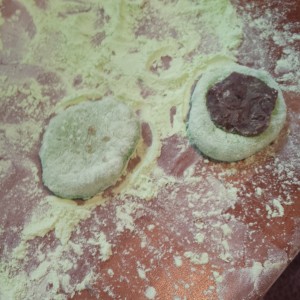
Lots of rice flour everywhere to stop the dough from sticky to everything

Lots of rice flour everywhere to stop the dough from sticky to everything

Dust your worksurface with rice flour (other recipes say to use potato starch or cornflour, but as I had rice flour to hand I used that and it was fine.) You’re going to want to dust your hands too as the jelly dough sticks to everything! Mine was a vivid green so it looked like I’d been slimed. I’m still finding green goo in my kitchen… Take a small amount of dough (about 1cm x 5cm) and flatten it out using your finger tips on the worksurface. Press it into a round shape about 3mm thick.

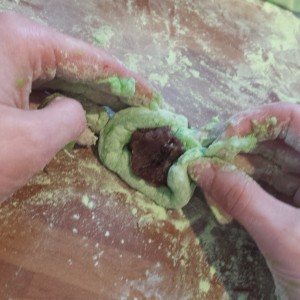
Fold in the edges to seal in the red bean paste

Fold in the edges to seal in the red bean paste

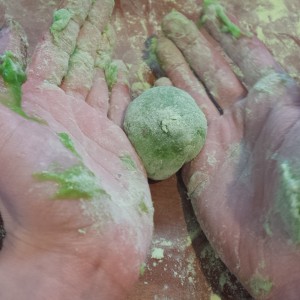
Dollop a nice large marble sized pea of red bean paste in the centre of your dough and fold the dough over the paste to seal it in. Turn the Mochi over and roll it in a cupped hand or on the work surface to encourage the sealed edge to stick together and create a smooth round finish. Roll it in a little more rice flour and pop it into a mini cupcake cake case. Roll and repeat until you’ve used all of your paste and dough!

Shape shape shape your mochi

Shape shape shape your mochi

You could choose other pastes or ice cream to flavour your mochi with. Next time I’m going to try matcha ice cream centres!

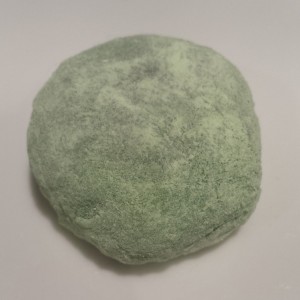
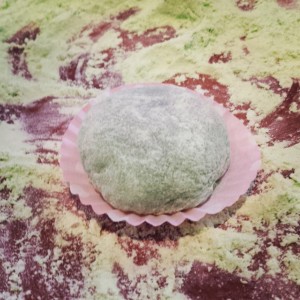
The finished Mochi sitting pretty

The finished Mochi sitting pretty

I had to make a second batch of dough as I’d been a bit too enthusiastic with my portion sizes first time round. My Mochi were more dough than paste which isn’t as tasty to eat.
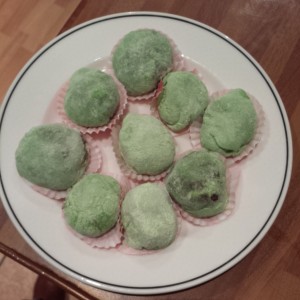
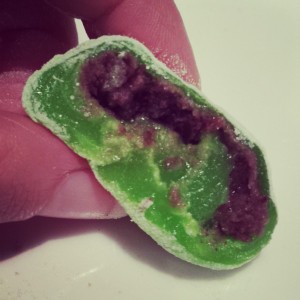
The first batch - I had rolled some too thin so the red bean paste is lurking periliiously close to the surface of some mochi

The first batch – I had rolled some too thin so the red bean paste is lurking periliously close to the surface of some mochi

It could be the complex combination of it’s jelly like texture or the smooth savoury yet sweet paste filling that make Mochi so memorable. Or perhaps it’s the unusually satisfying bite that they possess. Once you’ve tried them I’m sure you’re going to want to try them and experiment with more flavour combinations. They’re small so you probably want to eat at least 2 in a sitting!

A mouthful of mochi! Yum yum yum!

A mouthful of mochi! Yum yum yum!

This dough recipe was enough to make 16 small mochi. I had enough paste left to make another batch so made a second batch of dough. Good news Mochi are gluten free and low in sugar so they’re relatively health conscious snack or dessert too. It’s best to store Mochi in an air tight container. They will keep for a couple of days if you don’t eat them all straight away!
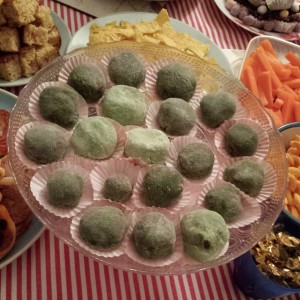
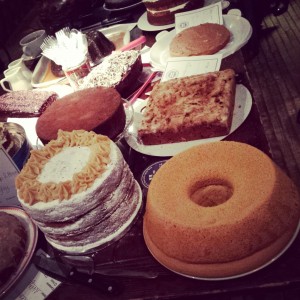
My Mochi Mountain at Confidential Canapé Collective

You can see the Matcha Mochi are a bit darker in colour and more rounded in shape 🙂 My Mochi Mountain at Confidential Canapé Collective

I made my Mochi to share with friends at out Confidential Canapé Collective which we hosted at my new house. I really enjoyed making and eating these little sweet treats. I definitely prefer my Mochi with matcha in the dough. It gives a richer yet subtle flavour whilst tinting the dough naturally with a dark green hue. I was surprised by how many disappeared that night and some friends even took a couple home for later. Therefore I can confidently declare my Matcha Mochi a success! I can’t wait to attempt Matcha ice cream next!

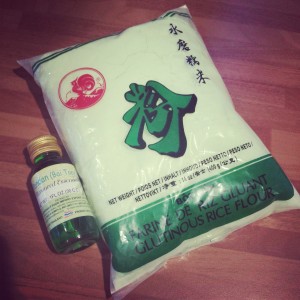
Things that I used to make my Mochi

Matcha Green Tea Mochi Dough Recipe

Really quick to prepare! Makes enough dough for approx 16 small mochi

  • 1 cup of glutinous (sticky) rice flour – I used pandan flavoured flour but you could use plain and add other flavours
  • 1 cup of water
  • 1/4 cup of caster sugar
  • 2 tsp matcha green tea powder

Mochi Filling Red Bean Paste (Anko) Recipe

Takes a bit of preparation: Soak over night and boil for 2 hours

Makes enough to fill approx. 30 mochi

  • 100g dried Aduki beans
  • cold water
  • 50g sugar

Red Bean Paste Instructions

  1. Soak the dried beans in cold water over night
  2. Drain the water.
  3. Cover the beans in cold water and bring to the boil. Simmer for 2 hours til tender.
  4. Drain the water. Stir in sugar. Add half cup of water. Simmer til very soft and water is evaporated.
  5. Blend with hand blender to a smooth paste.

Mochi Instructions

  1. Whisk the ingredients together into a thin batter
  2. Cover with cling film and microwave for 3 minutes 30 seconds and then a further 30 seconds if needed to firm the dough up further
  3. Allow to cool before scooping the dough onto a rice floured surface (use more flour as needed to prevent sticking)
  4. Take small pieces (1x5cm) of the dough and shape into rounds
  5. Place a marble sized dollop of your chosen filling in the centre of the dough
  6. Fold the edges over the filling. Press the edges to seal
  7. Turn the mochi over and roll in a cupped hand to seal the edges further.
  8. Dust with rice flour and place into paper case
  9. Leave to set at room temperature for an hour
  10. Eat!
59. Pandan Chiffon Cake – South East Asia & Gluten Free

Huge and Fluffy Pandan Cake

Huge and Fluffy Pandan Cake

Searching for a suitably exotic and challenging recipe I remembered a wonderful recipe I was given by a fellow cake clubber. Her family recipe for Pandan Cake.  Not to be confused with Panda cake. Although a Panda Pandan Cake would be immense.

The Great Reveal! (Probably not the best photo that I could have got of the delicate Pandan Chiffon Cake but it shows how brightly coloured it is on the inside!)

The Great Reveal! (Probably not the best photo that I could have got of the delicate Pandan Chiffon Cake but it shows how brightly coloured it is on the inside!)

Pandan is a traditional flavouring used in South East Asia. (You might find Pandan Cake in Indonesia, Malaysia and Singapore.) It comes from the leaves of the Pandan plant. It is also used to help flavour dishes such as jasmine sticky rice.  If you can get a hold of some Pandan leaves you can make your own extract by boiling the leaves in a small amount of water. Pandan cake is usually green because of the chlorophyll from the leaves  but as the leaves aren’t readily available everywhere most Pandan essences contain some bright food colouring to help recreate the glorious green sponge at home.

Gloriously Green Pandan Essence and Pandan infused Glutinous Rice flour

Gloriously Green Pandan Essence and Pandan infused Glutinous Rice flour

In search for Pandan paste I found Pandan essence and Pandanus Glutinous Rice flour which contained the elusive Pandan extract.  As rice flour behaves in a slightly different way to normal plain flour I had to modify my recipe to accommodate the changes. You don’t have to use the green flour if you can’t find it. You can use self raising or plain. But if you prefer gluten free go for rice flour.  Glutinous rice flour (despite it’s name) is gluten free. The glutinous bit means the rice belongs to the sticky rice family.

The Pandan Chiffon Cake in amongst the stunning array of Clandestine Cakes

The Pandan Chiffon Cake in amongst the stunning array of Clandestine Cakes

Now upon extra research I realised that this is a chiffon cake. Those Great British Bake off fans will remember this as one of the technical challenges that was a bit tricky to bake! And considering my oven’s unpredictability this may not be the best choice to bake for our first Clandestine Cake Club gathering of 2014. But I do like a challenge!

Whisk 8 eggs yolks with the sugar

Whisk 8 eggs yolks with the sugar

This has a lot of eggs in it so you will need 2 big bowls but doesn’t take as long to make as you might think. (Only if you stop to take photos along the way does this take a long time! ). Whisk 8 egg yolks with 100g of sugar until light and fluffy

Whisk in the coconut milk and oil

Whisk in the coconut milk and oil

Whisk in the coconut milk along with the pandan essence/paste/extract.  If you’re worried it’s not going to be green enough add a dot of green food colouring gel.  It will soon become a frothy fluid batter with a green tinge to it.

Adding the Pandan Essence

Adding the fluorescent Pandan Essence

Sift in the flour ( whatever type you prefer) along with the baking powder and bicarbonate of soda.  If using self raising flour you will not need as much raising agent.  Whisk a third of the flour into the batter followed by a third of the oil. Repeat until it’s all combined.

Whisking in the glutinous rice flour - How bright is the batter!

Whisking in the glutinous rice flour – How bright is the batter!

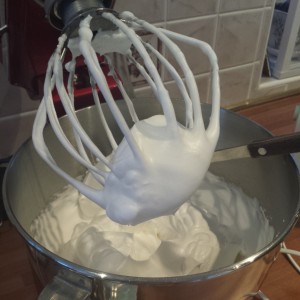
Whisk the egg whites until frothy. Then gradually add 100g of sugar and continue to whisk on high until stiff peaks form.

Whisk the egg whites (adding the sugar gradually) until stiff peaks are formed

Whisk the egg whites (adding the sugar gradually) until stiff peaks are formed

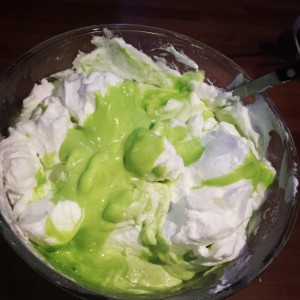
Fold a dollop of egg whites into the green batter to loosen the mix and then carefully fold the egg whites in to preserve the air in the mix and help the cake rise evenly.

Carefully fold in the egg whites

Carefully fold in the egg whites – Love how green the batter is!

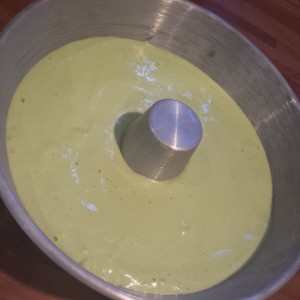
As uncomfortable as this seems (it screams against all baking experience)  pour the mix into a NON GREASED tube pan (looks like a flat topped Bundt tin). Apparently chiffon cakes need to cool upside down and grip the sides of the tin so they slowly slide out of the tin as they cool. If removed straight away the cake will concertina up and end up as a dense pancake.  Greasing the tin would make the cake slip out too quickly so try not to grease it

Chiffon batter ready to bake in it's un greased tube pan

Chiffon batter ready to bake in it’s un greased tube pan

Now with all that wonderful air in the cake the sponge springs up magnificently in the oven almost escaping the tin. With the hole in the middle the cake will cook quicker and more evenly which can only be a bonus in my oven.

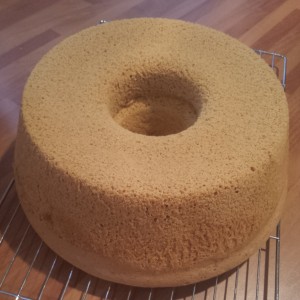
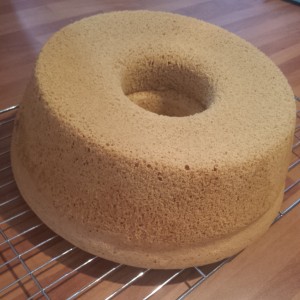
The enormous Pandan Chiffon Cake!

The enormous Pandan Chiffon Cake!

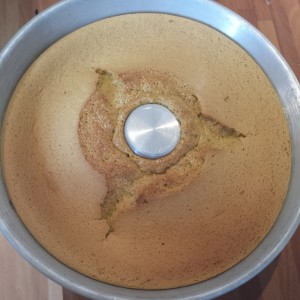
You will need to keep an eye on the cake to make sure it doesn’t burn.  Bake it for 50 mins at 160 degrees c ( fan) but if it is cooked through sooner take it out (or leave it longer if it needs it.) I made the mistake of sticking cocktail sticks into the cake too often to check that it was cooked. This meant I deflated the cake slighty. Also pausing to mess around taking photos of the cake meant that I didn’t invert the cake tin quick enough and to my horror saw the cake sag down inside the tin. You can see on the cooled cake that it has a little ridge around the bottom of the cake (a bit like a muffin top over spilling someone’s jeans). Note to self: check it’s cooked and tip the tin upside down immediately when taking it out of the oven!

Despite it's saggy ridge the Pandan Chiffon Cake was amazing!

Despite it’s slightly saggy ridge the Pandan Chiffon Cake was amazing!

Once the cake cooled completely I found that it didn’t slide out of the tin as easily as I had hoped, as the cake was clinging on a little too tightly to the tin. I coaxed it gently out of the tin using a sharp knife and running it around the edge of the tin, allowing gravity to do the rest of the job. This meant that the cake didn’t have a shiny finish to it, but  I think this is how it’s supposed to look.

The Magnificent Pandan Chiffon Cake

The Magnificent Pandan Chiffon Cake

What a magnificent cake the Pandan Chiffon Cake is! It is extremely light and soft to the touch, more like a tasty pillow than a cake. I’ve never eaten a cake that actually melted in my mouth before until now. It’s moist and airy and keeps for at least 3 days after baking it. (That’s as long as I managed to save my final piece until.) It’s worth slicing the cake with the sharpest knife that you have to preserve it’s shape as much as possible as it is very delicate. (I may have been a tad heavy handed when slicing it up as I squished it slightly.)

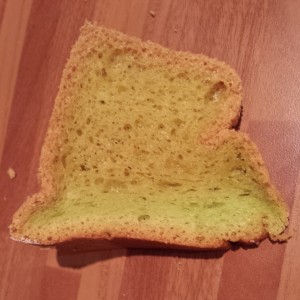
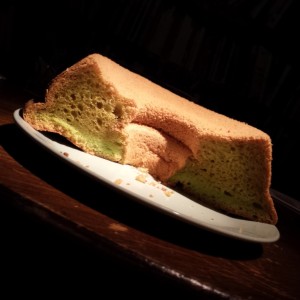
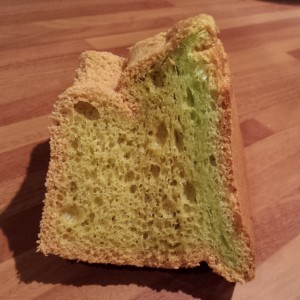
A slightly squashed slice of Pandan Chiffon Cake

A slightly squashed slice of Pandan Chiffon Cake

Pandan is an unusual flavour. It perfumes the air whilst managing to taste both sweet and savoury at the same time. It’s similar to Green Tea (Matcha) cakes but like nothing else that I’ve ever tasted before. I will surely be baking this again. It really doesn’t take as long as you might think, perhaps 30 minutes to prepare and as it doesn’t need any dressing up, you don’t need to spend time decorating the cake. Icing would be overkill. It’s a deceptive cake. It looks rather plain and boring from the outside, but that first slice releases the pandan perfume and the glorious green chiffon . It’s a much more complex and interesting cake than you might initially think. If you’re going to attempt an exotic cake I can’t recommend the Pandan Chiffon Cake enough!

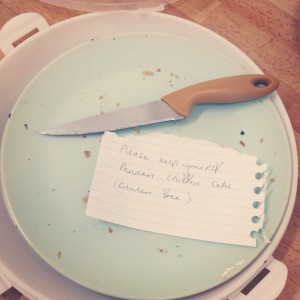
An empty plate speaks for itself!

An empty plate speaks for itself! – The Pandan Chiffon Cake disappeared very quickly

Things I used to make my Pandan Chiffon Cake

Batter

  • 8 egg yolks
  • 100g sugar
  • 140ml coconut milk
  • 1/4 cup olive oil
  • 170g pandan flavoured glutinous rice flour (you can use plain rice flour if you prefer)
  • 3 tsp pandan essence (1tsp paste)
  • 3 1/2 tsp baking powder
  • 2 tsp bicarbonate of soda
  • (Green food colouring if you wish)

Egg whites

  • 8 egg whites
  • 100g sugar
  • 1/2 tsp cream of tartar

Method

  1. Whisk the eggs yolks with the sugar until light and fluffy
  2. Whisk in the coconut milk, pandan essence (and a splash of green food colouring if you would like it extra bright)
  3. Sift the bicarbonate of soda and baking powder and flour together
  4. Whisk in a third of the flour mixture followed by a third of the oil until it’s all incorporated
  5. In a separate bowl beat the egg whites until frothy, then gradually add the sugar and cream of tartar
  6. Beat until the eggs whites are they reach stiff peaks
  7. Fold the egg whites into the batter gently
  8. Pour into a non greased tube pan
  9. Bake at 160 degrees c fan for 50 minutes
  10. When fully cooked invert the tin immediately over a cooling rack and allow the cake to slide gently out of the tin as it cools
  11. Slice with a very sharp knife and store in an airtight container

55. Giant Punschrulle – Swedish Green Marizpan Rolls

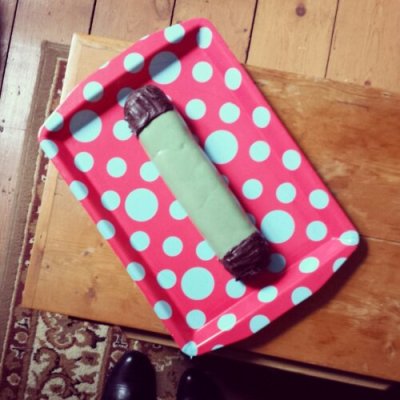
too long for a normal plate - the giant prunschelle

too long for a normal plate – the giant punschelle

The Prince family love marzipan. In every shape, form and colour. There is a a rather well known Swedish shop that sells these amazing little green marzipan rolls called Punschrulle and everytime I go I stock up, mainly on food ignoring all the other homeware options.

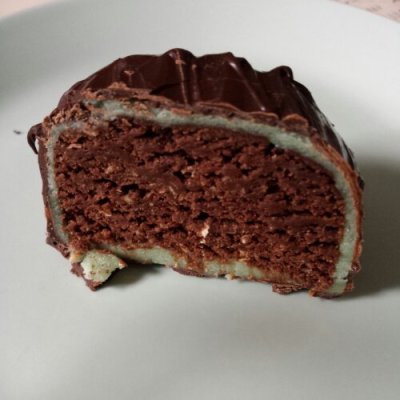
A slice of giant Punschrulle cake

A slice of giant Punschrulle cake

I have been looking for a recipe for Punschrulle or Punsch-rolls forever and was unable to find one that reflected the ingredients described on the back of the packet. The key ingredient was always missing, oats! So in the end I made up my own recipe and tasted it along the way to make sure I had got it as close to the original as possible.

A birds eye view of a giant Punschrulle cake

A birds eye view of a giant Punschrulle cake

The Punschrulle is also known as dammsugare which in English means rather oddly, “vacuum cleaner”. I think this is related to it’s tube like appearance, like a vacuum cleaner’s hose perhaps? But also because this cake gives you the opportunity to use up leftover cakes and cookies, hoovering up the crumbs from yesterday’s baking. What an efficient little cake this is.

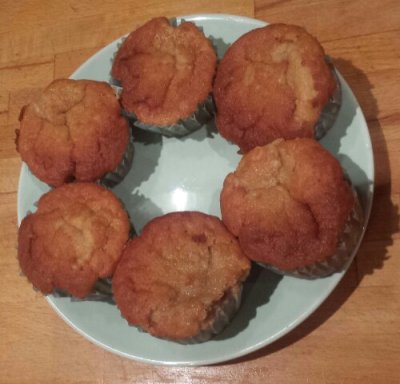
6 Earl Grey Cupcakes just begging to be mashed up

6 Earl Grey Cupcakes just begging to be beaten up

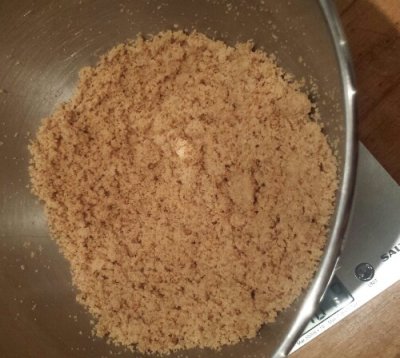
I was lucky to have 6 earl grey cupcakes waiting patiently to be eaten in my freezer from a rather large baking frenzy I had whipped myself into. now was there time to shine. I defrosted the 6 cupcakes and blended them in my kitchenaid (using the beater attachment) to a fine crumb. You could also use a hand blender or food processor if you wish. I simply couldn’t be bothered to unpack my food processor so used the kitchen aid, which does a pretty good job of beating things to a fine crumb, particularly if you break it up a little by hand first.

cake crumbs

cake crumbs

Chocolate and marzipan are my favourite combination. I could merrily eat a block dipped in dark chocolate all to myself, but tried to resist as far as possible. Punschrulle rolls are filled with a rich chocolatey, oaty cake. Further investigation also indicates that they are a rather boozy cake too, with punsch liquor. However I wanted to make a child friendly recipe, not get my little nephew hammered, so I omitted the booze from my recipe. But feel free to whack a bit in if you prefer your cakes alcoholic. I’m not entirely sure where you purchase punsch liquor from in the UK, but I think brandy , vodka or rum would be a good substitute!

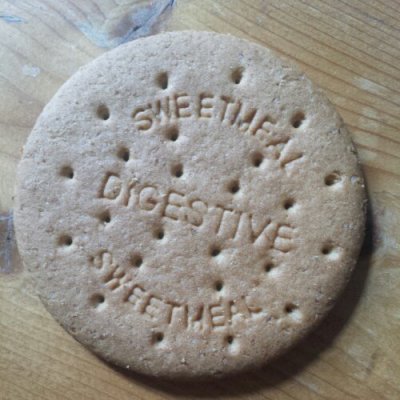
The classic storecupboard essential- digestive biscuits

The classic storecupboard essential- digestive biscuits

Sieving cocoa powder and sugar into the mix I realsied that I needed something more to bulk the cake crumbs up and balance out the cocoa powder. Rooting around in my cupboards I found some digestive biscuits which were perfect for this purpose. Again I crumbled them into the mixer bowl by hand and let the mixer do the work for me.

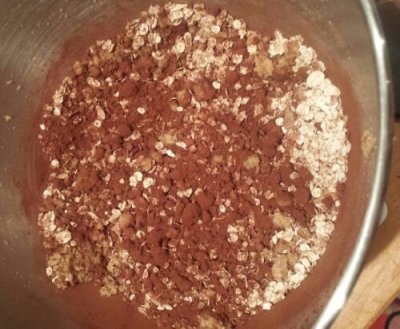
Chuck in the rest of the cocoa powder and sugar

Chuck in the rest of the cocoa powder and sugar

I was worried that the oats would be a bit too large in this mixture so introduced my hand (stick blender) to blitz the mixture to a much finer crumb. As this cake is uncooked, the oats needed a little time to soften in the mixture, you want texture to the cake, but not to make your friends feel like they have oats stuck in their throat.

Beat in the butter

Beat in the butter

It’s such a simple cake to make, having completed the baking when I made the cupcakes a few months ago. All that’s left to do is to rub in the butter and shape the mixture into a roll! I wanted to make my punschrulle for my sisters birthday and envisaged a giant punschrulle roll, rather than making individual rolls.

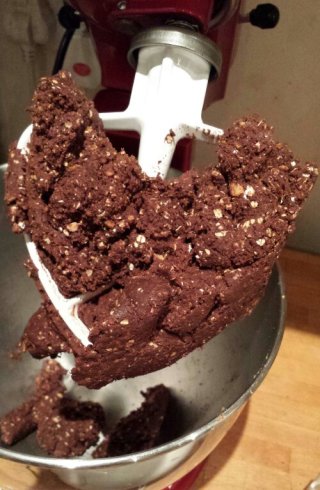
Beat the mixture together until it sticks in one nice lump

Beat the mixture together until it sticks in one nice chocolatey lump

I used cling film to roll the mixture up and flatten at the ends, whilst smoothing the top.

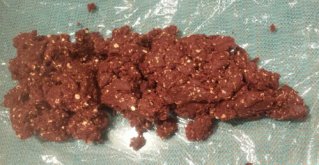
Plonk your buttery cake crumb lump onto some clingfilm and roll

Plonk your buttery cake crumb lump onto some clingfilm and roll

Sealing the ends of the cling film, the roll can then be transferred easily to the fridge to set, while you get busy colouring the marzipan and rolling it out.

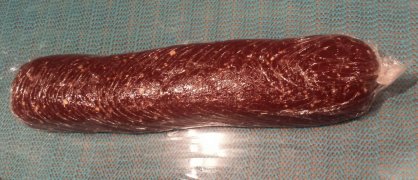
a cling film wrapped chocolate sausage

a cling film wrapped chocolate sausage

Traditionally Punschrulle rolls are bright green and each end is dipped in dark chocolate. I used a little green gel food colouring and kneaded it thoroughly into the marzipan. dousing the worksurface in icing sugar stops the marzipan sticking and means you can roll it out into a thin rectangle, just enough to cover the entire cake.

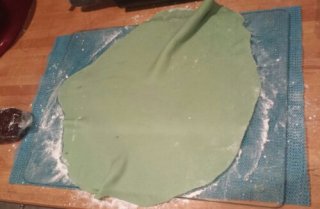
Turn your marzipan green and roll out

Turn your marzipan green and roll out

Making sure the marzipan was loose enough to remove it from the worksurface, (The last thing you want is to realise half way through icing you cake is that the marzipan is welded on to the worksurface.)

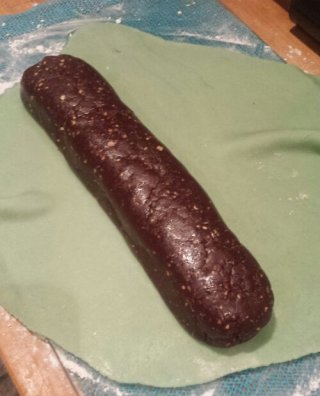
Chocolate Sausage ready to be wrapped in marzipan

Chocolate Sausage ready to be wrapped in marzipan

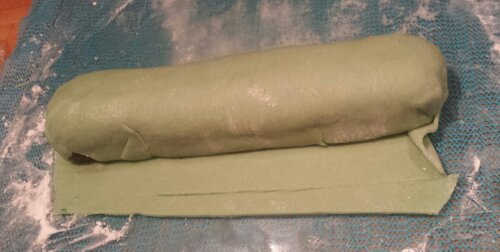
I plonked the roll face down (the smooth side which is to be the top of the cake) face down on to the marzipan and folded the marzipan over to envelope the cake fully. Strategically folding the marzipan to hide the join underneath the cake and tuck the folds along the edges underneath.

Wrap up and tuck in the edges

Wrap up and tuck in the edges

Whilst the bottom of the cake is facing upwards, I melted a bar of dark chocolate in the microwave, reserving one third of the chocolate and stirring every 30 seconds to avoid it burning. Once the chocolate is melted pour in the final third of the chocolate and stir until fully melted. This helps to reduce the temperature of the chocolate and temper it, so it retains a glossy finish and doesn’t look like a sweaty mess when you’re finished.

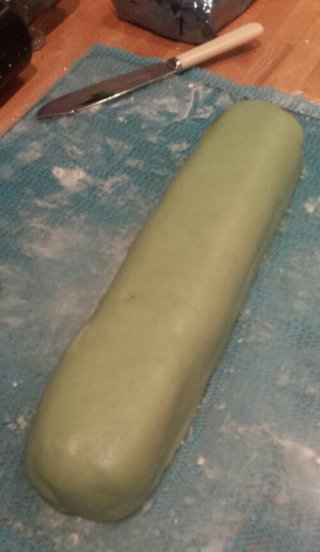
One chocolate cake sausage encased in marzipan

One chocolate cake sausage encased in marzipan

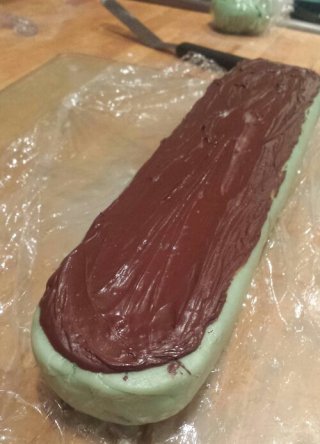
I smeared melted chocolate all over the bottom of the cake in a thin layer and allowed it to set. This means each slice has a layer of chocolate, not just the lucky people who get the end pieces! It also helps to lift the cake when you need to move it later on…

Smear melted chocolate all over the bottom of the roll

Smear melted chocolate all over the bottom of the roll

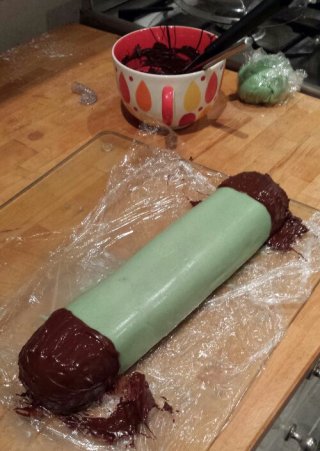
Once the bottom layer of chocolate has set fully, turn the cake face up and paint the ends of the cake with a thick layer of chocolate. Et voila, you have created a giant Punschrulle cake!

Paint each end with melted chocolate

Paint each end with melted chocolate

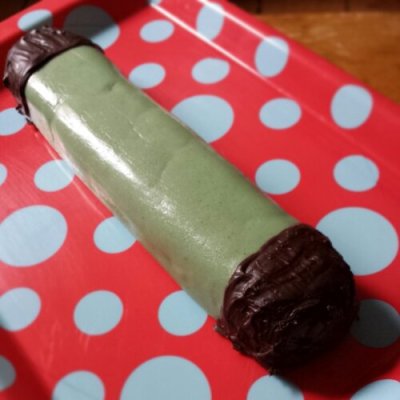
Now this is when I realised that you have to be a member of my family to think this cake looks pretty. On a giant scale, the Punschrulle looks a bit odd… but it tastes great! (Even if I do say so myself.) I don’t own a plate or chopping board long enough to house such an enormous cake, so I had to resort to using a colourful serving tray.
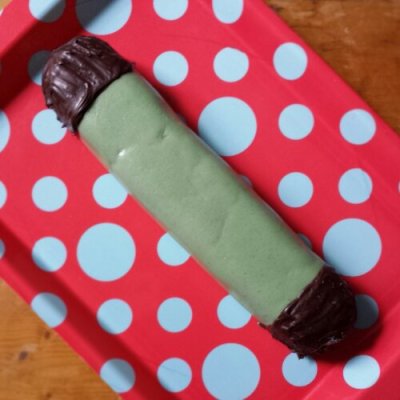
too long for a normal plate - the giant Punschrulle

too long for a normal plate – the giant Punschrulle

The addition of a giant candleabra birthday candle  gave the cake somewhat of an eccentric finish. What Giant Punschrulle cake would be complete without a birthday candleabra? This cake didn’t last long in our house. Despite it’s chocolatey richness, it’s very moreish and disappears very quickly when served with a hot cup of tea. I could easily eat 2 slices in one sitting. The crunch of the dark chocolate is there with every bite, balancing out the marzipan and dense oaty filling.  It’s a great way to use up any leftover cakes and biscuits in your house, so it’s a rather economical and unusual birthday cake. If you want to see how the individual Punschrulle rolls should look, have a pop over to www.nearof.com for a review of the cakes I based my recipe on.

What giant prunschelle cake would be complete without a birthday candleabra?

What giant prunschelle cake would be complete without a birthday candleabra?

Happy Birthday to my wonderful sister! Here’s a interesting interpretation of the Punschrulle cake just for you!

Giant Punschrulle Cake

Giant Punschrulle Cake

Things that I used to make my Giant Punschrulle Cake

  • 6 cupcakes (you could use whatever cake crumbs you have available, chocolate or vannila would probably work best)
  • 10 digestive biscuits (plain biscuits again work well in this cake, rich teas, shortbread or digestives would be good)
  • Sugar
  • Butter
  • Vanilla

Icing

  • 300g marzipan
  • green food colouring
  • icing sugar (for dusting the board)

Chocolate 

  • 100g dark chocolate

54. Hawaiian Haupai Pie – A Coconut Chocolate Cream Dream

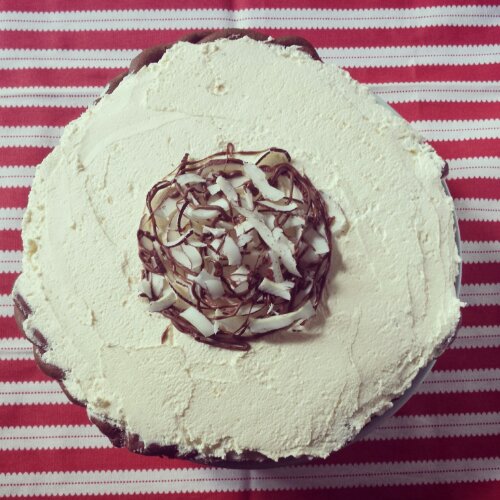
Coconut curls and chocolate drizzle. Haupai Pie part deux

Haupai Hawaiian Coconut Pie

Having never visited Hawaii I have absolutely no idea what the traditional cake Hawaiian cake would be until I discovered Haupai Pie. I’ll never look back from this tropical chocolate, coconut cream dream pie.

The first slice of Haupai Pie

The first slice of Haupai Pie

Trying to decide on a birthday cake for my sister I put a call out for inspiration on twitter and Haupai Pie was suggested by the lovely @FoodandFrets. I knew instantly that this was the pie for me especially with my upcoming trip to @private_pie club which was to be held the amazing Quilliam Bros Teahouse (which is incidentally also my favourite shop to visit with their millions of teas brewed to perfection and spectacular peanut brownies). The theme of Private Pie club this month was ‘free from’. I interpreted this to mean free from meat but not free from calories.

The sweet pie table at Private Pie. Gorgeous Raw Chocolate Vegan Pie, Shoofly Pie and my Hapuai Pie

The sweet pie table at Private Pie. Gorgeous Raw Chocolate Vegan Pie, Shoofly Pie and my Hapuai Pie

Recipes vary for Haupai pie. Many require just an unspecified ‘pie crust’. Which is helpfully vague but also means I can do what I like best in the kitchen, and make it up as I go along. Sweet chocolate pastry pie crust it is then for me!

Pastry is not my forte. It’s no secret. I have heard that chocolate pastry is particularly difficult and delicate but who cares what the worriers tell you. Just plough on through and it’ll be fine. If I can make it I’m sure anyone can.

Butter me up

Butter me up

Infused with confidence, having churned my own butter recently, I set to work using my Homemade butter to make this challenging crust.

Rub rub run your flour

Rub rub run your flour

Rubbing together the flour, cocoa powder, icing sugar and homemade butter by hand means you’re more in control of the pastry and less likely to overwork it. (Not that I could honestly tell the difference between over our under worked pastry as they all taste pretty good to me.) I chose to use icing sugar rather than caster sugar to achieve a smoother pastry. Caster sugar, although finely ground, could be a little too course for this pastry  (Another helpful tip brought to you from the wisdom of Mary Berry!) It’s definitely not because I had ran out of caster sugar and only had icing sugar to hand…

Pastry starting to come together

Pastry starting to come together

An egg is used to enrich the pastry and bring the dry mixture together. I also added a splash of milk to get the pastry to a good rollable consistency. Once it starts to come together, tip it onto an icing sugared dusted surface and knead it lightly and pat it into a round.

A dark chocolate pastry ready for rolling

A dark chocolate pastry ready for rolling

Moving the pastry as little as possible is apparently the key to good pastry (and cold hands, which I have even in summer). Lightly rolling the pastry away from you, in one direction, turn the pastry 90 degrees clockwise, roll again and turn. Keep repeating until it’s about 5mm thin and big enough to line your tin.

A thin pastry rectangle

A thin pastry rectangle

The best tip I have is to trim off the excess pastry, making more of a round shape as you roll to help keep it all under control. It makes life much easier when trying to fling the pastry into your tin too. Also as the pastry has a high butter content, there’s no need to grease your tin. Hurrah! Another job saved.

Pastry envelope

Pastry envelope

My method is to fold the pastry like an envelope, into thirds and lift it into the middle of the tin. Then all you have to do is unfold the pastry and gently press it into all of the nooks and crannies of your tin (I chose a tart tin with a wavy edge for my main pie). If your pastry is extremely delicate you can press it using a piece of cut off pastry instead of your fingers to stop yourself from poking a hole in it.

Unfold your pastry into the tin

Unfold your pastry into the tin

Once the pastry has relaxed and is pressed tightly into the tin you can trim off the extra and save it for later. This recipe made enough pastry for 2 pies! So I made a bonus practice Haupai pie. You could freeze the raw pastry for another day if you prefer or make some tasty biscuits instead.

Trim your edges

Trim your edges

The pastry needs to chill in the fridge for at least 10 minutes before blind baking the case.

Trimmed and chilled pie case

Trimmed and chilled pie case

Before baking the chocolate pastry case prick the pastry all over with a fork to stop it bubbling up allowing you to fill it evenly later on.

Blind baking with kidney beans

Blind baking with kidney beans

I like to use crumpled up greaseproof paper to line the case and kidney beans to hold the pastry down during the blind bake. With my extra pastry I decided to attempt a fancy twisted pie crust…

Fancy twisted pie crust

Fancy twisted pie crust

However in reality the fancy pie crust was a bit over ambitious. It melted in the oven during the blind bake and collapsed into the case giving some lucky people an extra thick chocolate crust! To make sure the pie crust bakes evenly I pop the pie onto a preheated baking sheet. The pie needs to be blind baked for 15 minutes and then baked uncovered for a final 5 minutes until it’s fully cooked in the middle. Some of the crust did stick to the greaseproof paper but hey it doesn’t need to look pretty on the inside, it’s going to be covered in luscious chocolate and coconut pudding. (Please ignore the twisted pastry mess on the outside too.)
Not so fancy pie crust

Not so fancy pie crust

Whilst the pie crust is cooling you can then make the coconut custard/pudding mixture. This recipe seemed worryingly liquid filled to me.  I couldn’t imagine it ever thickening up to a custard consistency. I had visions of the runny custard seeping into the pastry and ruining the crisp base. No one wants a soggy bottomed tart. The recipe called for a lot of coconut milk, milk and sugar to be boiled together and allowed to thicken. I had some homemade dulce de leche that needed to be used up so I substituted half of the milk for this instead, which also helped to thicken the mixture. (But you could just use normal milk or condensed milk for an extra sugary kick if you prefer…)

Simmering and whisking coconut milk, dulce de leche

Simmering and whisking coconut milk, dulce de leche

I’ve never made a custard without eggs before, relying solely on corn flour to thicken the mixture. This seemed the perfect opportunity to use up the box of cornflour I had carefully carried through customs all the way back from Berlin recently too, believing it to be a German cake mix. Google translate revealed later that it’s just plain old cornflour that I could buy in any shop here…

This custard/pudding recipe screamed against all my baking instincts, which I had to suppress with all my might to stop myself throwing in the odd egg yolk or two. I’m pleased I ignored my supposed baking instincts and put my faith in the recipe.  Pouring the full volume of water mixed with cornflour into the coconut milk, I held my breath and whisked like mad…

This seems like a lot of water and cornflour to me...

This seems like a lot of water and cornflour to me…

Miraculously the custard thickened immediately after I poured to full amount of cornflour into the mix! Producing a gloriously thick and glossy custard.
Beautifully thick and glossy coconut custard

Beautifully thick and glossy coconut custard

The custard then needs to be divided in half to whisk chocolate into one half and dessicated coconut to the other, until you get a beautifully shiny chocolate custard and a wonderfully textured coconut pudding custard.

Chocolate custard

Chocolate custard

Coconut custard

Coconut custard

With your cooled chocolate and coconut custards at the ready, the rest of the Haupai Pie assembly is pretty straight forward. Pour the chocolate layer in first and spread evenly over the base, followed by a layer of coconut custard. As I was making two pies, I ran out of coconut custard for my second pie, but you get the gist of it… You could just make one really full pie instead if you prefer or have a much more chocolatey second pie, like me.

Chocolate custard filled chocolate pastry cases

Chocolate custard filled chocolate pastry cases

Whilst this is setting in the fridge, take the opportunity to whip up your double cream with a little caster sugar, until fluffy and light.

Followed by a generous layer of Coconut custard

Followed by a generous layer of Coconut custard

Spread a final thick layer of whipped cream evenly all over your pie and decorate with chocolate, or coconut or a combination of the two! With two pies to decorate I made one with chocolate buttons and another with homemade coconut curls and a milk chocolate drizzle.

The first slice of Haupai Pie - chocolate buttons make a quick decoration

The first slice of Haupai Pie – chocolate buttons make a quick decoration

I absolutely love Haupai Pie! I love the triple layered effect, with the dark chocolate pastry and custard contrasting with the mellow coconut custard and the white whipped cream! You can probably tell I have a bit of a coconut fascination, so this pie is right up my street.

Haupai Hawaiian Coconut Pie

Haupai Hawaiian Coconut Pie

The crisp chocolate base is the perfect partner to the smooth and creamy filling. Adding the extra dessicated coconut to the custard gives an added texture and interest to the pie too. And despite my crust slipping into the pie, I quite enjoyed the extra thick crust.  I could quite happily eat chocolate pastry every day. Who would have thought that this time last year I thought that I didn’t really like pastry or cream?! I’m so pleased I persevered and not only do I now like pastry and cream I can now say I really do LOVE it.

Coconut curls and chocolate drizzle. Haupai Pie part deux

Coconut curls and chocolate drizzle. Haupai Pie part deux

I was worried that I had prepared the pies too early as I made them on Monday to be served on Wednesday. I feared that the custard would make the pastry too wet. But lo and behold it was still perfectly crisp after 2 days. This pie definitely needs to be kept in the fridge and is probably eaten as soon as possible but rest assured it keeps very well for at least 3 days (if it lasts that long in your house!).

Haupai Pie mid devouring at Private Pie Club

Haupai Pie mid devouring at Private Pie Club

Things That I used to make me Haupai Pie

Chocolate Pastry Recipe

  • 90g icing sugar
  • 30g cocoa powder
  • 250g plain flour
  • 140g butter
  • 1 egg
  • a splash of milk
  1. Rub together ingredients dry ingredients and butter
  2. Add the egg (and milk if needed) to bring the pastry together
  3. Roll out to 5mm thickness and press into tin
  4. Cut to shape and prick with a fork all over
  5. Blind bake for 15 minutes at 180 degrees c.
  6. Bake uncovered for a further 5 minutes, until evenly baked.
  7. Allow to cool

Coconut and Chocolate Custard Fillings

  • 235ml milk (or 175ml dulce de leche and 50ml milk) (or 235ml condensed milk)
  • 1 can of coconut milk (400ml)
  • 200g white sugar

Heat milk and sugar until boiling and simmer for 5 minutes to thicken.

  • 235ml water
  • 65g cornflour
  1. Mix the cornflour and water until dissolved.
  2. Pour cornflour into the coconut milk
  3. Whisk over the heat until thickened (about 3 minutes)
  4. Take off the heat and divide the mixture in half
  • 210g chocolate (100g milk and 110g dark)
  • 40g dessicated coconut
  1. Whisk the chocolate into one half of the custard
  2. Whisk the dessicated coconut into the other half of the custard
  3. Allow to cool
  • 400ml Double cream
  • 40g caster sugar
  1. Whisk the double cream and sugar together until fluffy
  2. Pour chocolate custard into the pastry case
  3. Pour coconut custard into the pastry case
  4. Top with whipped cream
  5. Decorate with chocolate/coconut (or anything else you like)
  6. Enjoy!
Eat with a big spoon

Eat with a big spoon

51. The Legendary Crack Pie (concocted the lazy way)

Legendary Crack Pie - no actual crack is involved in this baking process

Legendary Crack Pie – no actual crack is involved in this baking process

Crack Pie the most addictive pie you’re ever going to eat. It even sounds legendary before you even know what’s actually inside it. It hails from New York so apologies this is yet another American bake in my around the world adventures. But I’m sure you will understand why I just HAD to bake this. It was originally invented by Momofuku Milk Bar’s very talented pastry chefs and coined Crack Pie due to it’s extremely moreish quality.

A slice of gooey Crack Pie

A slice of gooey Crack Pie

I’ve been waiting for an excuse to bake this pie. This excuse came in the form of the Private Pie Club. The theme for this months Private Pie was Film Pie. I managed to shoehorn my Crack Pie in under the banner of ‘Fear and Loathing in Las Vegas’ as the most drug fuelled film I could think of , although with it’s final dusting of floral icing sugar the pie appears much more sweet and innocent than it’s name suggests… (If you like pie you should also come along to Private Pie club and meet other pie enthusiasts!)

Fully iced Crack Pie

Fully iced Crack Pie

The original epic recipe is merely concocted from a few store cupboard essentials. This means you will probably have all of the ingredients ready to hand to bake this pie. So what are you waiting for?? Get baking! Although there is a LOT of everything in it so you may need to invest in a few more eggs…

Blending sugar, salt and flour together the lazy way

Blending sugar, salt and flour together the lazy way

The homemade oat cookie base is well worth the extra effort of making a cookie just to crumble it up and reconstitute it into a pie crust. The pie in total consists of an entire block of butter, almost 500g of sugar (brown and white) 8 egg yolks and cream! This is a gloriously decadent pie for the hungry. It’s so popular I’ve heard that they sell for $45 a pop and are couriered across the states to feed the Crack Pie habit of the nation.

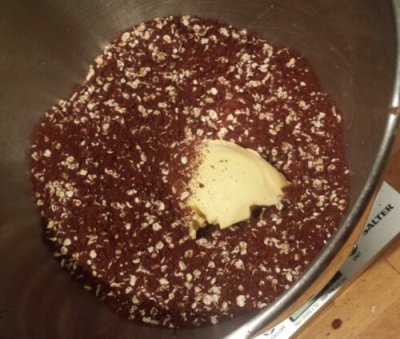
Beat in the butter

Beat in the butter and egg

To start with I got the method a bit backwards. Despite my lack of reading ability it turned out pretty well so you too can follow my lazy method. I forgot to cream the butter and sugar together and instead whacked all of the dry ingredients together into the mixer and beat them until crumbly.

Then beat in the butter and egg to make a thick cookie batter.

Splodge the cookie batter roughly onto a baking sheet and smooth down

Splodge the cookie batter roughly onto a baking sheet and smooth down

The best bit about baking this kind of cookie is it doesn’t need to be pretty and you don’t even have to bother rolling and cutting it out! Music to my lazy baking ears. Basically whack it all onto a greased baking sheet, press it down with your fingers and bake it for 20 minutes. Job done.

The baked cookie base

The baked cookie base

The rough cookie will be a lovely golden hue after 20 minutes in the oven at 160 degrees C. Technically you should let it cool down before crumbling up the cookie but I couldn’t wait.

Blend the crumbled cookie together with even more butter and sugar

Blend the crumbled cookie together with even more butter and sugar

All of the other recipes I’ve found instruct you to blitz up the cookie in a food processor, but frankly that involves unpacking my food processor from the jenga game that is my kitchen cupboard and even more washing up , so I didn’t bother. I threw the roughly crumbled cookie into my mixer and beat it into submission along with an additional 55g butter, 20g brown sugar and 1/2 tsp salt.

This is how the cookie crumbles

This is how the cookie crumbles

After a quick blitz with the mizer (I’m sure you could just use a spoon or an electric handwhisk if you’re feeling the strain) the cookie turn to glossy crumbs. Just moist enough to shape it into a pie crust in your 2 pie tins.

Cookie Pie Crusts

Cookie Pie Crusts

Divide the cookie crumbs into 2 and squash them into 2 pie tins giving a thin and even crust along the bottom of the tin and up the sides. If it’s not sticking you can always blend in a little more butter to moisten the crumbs. I used a 9 inch tart tin and an 8 inch round cake tin. It’s handy to use a tin with a loose bottom to help remove the pie when it’s ready for eating. But feel free to use a solid pie dish, it’ll all taste amazing anyway. Pop the crusts in the fridge to set.

Blend together your sugars

Starting the filling: Blend together your sugars and salt

Now here’s the bit where I ad lib even further from the original recipe. I admit the one store cupboard essential I don’t own is powdered milk. So I just left it out of the filling. I’m not sure what impact this had on the final flavour of the pie but to be honest I didn’t miss it. Looking for a substitute all things suggested just adding actual milk. A splash of milk and a dollop of speculoos butter later and we have one tasty Crack Pie!

Whisk into the sugar, the melted butter, double cream, vanilla, speculoos butter and a splosh of milk

Whisk into the sugar, the melted butter, double cream, vanilla, speculoos butter and a splosh of milk

I love the fact that you just have to keep adding to the one pot to make each stage of this pie. After blending together the white and brown sugar, all that’s left to do is to whisk in to the sugar the melted butter, the double cream, a splash of vanilla, a splosh of milk, and a dollop of speculoos butter. You don’t need to incorporate lots of air into this caramel custard so just whisk it until it’s smooth and everything is incorporated.

Pour the caramel custard into onto the cookie crusts

Pour the caramel custard into onto the cookie crusts

The caramel custard will be shiny and smooth taking on the hue of the brown sugar. Simply pour half of the custard onto each pie crust and bake for 15 minutes at 170 degrees C. Then turn down the oven to 160 and bake for a further 10 minutes. I baked both pies side by side, but the larger of the pies needed an extra 10 -15 minutes of solitary baking time. The pies are clearly cooked when golden all over and only a little jiggly (like a good custard tart should be!)

The just baked Crack Pie

The just baked Crack Pie

A good tip from Mary Berry to achieve an even bake is to place your pies onto a hot baking sheet. It also means your loose bottomed tin will keep it’s bottom when lifting it in and out of the oven (I have had issues in the past with my tart tin). Also if it leaks any butter (and let’s face it with all of the butter in this pie it’s going to ooze a little) you will save a lot of oven cleaning by having your pie on a baking sheet instead.

A pair of Crack Pies cooling

A pair of Crack Pies cooling

The filling will rise slightly whilst baking but maintains a lovely smooth and flat top. Once baked leave your Crack Pies to cool down in their tins. They will keep well for about a week in the fridge and I hear it tastes even better the longer it lasts… (if you can reserve yourself that is!). When I took that first bite of Crack Pie I actually ‘yummed’ out loud. In public! It’s so moist, the cookie crust almost disappears into the gooey caramel filling with the edges giving that much needed bite. It’s a perfect combination of smooth, sweet caramel and oaty crumble, with a hint of spice (from the speculoos) and a tang of salt. The slice quickly disappeared before my eyes and the whole pie was gone within minutes. Without doubt a wonderful sign of an excellent pie.

Extreme Close up of the Crack Pie. Check out that caramel custard

Extreme Close up of the Crack Pie. Check out that caramel custard

As this is a recipe for 2 Crack Pies, you could scale it back to make just the one. But I fear one will never be enough! If you have the ingredients you may as well make two and share with friends (if you like anyone enough to share your Crack Pie with them) or alternatively gorge yourself on all of the pie. (Please eat your Crack Pie responsibly) Or even more sensibly you could freeze your second Crack Pie for a special occasion. I have my Crack Pie resting carefully in the freezer, wrapped diligently in greaseproof paper and tin foil (still in it’s tin) to prevent freezerburn and   that distinctive ‘freezer flavour’ contamination. I literally can’t wait to defrost it.

How to decorate a Crack Pie?

How to dress a Crack Pie?

Now you don’t have to dress your Crack Pie, if you don’t want to. You could leave it naked as the day it was born if you prefer, but I wanted to make it look pretty (and hide a few of the little cracks that had appeared on the delicate crust in the process of forcibly removing it from the tin) Armed with a cake stencil, tea strainer and a box of icing sugar I liberally dusted on a floral pattern, covering the entire pie. It’s the first time I’ve ever managed to stencil anything successfully! Hurrah! Cue many self indulgent shots of stencilled Crack Pie…

The Fully Dressed Crack Pie

The Fully Dressed Crack Pie

Things that I used to make The Legendary Crack Pie 

Oat Cookie (for the crust)

  • 150g plain flour (2/3 cup plus 1 tablespoon)
  • 1g baking powder (1/8 teaspoon)
  • 1g Cream of tartar (1/8 teaspoon) – This should actually be bicarbonate of soda however I got the pots mixed up! It didn’t seem to do any harm so I will be using cream of tartar in the future.
  • 2g salt (1/4 teaspoon)
  • 115g softened butter (1/2 cup)
  • 60g dark brown sugar (1/3 cup )
  • 40g  caster sugar (3 tablespoons)

Step 1: Beat all of the above together until fully incorporated

  • 1 egg

Step 2: Beat in the egg

  • 90g oats (1 cup)

Step 3: Stir in the oats

Step 4: Spread onto greased baking tray and bake in preheated oven for 20 minutes at 160 degrees C (375F)

Pie Crust

Step 5: Crumble up the baked cookie and beat in

  • 55g butter (1/4 cup)
  • 20g brown sugar (1 and 1/2 tablespoons)
  • 1g salt (1/8 teaspoon)

Step 6: Split the crumbs in half and press firmly and evenly into 2 (approximately 9 inch) pie tins all over the base and up the sides to form a thin crust.  Pop the crusts in the fridge to set.

The Caramel Custard Filling

  • 270g caster sugar (1 and 1/2 cups)
  • 130g dark brown sugar (3/4 cup and a scant 3 tablespoons)
  • 1g salt (1/4 teaspoon)
  • (I left the milk powder out but if you want to put it in use 1/3 cup plus 1 teaspoon)
  • 113g melted butter  (1 cup)
  • 285ml double cream (3/4 cup)
  • 1 teaspoon vanilla extract
  • Splash of milk (to make up for the lack of milk powder)
  • 50g speculoos butter (to make up for the lack of milk powder – you could leave this out if you prefer or even use peanut butter instead)

Step 7: Whisk all of the above together

  • 8 egg yolks

Step 8: Whisk in the egg yolks one at a time until the mixture is smooth, shiny and thick

Step 9: Pour half of the caramel custard onto each pie crust

Step 10: Bake the pies side by side in a preheated oven on a hot baking sheet for 15 minutes at 17o degrees C (350F) then turn the oven down to 160 degrees C (325F) and bake for a further 10 minutes. When golden all over and only ever so slightly jiggly your Crack Pie is ready! 

Step 11:  Allow your pies to cool and dress with icing sugar. Then reward yourself for all of your efforts with a slab of pie. Enjoy!

*The Momofuku Recipe was published by the LA Times recently if you want to see it in all it’s glory

50. Authentic Danish Rye Bread – Rugbrød

Danish Rye Bread

Danish Rye Bread

My wonderful friends Josh and Mark shared their genuine Danish Rye Bread recipe with me months ago and I’ve been dying to try it! I was going to visit them in Manchester and thought it the perfect occasion to take them some freshly baked Rye bread too to say thank you for letting me stay!

A cross section of Danish Rye Bread

A cross section of Danish Rye Bread

The recipe arrived in 3 photos of hand written sheets so I knew it was going to be good and truly authentic. It requires rather a lot of flour as it is enough for 3 loaves. My brain couldn’t calculate the maths to scale this recipe down so 3 loaves it is!

The Rye Bread Sourdough Starter

The Rye Bread Sourdough Starter – porridgey

The recipe calls for a homemade sourdough base. I have attempted to make my own sourdough starter from scratch before following the Fabulous Baker Brothers method of capturing the yeast from the air in flour and water and letting it ferment. Perhaps my house is not particularly yeasty, I’m not sure but for whatever reason I couldn’t get it to bubble. Having made a successful Herman the German Sourdough starter and cake before I know that adding instant yeast is a sure fire success. Therefore, I admit it, I deviated from the rules immediately, before I even began baking pouring in a little cheating instant yeast to get the sourdough started.

Starting the Rye Bread in my massive cake tin

Starting the Rye Bread in my massive cake tin

I don’t own a bowl big enough to stir this vast amount of flour in so wielding my largest cake tin I set to work… and consequently ruined said cake tin, bending it out of shape with the cement like dough!

If you were making your own sourdough starter, you could keep some back and carry on feeding it so you can make many more beautiful loves in the future. I was making just enough for this recipe, but may attempt to make my own sourdough rye starter again.

There's a lot of flour in this Rye Bread

There’s a whole lot of flour, seeds and grains in this Rye Bread

Rye is quite the healthy flour, full of wholesome goodness, as opposed to refined white flour. This means that it has quite a distinct flavour and it is much heavier than white flour. It creates a rather dense loaf. Mixing rye flour with white flour lifts the texture and colour of the bread slightly. The addition of seeds, nuts and grains give it extra texture and nutritious value!  This bread is perfect for applying lashings of cream cheese and smoked salmon to. I love the traditional Smørrebrød, or Danish open sandwiches. Rye bread is an essential part of proper Danish sandwich making.

If you plan this in advance you will have plenty of time to allow the starter to ferment. I however did not. You should mix the flour and water together, stirring it into a smooth, thick paste and leave for at least 12 hours to let it bubble. I made my starter but needed it to be ready to go asap so I cheekily added 7g of instant yeast to make sure it rose fully.

Adding the flour and seeds to the sourdough start mix

Adding the flour and seeds to the sourdough start mix

Once your starter is ready you can save a cup back for future sourdough creations or, whack it all in to the mix like me. The beauty of rye bread is that it doesn’t require kneading! However you do need strong arms for the mixing. My weapon of choice was a wooden spoon to battle the heavy dough with. Combining the sourdough starter with the rest of the rye bread mixture, alternating between the dry ingredients and the water is hard work but you must keep on stirring until everything is combined, including the seeds and grains. Prepare yourself for a good 10 minutes of elbow grease.

How to fit all of this in one bowl... water, flour, seeds and sourdough starter

How to fit all of this in one bowl… water, flour, seeds and sourdough starter

Unfortunately there were a few ingredients that I didn’t have to hand so improvising to my hearts content, I chose sunflower and sesame seeds to add to the dough. I haven’t been able to find malt powder so I just left it out of the mix, but I bet you can get it in healthfood shops. Rye/barley/wheat grains don’t really feature in my cupboards (other than broth mix and I’m pretty sure dried barley and split lentil is not what we’re looking for here) but oats were an excellent emergency substitute!

Thick and porridgey just how the best Rye breads should be

Thick and porridgey just how the best Rye breads should be

Once the dough is the consistency of thick porridge (lumpy in a good way) it’s ready to pour/scoop into your greased and floured loaf tins. It is quite a stiff liquid so your have to encourage the dough as you pour it into the corners of the tins. Pour in enough dough fill two thirds of the tin, so there’s still space for the dough to expand without overflowing the tin. I had to resort to baking one loaf in a square cake tin (the same size as 2 normal loaf tins) and some mini pudding tins as I only have the one small (500g) loaf  tin!  Coat each loaf with a nice wash of oil and sprinkle a few oats/seeds on the top. Cover the loaves with greased cling film and leave to prove/mature for 8-12 hours. This time allows the sourdough to mature further and add a deeper tangy flavour to the bread.

Pour your rye bread dough into all of your loaf tins (and every other container you can find...)

Pour your rye bread dough into all of your loaf tins (and every other container you can find…)

When proved the dough will not double in size like other breads but it will increase in volume and should reach the top of your loaf tins. Prick the tops of the proven loaves all over with a fork, this will help keep your crust intact as it may fall off if left un perforated. It also prevents the loaves from rising and cracking in the oven, maintaining that distinctly symmetrical Danish Rye bread oblong shape.

The cling film covered and proving loaves

The cling film covered and proving loaves

Pre heat your oven to 220 degrees C. Bake the loaves at 220 degrees for 10 minutes. This initial blast of heat helps to force the bread to rise and the crust to develop. Lower the temperature to 175 degrees C and bake for a further 75  minutes.

Sometimes pegs come in handy to keep the cling film in place...

Sometimes pegs come in handy to keep the cling film in place…

If your loaves can be removed easily from the tins at this point do so. if not, leave for another 5-10minutes until they can be removed. Bake the bread for a further 5-10 minutes without the tin directly on the oven shelf to allow the crust to become extra crunchy.

The forked loaf ready for the oven

The forked loaf ready for the oven

Once they’ve cooled they’re ready to eat! You should be able to keep them at room temperature for 1-2 weeks or they freeze really well too.

Danish Rye Bread fresh from the oven

Danish Rye Bread fresh from the oven

I always know when I’ve baked something especially tasty as Super Hans will go out of his way to steal it from me. He was desperate for a bit of my Danish Rye Bread. I love the depth of the flavour in this bread. It radiates health and wellbeing. It’s also rather filling, so thin slices are a must. The sourdough tang cuts through the fantastic texture of the seeds and nuts. Now that I have the Kitchenaid I can dispense with the cake tin mixing method, so I will be purchasing more rye flour very soon and having another go. I would also love to try other dark breads. I can see me attempting many more in the future. Thank you Josh and Mark for sharing your fantastic recipe with me!

Extreme close up of the crunchy crust

Extreme close up of the crunchy crust

Things that I used to make Danish Rye Bread

Sourdough Starter

  • 300ml luke warm water
  • 250ml rye flour
  • 7g of instant yeast (if you’re in a hurry)

Mix together to a thick smooth paste and leave to ferment until bubbly (12-24 hours) or if you’re impatient add 7g of instant yeast to your starter…

Rye Dough

  • 1 litre of warm water
  • (if you can find it add 1 tablespoon of ground malt -I didn’t)
  • 200g sunflower seeds
  • 200g sesame seeds
  • 400g oats (or whole rye, barley/wheat grains)
  • 2 tablespoons salt
  • 1 tablespoon honey
  • 300g strong white flour
  • 900g rye flour
A slice of rye

A slice of rye

My pair of rye loaves

My pair of rye loaves

49. German Pretzel Playtime

Pretzels, Pretzels, Pretzels!

Pretzels, Pretzels, Pretzels!

I discovered that I have a slight obsession with Pretzels on our recent visit to Berlin, where I bought many delicious chewy pretzels the size of my head. I really rather enjoyed Berlin, my first venture into German cusine! Traditionally Preztels are a savoury German snack, dipped in a rather caustic solution of lye to achieve the dark brown coating with the distinctive chewy texture.

In amongst the Curry Wursts, Strudels and Pork Knuckle I filled my self up on pretzels as often as I could. We explored the historic sites and the bohemian avenues in the post Christmas and wedding drizzle. Berlin was a very welcome change of scenery, with pickled herring and salmon for breakfast. I went all in with the Germanic food. My instagram feed became awash with a vast array of wonderful and interesting food. Nothing went undocumented!

Dough ready for some good kneading

Dough ready for some good kneading

Upon returning home I wanted to recreate some pretzel perfection, preferably without the hazardous solutions. No chemical burns for me please! Pretzels are made from a basic soft white bread dough recipe. The flour, yeast, oil and water should be mixed together in a big bowl until it can then be kneaded on a oiled board for 10 minutes. Once the dough is smooth and bounces back when pressed your kneading is done.

Kneaded dough ready to prove

Kneaded dough ready to prove

The dough can then be left to prove in a warm place in a greased plastic bag, for about an hour or two.

The proven preztzel dough

The proven pretzel dough

When the dough has doubled in size it’s ready to shape. This is probably the most complicated and time consuming bit of the entire pretzel making process. But it’s not as difficult as it may seem! I shall demonstrate in 10 easy steps…

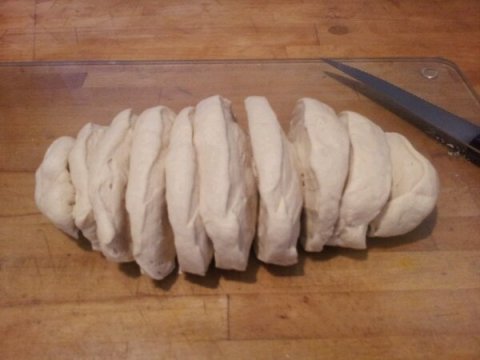
Stage 1. Roll your dough to a sausage shape and cut into 12 equal pieces

Stage 1. Roll your dough to a sausage shape and cut into 12 equal pieces

Stage 1: Roll your dough to a sausage shape and cut into 12 equal pieces

Stage 2. Roll your 12 pieces into balls (check that they're all roughly the same size)

Stage 2. Roll your 12 pieces into balls (check that they’re all roughly the same size)

Stage 2: Roll your 12 pieces into balls (check that they’re all roughly the same size). Redistribute the dough to make sure you have equal sized dough balls here if needed.

Stage 3. Take one dough ball and leave the others covered with cling film in a greased bowl to stop them drying out. Roll your dough into the longest thinnest sausage you can make

Stage 3. Roll one dough ball into the longest thinnest sausage you can make

Stage 3: Take one dough ball at a time leaving the others covered with cling film in a greased bowl to stop them drying out. Roll your dough into the longest thinnest sausage you can make. Give the dough a good slap if you spot any air bubbles along the way. You need to pop any air bubbles to get a good even bake and to maintain your lovely pretzel shape.

Stage 4. Start shaping you sausage. Curl the dough into a circle but don't close the ends.

Stage 4. Start shaping you sausage. Curl the dough into a semi circle but don’t close the ends.

Stage 4: Start shaping your sausage. Curl the dough into a semi circle but don’t close the ends. You need those loose ends to finish your pretzel shape.

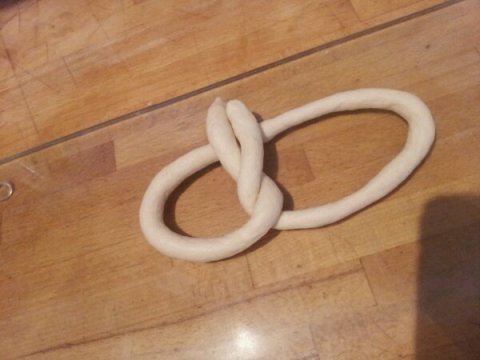
Stage 5. Bring the loose ends of the dough together and twist them up the centre of the circle

Stage 5. Bring the loose ends of the dough together and twist them up the centre of the circle

Stage 5: Take the loose ends of the dough and twist the strands together, one under the other up the centre of the pretzel circle.

Stage 6. Bring the loose ends two thirds of the way up the sides of the pretzel like arms

Stage 6. Bring the loose ends two thirds of the way up the sides of the pretzel like arms

Stage 6: Bring the loose ends two thirds of the way up the sides of the pretzel like arms. Reshape the circle of the pretzel as you go to keep the even shape.

Stage 7: Gently press the 'arms' of the pretzel into the dough to fix it in place.

Stage 7: Gently press the ‘arms’ of the pretzel into the dough to fix it in place.

Stage 7: Gently wrap the ‘arms’ of the pretzel around the pretzel. Gently press the arms into the dough to fix them in place.

Stage 8. Carefully line up your pretzels on a greased and lined baking tray

Stage 8. Carefully line up your pretzels on a greased and lined baking tray

Stage 8: Carefully line up your pretzels on a greased and lined baking tray. Cover them with greased cling film and leave them to prove again for another hour.

Stage 9: Give each pretzel a good coat of egg wash and water and sprinkle with rock salt before baking

Stage 9: Give each pretzel a good coat of egg wash and water and sprinkle with rock salt before baking

Stage 9: Give each pretzel a good coat of egg wash and water and sprinkle with rock salt before baking. In hindsight I went a bit mad with the rock salt. It kind of burns the tongue when you put that much on! I might in the future smash up the rock salt with a pestle and mortar to get smaller chunks and sprinkle a much smaller amount on!

The baked pretzels

The baked pretzels

Stage 10: Give the pretzels a good baking in the oven for 15 -20 minutes at 200 degrees C. These are snack sized rather than the extra large pretzels that I was eating in Berlin, which could probably constitute a main meal. So if you wanted to make yours larger you could divide your dough into 6 lumps rather than 12 and shape them to your hearts content.

The golden pretzel

The golden pretzel

After a quick bake in the oven these mini pretzels beauties are ready to be devoured! The most complicated bit of the entire process is the shaping and after a couple of goes you soon get used to the technique. I’m sure you will end up developing your own pretzel twisting style too. I adore these pretty bread shapes and will most definitely be making them again. They look impressive, so you can wow your friends with your technical know how and let them imagine you’ve spent countless hours in the kitchen preparing treats for them.

Piles of Pretzels

Piles of Pretzels

They also taste amazing with their glistening golden crust. White bread can sometimes be a bit plain, but as the pretzel is thin it takes on the depth of flavour from the egg yolk and salt. Combined with the chewy texture, they are like a plaited bit of bread heaven.  You could even make sweet pretzels if you prefer, with cinnamon and sugar coatings, or add sesame seeds or poppy seeds for a bit of variation. Then you can enjoy them for breakfast lunch and dinner! I may attempt some wholemeal pretzels too to inject some health into my bread products. I will also be attempting extra large pretzels with the distinctive slash as soon as possible! Things I used to create Mini Pretzels Pretzel Dough Recipe

  • 350g strong white flour
  • 1 tsp instant dried yeast
  • 1 tsp salt
  • 1/2 tsp sugar
  • 215ml of luke warmwater
  • 10ml olive oil

Egg Wash Topping

  • 1 egg yolk mixed with a tbsp of water
  • A sprinkling of rock salt to decorate
  • (Or you could dust them in cinnamon sugar, poppy seeds, or sesame seeds if you wish!)

Bake for 15-20mins until golden brown at 200 degrees C

Happy Christmas – The Rosca de Reyes results are in!

A very decadent Rosca de Reyes - 3 Kings Cake

A very decadent Rosca de Reyes – 3 Kings Cake

Wow what a year this has been indeed! We’ve made it over half way around the world in 80 bakes, ran my first half marathon (raising over £700 for Oxfam!), baked (and devoured) some wonderful (and some not so wonderful…) cakes AND been very lucky indeed to win the Blog North Best Food and Drink Blog Award.

Great North Running

Great North Running

And that’s not even the end of this amazing year’s excitement, it doesn’t all finish there! I’m very excited to let you know that I won the online bake off and £500 of holiday vouchers for my Rosca de Reyes 3 Kings Cake! Amazing! Thank you all so much for reading, commenting and also voting for me. I can’t thank you enough for your support and love. We will be using the £500 of Cosmos Holiday vouchers to book our honeymoon in the new year, a trip somewhere hot and relaxing will be perfect after our wintery wedding (which is taking place in less than 2 days…)! Fingers crossed the cake stays upright!

A golden Rosca de Reyes

A golden Rosca de Reyes

The lucky winner of the £50 very.co.uk voucher is Jenny B. The company will contact you directly to arrange your voucher. Thank you so much for voting!

I can’t go without mentioning the 4 brilliant bakers and bloggers, in the Rosca de Reyes bake off. They are exceptionally good bakers and I’ve been enjoying their blogs for over a year now and follow them all on twitter. I really recommend checking out their blogs, if you haven’t done so already. They are very talented and inspirational foodie bloggers.

I hope you all have had a wonderful Christmas and are looking forward to the New Year as much as me. I will be returning shortly as a married baker, with a new name and everything. Looking forward to letting you know how my biggest challenge so far pans out… my 5 tier wedding cake!

Lots of love and happy new year!

Lauren x x x

p.s Now would be a perfect time to have a go at baking your own Rosca de Reyes to celebrate the Epiphany on January 6th.

p.p.s. My golden Rosca de Reyes – 3 Kings Cake even got a mention in the The Mirror within an article about Christmas eats and treats around the world!

45. Rosca De Reyes – Spanish Three Kings Cake

Rosca de Reyes - 3 Kings Cake

Rosca de Reyes – 3 Kings Cake

I’m so excited! I’ve been invited to join an online bake off with 4 amazing bloggers, including the wonderful Yasmin Lambert from the Great  British Bake Off! We’re all baking the Spanish festive bake, Rosca de reyes and the baker with the most votes will win £500 worth of holiday holiday vouchers! (which would come in very handy for our honeymoon which are still yet to arrange following our wedding in less than 3 weeks…) I’m so happy to also be able to offer you the chance to win  £50 of vouchers to spend on the very.co.uk Christmas Shop, perfect for finding those last minute Christmas gifts! My first ever competition on aroundtheworldin80bakes! 

If you would like to enter this competition all you need to do is vote for my Rosca de Reyes (aroundtheworldin80bakes) on the Cosmos Holidays website by leaving a comment at the bottom of the article and a 5 star rating. This would be very gratefully appreciated! You can see the full Rosca de Reyes in all it’s glory over on the Cosmos holiday website. The closing date is Wednesday 19th December. Then please let me know that you have voted by leaving me a comment on (any or all!)

This means I can then contact you if you are the lucky winner. I will choose one winner at random from all of those who vote for me. You could tweet something like “I’ve voted for @laurenprince #roscadereyes  to win£50very.co.uk vouchers http://aroundtheworldin80bakes.com #bakeoff #competition Vote to enter”

Now for the bake itself! I hope you like it!

Rosca de reyes  (Kings’ Cake) is a traditional Spanish  cake with an amazing story. It’s eaten on 6th January, the day that the 3 Kings (or wise men) reached the stable to visit Jesus.  This is also known as the religious holiday the Epiphany, a day where Christians celebrate the Son of God taking on human form as baby Jesus. In some countries this is the day that children open their presents rather than Christmas Day so this day definitely needs a special cake to celebrate!  A little figurine or a bean is usually hidden inside the cake to represent baby Jesus fleeing from King Herod who was trying to kill Jesus. Whoever finds the baby bean/figurine is blessed  as ‘King’ or ‘Queen’ of the banquet and should take the figurine to church with them on February 2nd. In Mexican cultures this person also has to throw the Epiphany banquet party for their families and friends the following year!

I’ve never eaten a Rosca de reyes despite all of our family holidays in Spain as a child. We always visited Spain in the Summer holidays where we contented ourselves eating ice cream and custard filled donuts whilst basking in the sun on the beaches instead. Some of our best family holidays were in Spain, so this recipe intrigued me. I’ve never attempted to hide things inside my cakes before and was unable to find a figurine in my house small enough, or that wouldn’t poison us all so I decided to make one out of sugar paste instead and hope that it doesn’t melt in the oven!

My marzipan interpretation of the baby Jesus...

My marzipan interpretation of the baby Jesus…

Looking for a suitable recipe I discovered there are quite a few variables. The Rosca de reyes is usually a ring shape or it could also be an oval (depending on how many people you’re baking for!). The festive dried fruits usually include wonderful reds, greens and oranges so you could use cherries, apricots, figs, cranberries, or mixed candied peel. The choices are endless.

This is essentially an enriched dough, shaped into a bejewelled festive wreath. It’s a bit of a cake/bread/pastry hybrid and stuffed with beautiful dried fruits.

Whizz up the flour and yeast

Whizz up the flour and yeast

If you’re using instant dried yeast you can throw it straight into your flour and mix it evenly through the flour. Using my Russian Doll measuring cups makes life a bit easier than weighing things out on the scales.

As it’s almost Christmas (we’re celebrating on 15th December this year as our wedding is just around the corner…) I wanted to make light work of this recipe. I struggle to knead dough for a long time, I’m simply not tall enough to put enough weight into it! So I whacked it all into my food processor to ease the process. If you don’t have a food processor you can mix it together by hand instead.

Grind up a star anise

Grind up a star anise

I whizzed the yeast and the flour together first to make sure the yeast is evenly distributed throughout the flour. Then while the food processor was running I added the dry ingredients first, the sugar, salt, cinnamon and ground star anise.  The spices really enhance the colour of the dough giving it a wonderful brown hue.

Rub in the butter

Rub in the butter

Once this is combined I popped the butter in and rubbed/blended it into the flour.

Rub in the butter until it looks sandy

Rub in the butter until it looks sandy

Followed quickly by the  beaten eggs, vanilla pod seeds and water. In the future I probably wouldn’t add any water as this made an extremely wet and sticky dough which meant my food processor went into over drive and actually caught fire! The poor food processor didn’t make it but the dough was thoroughly kneaded!


Beat in the eggs

Beat in the eggs


The food processor may screech a bit in protest but it can (usually!) knead the dough (using the dough hook) for a good 3 minutes before it starts to rock out of control and dance off the work top.

I had to add a little more flour in order to knead the dough by hand as it was more of a paste at this stage.

It was rather a sticky dough...


Once it becomes a firm dough it’s ready for a final knead on the work surface for 5 minutes or so until it bounces back when pressed lightly with a finger.

I had to bring out the cavalry to sort out this sticky mess - dough scraper!


Then to rest the dough for 2 hours in a greased and covered bowl in a warm place until it’s doubled in size. Or if like me you like to do things in stages feel free to let it rise slowly over night in the fridge and shape it at your leisure the next day.

A nice firm brown dough


When the dough has risen, punch it down and knead it thoroughly before starting to shape it into a ring or wreath. This really reminds me of my Swedish Tea Ring attempt. Roll it into a rectangle  about 30cm by 20cm. I oiled the board to stop the dough from sticking rather than dusting it with flour.

Roll it out to an even rectangle about 5mm thick

Roll it out to an even rectangle about 5mm thick

Spread the melted butter all over and give a generous coating to the outside edge of the dough.

Spread a generous coating of melted butter all over


I found I had an extra bit of dough which I trimmed off to make my rectangle extra straight. I used this to make another plaited version of Rosca De Reyes later on.

My second plaited Rosca de Reyes


Line the dough with an even covering of candied fruits, cinnamon and sugar.

Coat with sugar and spice and all things nice


Take your figurine/bean (or in my case a hand crafted marzipan baby Jesus) and hide him amongst the fruit.

Hide your figurine inside the fruit


Then roll it up into one long sausage, from the longest edge to the longest edge.

Roll roll roll your dough


Once you have you sausage shape you can add a smattering of melted butter to one end and coax the 2 edges together to form a ring. Feel free to pop a small greased pudding dish in the centre of the ring to ensure the ring has a hole in the middle as the dough rises.

The final sausage shape


A final egg wash and decoration with your chosen candied fruits, I used glace cherries and mixed peel, and it’s ready for the final proving.

Using lazy egg wash in a can (!) and dotting with cherries


Cover your ring with greased cling film to prevent it sticking and leave it for an hour to double in size on a baking tray greased and lined with greaseproof paper.

Bejewelled and ready to prove itself


After 40 minutes in the oven at 170 degrees C the Rosca De Reyes will have taken on a golden tinge and be firm to the touch. You can check it’s cooked through by tapping the bottom, of the ring, it should sound hollow.

Straight from the oven


Once it’s cooled completely I carried on decorating my Three Kings Cake. I’ve been saving my gold lustre spray for a special occasion and this seemed to be the perfect time to use it! I thought the gold would add a regal touch to the ring and additional symbolism as one of the 3 Kings brought gold as a present for baby Jesus. So I’m presenting a very gold Rosca de Reyes to you!

Then it seemed a bit too gold… so I added a sprinkling of marzipan stars with a dab of brandy on the back of each star to hold it in place. The original plan was to add just the one star, as the 3 Kings followed the star to Bethlehem to find baby Jesus in the stable, however I got a bit carried away with my cutters and made an entire starry night of marzipan instead. Resulting in a very decadent Rosca De Reyes!

A very decadent Rosca de Reyes - 3 King's Cake


With my left over dough I created a plaited Rosca De Reyes and smeared cinnamon, butter and sugar in between the plaits and dotted a few more glace cherries on the top. I hid one whole cherry underneath and tucked it into the dough.

A golden plaited Rosca de Reyes


Once it was baked I also gave it a liberal coating of edible gold lustre.

This bake feels so festive and is a wonderful cake to share with friends and family. It’s a bit like hiding a silver sixpence inside your Christmas pudding, waiting in anticipation to see who finds the baby Jesus inside their piece of bread. I loved this bake and think it may become a regular festive creation in my house. The egg wash gives the outside a fantastic bite to it. I love warming spices and this definitely packs a punch, with the cinnamon and star anise spices in the dough, carried through to the spicy sugary fruit inside. It is also rather reminiscent of a sticky Chelsea bun but even more festive and sparkly!

Cinnamon swirls - a slice of Rosca de Reyes


Marzipan is not traditionally found inside Rosca de reyes, but I adore it and try to fit it into everything that I possibly can. The addition of marzipan made the rosca de reyes slightly stollen-esque and what’s not to love about stollen? (It’s another of my favourite festive bakes – as if I don’t have enough already?!)  I try not to waste any ingredients  and wanted to put my left over marzipan to good use from icing my Wedding and Christmas cakes. You can adapt this recipe to suit your own favourite ingredients and play around with the shape too. Have fun and hope you enjoy it as much as me!


Things I used to make Rosca De Reyes:

Bake for approximately 45 minutes at 350 degrees F or 170 degrees C

  • 1/3 cup warm water (only add as much as you need)
  • 1 packet of yeast (7g dried instant yeast)
  • 4 cups flour
  • 1 cup sugar
  • 4 large eggs, beaten
  • 3/4 cup butter, room temperature
  • 1/4 teaspoon salt
  • 1 1/2 teaspoons cinnamon
  • 1/2 teaspoon ground star anise
  • 4 teaspoons vanilla extract

Filling

  • 2 tablespoons unsalted butter, melted
  • 1/2 cup sugar
  • 2 teaspoon cinnamon/mixed spice
  • A marzipan baby Jesus (or you can use a small figurine or toy or a bean)
  • Dried/candied fruit (about 2 cups of assorted fruit cut into small pieces  such as sultanas, orange/lemon peel, mango or cherries)

Decoration

  • Large dried fruits (so they don’t burn in the oven) such as glace cherries
  • Beaten egg (to wash over the whole ring)
  • Edible gold lustre spray (or glitter) if you wish!
  • Marzipan and star cutters

Experimental Chocolate Chip Polvorón – Spanish Christmas Cakes or Mexican Wedding Favours

image

I adore Polvorón and wanted to have a go at creating a nut free version. What other flavours could I incorporate into this delectable sweet treat and not diverge too far from the traditional ethos of the the Polvorón which mainly consists of nuts…? What else but chocolate and cinnamon!

image

Using the same method as my original Polvorón attempt I replaced the nuts with dark chocolate and added a generous dose of cocoa powder.

And here we have it… a flatter chocolatey and chewier version of Polvorón!

image

Perhaps because they lack the nuts to hold them together and chocolate (unlike nuts) makes when baked, the little chocolate balls spread into perfectly round chocolate chip cookies.

image

I chose to use caster sugar rather than icing sugar to enhance the crunchy texture. It also added a wonderful chewiness to the cookie, with the sugar and chocolate combining to create a toffee in the centre of the crumbly cookie! Yum! They have been very popular in my house!

image

With a light dusting of icing sugar they look very Festive. The hint of cinnamon conquers up Christmas.These are would make a perfect homemade present, or to be eaten by the handful with a large bucket if tea. I really rather enjoyed making this Spanish Christmas cakes/cookie recipe up!

image

I’m looking forward to my further Polvorón flavour experiments!

image

Things I used to make Chocolate Polvorón

Makes about 40 small biscuits

Preparation: 15 minutes

Chilling time: 30 minutes

Baking time: 18-20minutes at 170degrees c

  • 220g butter (1 cup or 2 sticks)  room temperature
  • 250g caster sugar (2 cups or 240 grams) – rather than icing sugar to add an extra crunch that the nuts would normally add
  • 2 teaspoons vanilla extract
  • 250g all purpose flour (2 cups or 240 grams)
  • 100 g (1 cup) dark chocolate coarsely ground/chopped
  • 1/4 teaspoon ground cinnamon
  • 30g cocoa powder
  • icing sugar to dust the biscuits with

image

I’m entering these experimental Spanish Polvores into Chris’s Cooking Around the World Spain Round up. Pop on over to his blog for a round up of some inspirational international cooking! Thanks for reading!