55. Giant Punschrulle – Swedish Green Marizpan Rolls

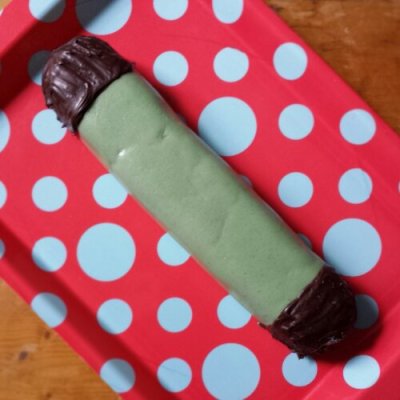
too long for a normal plate - the giant prunschelle

too long for a normal plate – the giant punschelle

The Prince family love marzipan. In every shape, form and colour. There is a a rather well known Swedish shop that sells these amazing little green marzipan rolls called Punschrulle and everytime I go I stock up, mainly on food ignoring all the other homeware options.

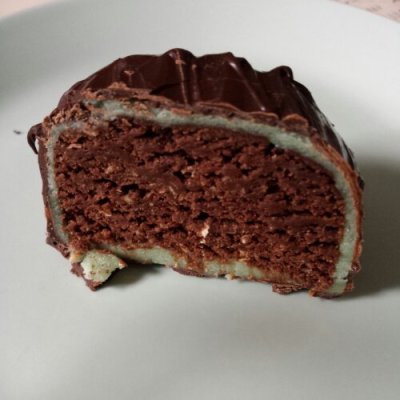
A slice of giant Punschrulle cake

A slice of giant Punschrulle cake

I have been looking for a recipe for Punschrulle or Punsch-rolls forever and was unable to find one that reflected the ingredients described on the back of the packet. The key ingredient was always missing, oats! So in the end I made up my own recipe and tasted it along the way to make sure I had got it as close to the original as possible.

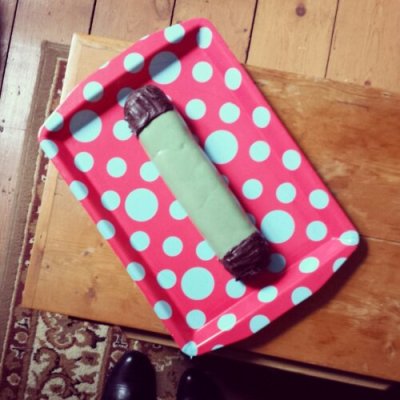
A birds eye view of a giant Punschrulle cake

A birds eye view of a giant Punschrulle cake

The Punschrulle is also known as dammsugare which in English means rather oddly, “vacuum cleaner”. I think this is related to it’s tube like appearance, like a vacuum cleaner’s hose perhaps? But also because this cake gives you the opportunity to use up leftover cakes and cookies, hoovering up the crumbs from yesterday’s baking. What an efficient little cake this is.

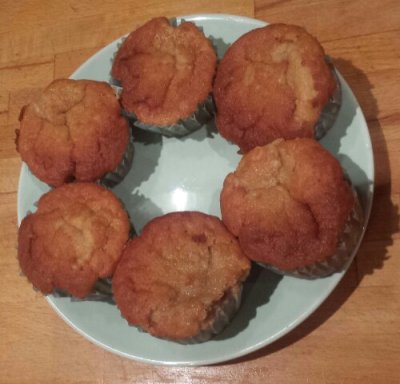
6 Earl Grey Cupcakes just begging to be mashed up

6 Earl Grey Cupcakes just begging to be beaten up

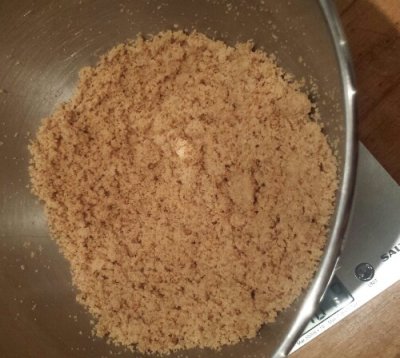
I was lucky to have 6 earl grey cupcakes waiting patiently to be eaten in my freezer from a rather large baking frenzy I had whipped myself into. now was there time to shine. I defrosted the 6 cupcakes and blended them in my kitchenaid (using the beater attachment) to a fine crumb. You could also use a hand blender or food processor if you wish. I simply couldn’t be bothered to unpack my food processor so used the kitchen aid, which does a pretty good job of beating things to a fine crumb, particularly if you break it up a little by hand first.

cake crumbs

cake crumbs

Chocolate and marzipan are my favourite combination. I could merrily eat a block dipped in dark chocolate all to myself, but tried to resist as far as possible. Punschrulle rolls are filled with a rich chocolatey, oaty cake. Further investigation also indicates that they are a rather boozy cake too, with punsch liquor. However I wanted to make a child friendly recipe, not get my little nephew hammered, so I omitted the booze from my recipe. But feel free to whack a bit in if you prefer your cakes alcoholic. I’m not entirely sure where you purchase punsch liquor from in the UK, but I think brandy , vodka or rum would be a good substitute!

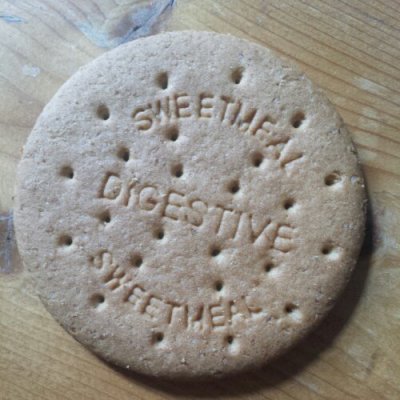
The classic storecupboard essential- digestive biscuits

The classic storecupboard essential- digestive biscuits

Sieving cocoa powder and sugar into the mix I realsied that I needed something more to bulk the cake crumbs up and balance out the cocoa powder. Rooting around in my cupboards I found some digestive biscuits which were perfect for this purpose. Again I crumbled them into the mixer bowl by hand and let the mixer do the work for me.

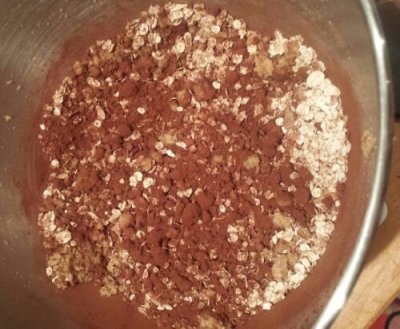
Chuck in the rest of the cocoa powder and sugar

Chuck in the rest of the cocoa powder and sugar

I was worried that the oats would be a bit too large in this mixture so introduced my hand (stick blender) to blitz the mixture to a much finer crumb. As this cake is uncooked, the oats needed a little time to soften in the mixture, you want texture to the cake, but not to make your friends feel like they have oats stuck in their throat.

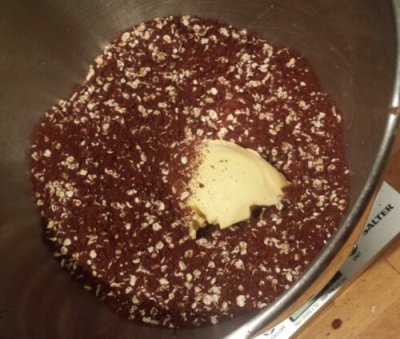
Beat in the butter

Beat in the butter

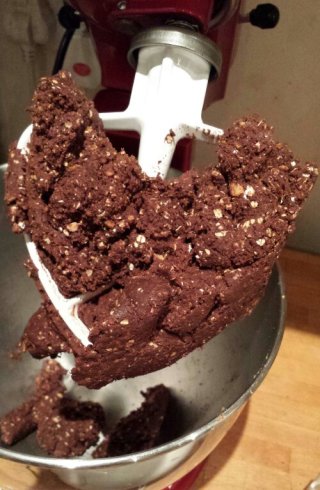
It’s such a simple cake to make, having completed the baking when I made the cupcakes a few months ago. All that’s left to do is to rub in the butter and shape the mixture into a roll! I wanted to make my punschrulle for my sisters birthday and envisaged a giant punschrulle roll, rather than making individual rolls.

Beat the mixture together until it sticks in one nice lump

Beat the mixture together until it sticks in one nice chocolatey lump

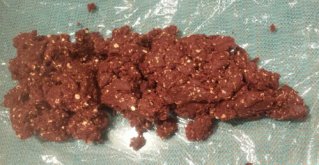
I used cling film to roll the mixture up and flatten at the ends, whilst smoothing the top.

Plonk your buttery cake crumb lump onto some clingfilm and roll

Plonk your buttery cake crumb lump onto some clingfilm and roll

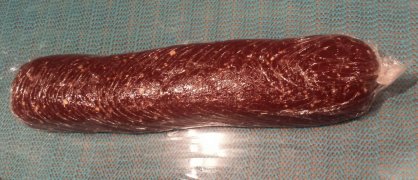
Sealing the ends of the cling film, the roll can then be transferred easily to the fridge to set, while you get busy colouring the marzipan and rolling it out.

a cling film wrapped chocolate sausage

a cling film wrapped chocolate sausage

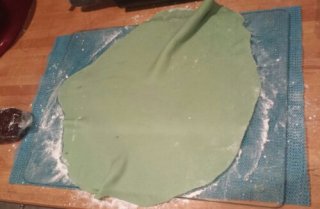
Traditionally Punschrulle rolls are bright green and each end is dipped in dark chocolate. I used a little green gel food colouring and kneaded it thoroughly into the marzipan. dousing the worksurface in icing sugar stops the marzipan sticking and means you can roll it out into a thin rectangle, just enough to cover the entire cake.

Turn your marzipan green and roll out

Turn your marzipan green and roll out

Making sure the marzipan was loose enough to remove it from the worksurface, (The last thing you want is to realise half way through icing you cake is that the marzipan is welded on to the worksurface.)

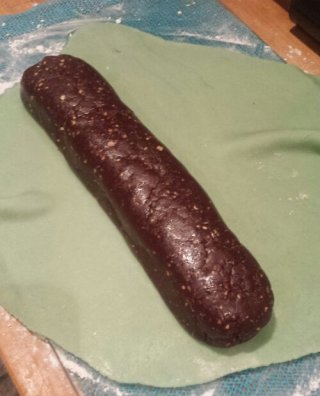
Chocolate Sausage ready to be wrapped in marzipan

Chocolate Sausage ready to be wrapped in marzipan

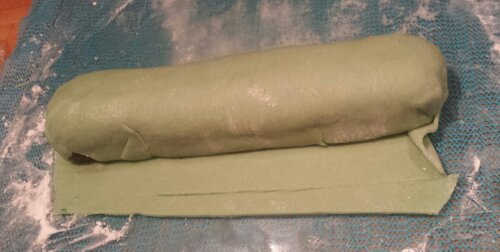
I plonked the roll face down (the smooth side which is to be the top of the cake) face down on to the marzipan and folded the marzipan over to envelope the cake fully. Strategically folding the marzipan to hide the join underneath the cake and tuck the folds along the edges underneath.

Wrap up and tuck in the edges

Wrap up and tuck in the edges

Whilst the bottom of the cake is facing upwards, I melted a bar of dark chocolate in the microwave, reserving one third of the chocolate and stirring every 30 seconds to avoid it burning. Once the chocolate is melted pour in the final third of the chocolate and stir until fully melted. This helps to reduce the temperature of the chocolate and temper it, so it retains a glossy finish and doesn’t look like a sweaty mess when you’re finished.

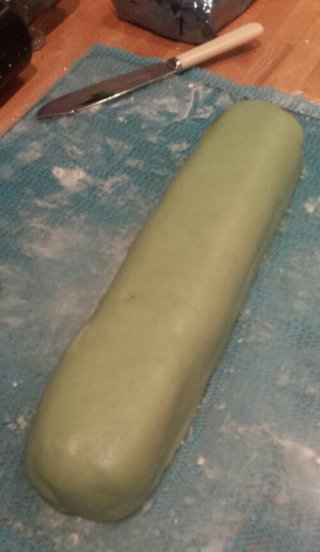
One chocolate cake sausage encased in marzipan

One chocolate cake sausage encased in marzipan

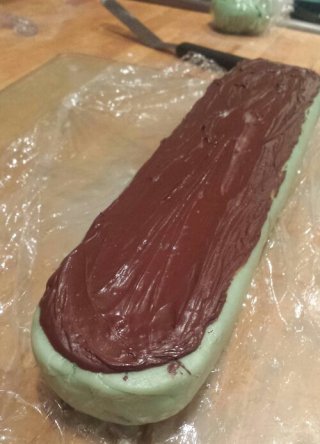
I smeared melted chocolate all over the bottom of the cake in a thin layer and allowed it to set. This means each slice has a layer of chocolate, not just the lucky people who get the end pieces! It also helps to lift the cake when you need to move it later on…

Smear melted chocolate all over the bottom of the roll

Smear melted chocolate all over the bottom of the roll

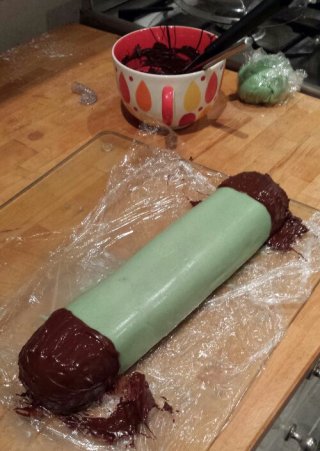
Once the bottom layer of chocolate has set fully, turn the cake face up and paint the ends of the cake with a thick layer of chocolate. Et voila, you have created a giant Punschrulle cake!

Paint each end with melted chocolate

Paint each end with melted chocolate

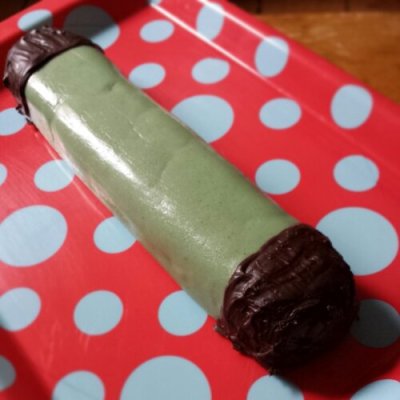
Now this is when I realised that you have to be a member of my family to think this cake looks pretty. On a giant scale, the Punschrulle looks a bit odd… but it tastes great! (Even if I do say so myself.) I don’t own a plate or chopping board long enough to house such an enormous cake, so I had to resort to using a colourful serving tray.

too long for a normal plate - the giant Punschrulle

too long for a normal plate – the giant Punschrulle

The addition of a giant candleabra birthday candle  gave the cake somewhat of an eccentric finish. What Giant Punschrulle cake would be complete without a birthday candleabra? This cake didn’t last long in our house. Despite it’s chocolatey richness, it’s very moreish and disappears very quickly when served with a hot cup of tea. I could easily eat 2 slices in one sitting. The crunch of the dark chocolate is there with every bite, balancing out the marzipan and dense oaty filling.  It’s a great way to use up any leftover cakes and biscuits in your house, so it’s a rather economical and unusual birthday cake. If you want to see how the individual Punschrulle rolls should look, have a pop over to www.nearof.com for a review of the cakes I based my recipe on.

What giant prunschelle cake would be complete without a birthday candleabra?

What giant prunschelle cake would be complete without a birthday candleabra?

Happy Birthday to my wonderful sister! Here’s a interesting interpretation of the Punschrulle cake just for you!

Giant Punschrulle Cake

Giant Punschrulle Cake

Things that I used to make my Giant Punschrulle Cake

  • 6 cupcakes (you could use whatever cake crumbs you have available, chocolate or vannila would probably work best)
  • 10 digestive biscuits (plain biscuits again work well in this cake, rich teas, shortbread or digestives would be good)
  • Sugar
  • Butter
  • Vanilla

Icing

  • 300g marzipan
  • green food colouring
  • icing sugar (for dusting the board)

Chocolate 

  • 100g dark chocolate
50. Authentic Danish Rye Bread – Rugbrød

Danish Rye Bread

Danish Rye Bread

My wonderful friends Josh and Mark shared their genuine Danish Rye Bread recipe with me months ago and I’ve been dying to try it! I was going to visit them in Manchester and thought it the perfect occasion to take them some freshly baked Rye bread too to say thank you for letting me stay!

A cross section of Danish Rye Bread

A cross section of Danish Rye Bread

The recipe arrived in 3 photos of hand written sheets so I knew it was going to be good and truly authentic. It requires rather a lot of flour as it is enough for 3 loaves. My brain couldn’t calculate the maths to scale this recipe down so 3 loaves it is!

The Rye Bread Sourdough Starter

The Rye Bread Sourdough Starter – porridgey

The recipe calls for a homemade sourdough base. I have attempted to make my own sourdough starter from scratch before following the Fabulous Baker Brothers method of capturing the yeast from the air in flour and water and letting it ferment. Perhaps my house is not particularly yeasty, I’m not sure but for whatever reason I couldn’t get it to bubble. Having made a successful Herman the German Sourdough starter and cake before I know that adding instant yeast is a sure fire success. Therefore, I admit it, I deviated from the rules immediately, before I even began baking pouring in a little cheating instant yeast to get the sourdough started.

Starting the Rye Bread in my massive cake tin

Starting the Rye Bread in my massive cake tin

I don’t own a bowl big enough to stir this vast amount of flour in so wielding my largest cake tin I set to work… and consequently ruined said cake tin, bending it out of shape with the cement like dough!

If you were making your own sourdough starter, you could keep some back and carry on feeding it so you can make many more beautiful loves in the future. I was making just enough for this recipe, but may attempt to make my own sourdough rye starter again.

There's a lot of flour in this Rye Bread

There’s a whole lot of flour, seeds and grains in this Rye Bread

Rye is quite the healthy flour, full of wholesome goodness, as opposed to refined white flour. This means that it has quite a distinct flavour and it is much heavier than white flour. It creates a rather dense loaf. Mixing rye flour with white flour lifts the texture and colour of the bread slightly. The addition of seeds, nuts and grains give it extra texture and nutritious value!  This bread is perfect for applying lashings of cream cheese and smoked salmon to. I love the traditional Smørrebrød, or Danish open sandwiches. Rye bread is an essential part of proper Danish sandwich making.

If you plan this in advance you will have plenty of time to allow the starter to ferment. I however did not. You should mix the flour and water together, stirring it into a smooth, thick paste and leave for at least 12 hours to let it bubble. I made my starter but needed it to be ready to go asap so I cheekily added 7g of instant yeast to make sure it rose fully.

Adding the flour and seeds to the sourdough start mix

Adding the flour and seeds to the sourdough start mix

Once your starter is ready you can save a cup back for future sourdough creations or, whack it all in to the mix like me. The beauty of rye bread is that it doesn’t require kneading! However you do need strong arms for the mixing. My weapon of choice was a wooden spoon to battle the heavy dough with. Combining the sourdough starter with the rest of the rye bread mixture, alternating between the dry ingredients and the water is hard work but you must keep on stirring until everything is combined, including the seeds and grains. Prepare yourself for a good 10 minutes of elbow grease.

How to fit all of this in one bowl... water, flour, seeds and sourdough starter

How to fit all of this in one bowl… water, flour, seeds and sourdough starter

Unfortunately there were a few ingredients that I didn’t have to hand so improvising to my hearts content, I chose sunflower and sesame seeds to add to the dough. I haven’t been able to find malt powder so I just left it out of the mix, but I bet you can get it in healthfood shops. Rye/barley/wheat grains don’t really feature in my cupboards (other than broth mix and I’m pretty sure dried barley and split lentil is not what we’re looking for here) but oats were an excellent emergency substitute!

Thick and porridgey just how the best Rye breads should be

Thick and porridgey just how the best Rye breads should be

Once the dough is the consistency of thick porridge (lumpy in a good way) it’s ready to pour/scoop into your greased and floured loaf tins. It is quite a stiff liquid so your have to encourage the dough as you pour it into the corners of the tins. Pour in enough dough fill two thirds of the tin, so there’s still space for the dough to expand without overflowing the tin. I had to resort to baking one loaf in a square cake tin (the same size as 2 normal loaf tins) and some mini pudding tins as I only have the one small (500g) loaf  tin!  Coat each loaf with a nice wash of oil and sprinkle a few oats/seeds on the top. Cover the loaves with greased cling film and leave to prove/mature for 8-12 hours. This time allows the sourdough to mature further and add a deeper tangy flavour to the bread.

Pour your rye bread dough into all of your loaf tins (and every other container you can find...)

Pour your rye bread dough into all of your loaf tins (and every other container you can find…)

When proved the dough will not double in size like other breads but it will increase in volume and should reach the top of your loaf tins. Prick the tops of the proven loaves all over with a fork, this will help keep your crust intact as it may fall off if left un perforated. It also prevents the loaves from rising and cracking in the oven, maintaining that distinctly symmetrical Danish Rye bread oblong shape.

The cling film covered and proving loaves

The cling film covered and proving loaves

Pre heat your oven to 220 degrees C. Bake the loaves at 220 degrees for 10 minutes. This initial blast of heat helps to force the bread to rise and the crust to develop. Lower the temperature to 175 degrees C and bake for a further 75  minutes.

Sometimes pegs come in handy to keep the cling film in place...

Sometimes pegs come in handy to keep the cling film in place…

If your loaves can be removed easily from the tins at this point do so. if not, leave for another 5-10minutes until they can be removed. Bake the bread for a further 5-10 minutes without the tin directly on the oven shelf to allow the crust to become extra crunchy.

The forked loaf ready for the oven

The forked loaf ready for the oven

Once they’ve cooled they’re ready to eat! You should be able to keep them at room temperature for 1-2 weeks or they freeze really well too.

Danish Rye Bread fresh from the oven

Danish Rye Bread fresh from the oven

I always know when I’ve baked something especially tasty as Super Hans will go out of his way to steal it from me. He was desperate for a bit of my Danish Rye Bread. I love the depth of the flavour in this bread. It radiates health and wellbeing. It’s also rather filling, so thin slices are a must. The sourdough tang cuts through the fantastic texture of the seeds and nuts. Now that I have the Kitchenaid I can dispense with the cake tin mixing method, so I will be purchasing more rye flour very soon and having another go. I would also love to try other dark breads. I can see me attempting many more in the future. Thank you Josh and Mark for sharing your fantastic recipe with me!

Extreme close up of the crunchy crust

Extreme close up of the crunchy crust

Things that I used to make Danish Rye Bread

Sourdough Starter

  • 300ml luke warm water
  • 250ml rye flour
  • 7g of instant yeast (if you’re in a hurry)

Mix together to a thick smooth paste and leave to ferment until bubbly (12-24 hours) or if you’re impatient add 7g of instant yeast to your starter…

Rye Dough

  • 1 litre of warm water
  • (if you can find it add 1 tablespoon of ground malt -I didn’t)
  • 200g sunflower seeds
  • 200g sesame seeds
  • 400g oats (or whole rye, barley/wheat grains)
  • 2 tablespoons salt
  • 1 tablespoon honey
  • 300g strong white flour
  • 900g rye flour
A slice of rye

A slice of rye

My pair of rye loaves

My pair of rye loaves