68. Speculoos Kransekake Christmas Tree Cake – Norwegian Ring Cake

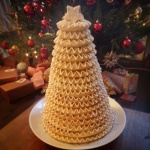
Vanilla Shortbread Kransekake recipe

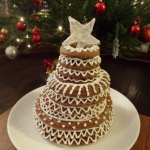
Vanilla Shortbread Kransekake


Traditionally Kransekake (Norwegian Ring Cake) is eaten at Christmas or on special occasions.  It’s a stack of about 18 almond ring shaped biscuits held together with lashings of ornate royal icing.

Speculoos Kransekake

Speculoos Kransekake

Now as I can never leave a recipe alone I had to switch this up and make it even more festive with a (Speculoos Kransekake (recipe below) and Vanilla Shortbread Kransekake (recipe below) instead. The sweet spices blended together makes a moreish fragrant biscuit. I loved it so much I kept going and for Christmas day made an enormous shortbread version, which is closer in colour to the traditional almond version.

Although I’m straying from the Norwegian almond tradition my Speculoos and shortbread versions are much cheaper to make and meant I didn’t have to make another trip to the shop for expensive ground almonds. You can buy Speculoos spice already mixed but I enjoy grinding and blending my own fresh spices for an extra punch.

I always have an abundance of spices in my cupboard so this is a perfect Christmas bake for me. And as we just put our tree up. The combination of  pine needles and freshly baked Speculoos floating through our house is like a piece of Christmas Heaven.

The Kransekake is baked in a special set of tins, called Kransekake pans. I couldn’t get my head around how it would all fit together so ploughed on rolling out on the work top as many long Speculoos sausages by hand to press into the tin as i could eek out of the dough. You can make this without the special tin, if you feel like shaping the circles yourself and bake them directly on a baking sheet instead, but the tin makes it a bit easier. Each tin holds 3 biscuit rings.

Roll the dough into smooth sausages and place carefully in to the pans. Press the ends together to seal the ring.

Roll the dough into smooth sausages and place carefully in to the pans. Press the ends together to seal the ring.

The dough is a little crumbly and took a bit of perseverance to roll it long enough to fill the larger rings, but it’s worth the effort. It’s best to make thin sausages to get more out of your dough and also the dough puffs up as it bakes. If the rings are too thick they will merge, making it difficult to get them out of the tins and also leaving you with rough dishevelled edges.

Kransekake pans hot from the oven

Kransekake pans hot from the oven

In hindsight I should have doubled the dough recipe as I ran out so had to make do with 11 rings rather than 18. This meant that the rings didn’t quite taper off in size as they should and I had to employ some clever royal icing layering to get the rings to fit together.  So don’t look too closely at my piping skills please! (I’ve doubled the recipe for you at the bottom of this page so you’re good to go!)

Glue the rings together with a good slick of royal icing

Glue the rings together (starting with the largest ring on the bottom!) with a good slick of royal icing

I also probably should have decided on my piping pattern before launching headlong into the design on the kransekake. But I got a bit carried away as per usual and ad libbed. I think my favourite pattern is the zig zags as I wanted to make it look like a Christmas tree. I love the contrast of the stark white snow icing against the brown Speculoos hues.

I got a bit carried away with the icing patterns... zig zags, stripes, and polka dots

I got a bit carried away with the icing patterns… zig zags, stripes, and polka dots

My original plan was to use white chocolate to fuse the rings together to add to the decadence of the bake, however I forgot to buy any, so royal icing it had to be. Having only used royal icing to glue together the tiers of my wedding cake before (when I used the pre mixed merriwhite powder available from cake decorating shops) I wanted to try powdered egg whites to avoid using raw egg whites to bind the icing together. It worked really well, so well in fact I went on to ice a gingerbread house and my goddaughter’s christening biscuits with it too. (I used sachets of Dr Oekters powdered egg whites so pregnant ladies and children can eat as much icing as they like without the worry of salmonella.)

I also think dark chocolate icing would be stunning against the spiced biscuit. perhaps dusted with a little gold lustre powder/spray for extra festiveness.

When I made Speculoos last time I made a soft dough so it could be piped in shapes directly onto the baking sheet. This dough needed to be firm and malleable so it would hold it’s shape and support it’s own weight. I didn’t add any liquid to this dough and left out the treacle to make sure it wouldn’t spread too much during baking. Although a little treacle might help to roll it out as it is quite a dry dough and had a tendency to crumble when molding it.

To add to the depth of flavour and darkness of the biscuit I used a combination of light and brown sugars.  Feel free to use your preferred sugar to reach the colour biscuit you prefer.

Things I used to make Speculoos Kransekake

Speculoos Spice Blend

  • 4 TBS ground cassia (or cinnamon if you can’t get cassia)
  • 4 TSP ground ginger
  • 8 cardamom pods (discard the pods and grind the seeds)
  • 2 star anise (grind the seeds only)
  • 1/2 TSP white pepper
  • 1/2 TSP pink Himalayan salt (or any salt will do)
  • 1/2 TSP black pepper
  • 6 cloves (ground)
  • 1/2 TSP nutmeg

Speculoos Dough

This is double the quantity from my previous version of Speculoos biscuits so it should be enough to make 18 rings!

  • 220g butter
  • 400g light brown sugar
  • 100g dark brown sugar
  1. Beat the butter and sugar together until light and fluffy. Bearing in mind you’re using brown sugars so the colour change won’t be as dramatic as when using white sugar. It looks more like a big lump of soft sugar…
Beaten brown sugars and butter

Beaten brown sugars and butter

2. Then beat the rest of the dry ingredients and speculoos spice mix in until it comes together into a ball. It is a slightly dry crumbly dough so it will take some work to bring it together.

  • 600g plain flour
  • 1/2 tsp bicarbonate of soda
  • 2 eggs
  • splash of almond extract
  • splash of vanilla extract
Slightly crumbly spicey speculoos biscuit dough

Slightly crumbly spicey speculoos biscuit dough

3. Chill in the fridge for an hour.

4. Roll the dough into 18 smooth sausages and arrange in the greased kransekake tins. Gently pressing the ends of the sausages together to seal the rings. If you have any dough left over you may want to cut a little star out and bake to adorn the top of your stack.

5. Bake for 10 -12 minutes at 190 degrees c until slightly puffed up and firm to touch.

6. While the biscuits are baking beat together the royal icing as described below.

7. Allow the biscuits to cool in the tin before coaxing gently out of the tin. You may need to separate some rings that have merged as they bake with a knife.

8. Starting with the biggest ring on the bottom apply a thin line of royal icing to the underside of each ring, gluing it in place. Stack the rings one on top of the other working your way from the largest to the the smallest ring.

Glue the rings together with a good slick of royal icing

Glue the rings together with a good slick of royal icing

9. Once the full stack is glued together and fully assembled take a deep breath and with a steady hand and fine nozzle on your piping bag slowly pipe your chosen design directly onto the rings. Maybe throw some (edible) glitter on it as you go for extra pazzaz.

10. Stand back and admire your creativity.

11. If you can bear to eat your creation depending on how many people it needs to feed… You can either pull a ring off the stack with a knife or cut straight into it with a sharp knife.

Back to the top

Things I used to make Vanilla Shortbread Kransekake
  • 250g butter
  • 110g sugar
  • 360g plain flour
  • splash of vanilla extract

1. Beat the sugar and butter together until light and fluffy.

2. Beat in the flour and vanilla until the dough comes together into a shiny ball.

3. Roll into 18 thin sausages and arrange in the greased kransekake tins as before. Gently press the ends of the sausages together to seal the ends.

4. Bake in the oven at for 15 – 20 minutes at 190 degrees c until slightly golden brown. (Keep an eye as you don’t want the biscuits to take on too much colour as they will look burnt and be dry.
Back to the top

Royal Icing recipe

  • 250g icing sugar
  • 5g powdered egg white (one sachet of Dr Oekter’s powdered egg white)
  • 45 ml of cold water

*optional* you can add food colouring at this stage if you like but be gel or powdered colour would be best so it doesn’t add to much liquid. If using liquid colouring supplement some of the water with food colouring instead.

1. Beat the sugar powdered egg white and and water together for about 5 minutes on medium speed and then increase to high for 4- 5 minutes. The icing will be glossy and thick. If it is too wet or runny it will not set or be strong enough to support the weight of the kransekake.

Thick royal icing

Thick royal icing

2. Scoop your icing into and icing bag with a fine nozzle for piping your decoration. It’s handy to sit your piping bag inside a tall glass for this job to support the bag.

3. If using a plastic icing bag don’t forget to cut the end off the bag when you’re ready to start icing.

4. Put the largest Kransekake ring onto your plate/cakeboard first. Apply a thin layer (or pipe a ring) of royal icing on the under side of the biscuit to hold it in place on the board.
5. Pipe another ring of icing on to the top side of the biscuit so the next layer will stick to it. Repeat until you have assembled all of the biscuits in a tower, from the largest to the smallest. Don’t worry if any of the ring have break! You can sneakily glue them back together with a little icing. Once you stick the next ring on top no one will notice!

6. Apply even pressure to the bag with your hand and keep the nozzle about 1-2cm away from the biscuit. Squeeze the bag gently and with a steady hand pipe your chosen pattern directly on to the assembled Kransekake.

7. Whilst the icing it still wet sprinkle with a little edible glitter.

8. Allow the icing to harden and the Kransekake will become very sturdy and easier to transport. The biscuits will start to soften after a couple of days so cover it with tin foil if you’re making it in advance.
9. Impress all of your friends and family with the great reveal of your Kransekake. I liked using mine as a Christmas table centre piece before inviting everyone to removing a ring at a time to eat.

Back to the top

61. Hungarian Lemon Poppy Seed Cookies


Lemon seeded cookies just asking to be eaten

Lemon seeded cookies just asking to be eaten

Cookie, cookie on my plate what will be your delicious fate? Lemon conjures up memories of spring time, Easter and fresh starts. As we’re nearing the final 20 bakes of my around the world in 80 bakes venture I’ve accumulated a lot of random ingredients that seemed like the most essential purchase at the time.

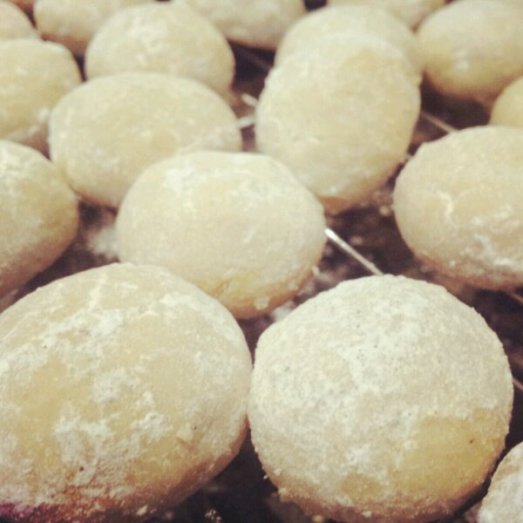
Stacks of Poppy Seed Cookies

Stacks of  glimmering white Poppy Seed Cookies

Like I’m ever going to use that pomegranate powder, gram flour, black mustard seeds and 4 bags of poppy seeds… So I’m getting creative. Working with what I have to make some new recipes, tweaking more traditional bakes to suit my more interesting ingredients.
Eat Me - cookie stamper

Eat Me!

All the recipes I found for Hungarian Lemon Poppy Seed Cookies were rather wet doughs, which had to be dolloped onto the baking tray or pinwheels with a poppyseed spiral running through them. I’m usually a fan of any recipe that doesn’t require a rolling pin but I received a beautiful cookie stamp for my birthday so I wanted to make a rollable dough so I could stamp away.
lemon Poppy seed cookies speckled dough

Poppy seed speckled dough

This recipe had to be tweaked gently to avoid creating too firm a dough as I would end up with a basic shortbread recipe, which is rather more Scottish than Hungarian. I took inspiration from Munn Cookies which are a traditional Jewish recipe. My Lemon Poppy Seed cookies are a Hungarian Munn Cookie hybrid! They’re a slim cookie (or biscuit to me) with a comfortingly crisp and crumbly texture.

Wrap your dough in cling film before chilling it for 30 minutes (or so a little longer won't hurt!)

Wrap your dough in cling film before chilling it for 30 minutes (or so a little longer won’t hurt!)

To make my recipe more mouldable I added more of everything. Calculating it carefully to get the balance right between the flour, sugar, seeds and butter. Creating a smooth buttery dough which rolls out beautifully once chilled.

Fancy fluted cookie shapes: Cutting out the Lemon Poppy Seed Cookies

Fancy fluted biscuit shapes: Cutting out the Lemon Poppy Seed Cookies

Chilling the cut and stamped cookies is the key to holding the shape and preventing too much oven spread.

These biscuits are pretty quick to bake. They take less than 15 minutes to whip up (especially if you’re using an electric mixer) and only 12 minutes in the oven. They spend longer in the fridge chilling than they do in the oven!

Poppy seed speckled and lemon zest flecked cookie close up

Poppy seed speckled and lemon zest flecked cookie close up

In addition to tasting great and looking pretty the poppy seeds bespeckling the cookies add an extra healthy dimesion. Poppy seeds are very common in many European baked good from bagels to seed cakes. They were traditionally incoporated into many desserts and breads as they are packed with nutrients, minerals and fibre. It’s suggested that Poppy Seeds can help with nausea and stomach upsets too. I also added some Chia Seeds for their superfood qualities to make these cookies a more health conscious snack.

Hungarian Lemon Poppy Seed Cookies

Go on.

The Lemon Poppy Seed Cookies are lovely. They retain their pale colour after baking so don’t expect them to develop a golden oven tan! They puff up slightly in the oven, leaving a smooth and shiny finish. They’re crisp and crumbly with a great crunchy texture owing to the seeds. You could add fewer seeds if you prefer, but I wanted to pack as many in as I could! The finished cookie reminds me of slices of dragonfruit.

Hungarian Lemon Poppy Seed Cookies

Hungarian Lemon Poppy Seed Cookies

If you prefer your cookies soft, bake them for 12 minutes at 175 degrees c. If you like a snap to your biscuits bake them for about 15 minutes. I feel rather refined sitting back in my chair with a poppy seed cookie to nibble on and a cup of Earl Grey to sip. The citrus in the tea brings out the lemon zest in the biscuit. A perfect combination! (Note: you may wish to share these with a friend who will point out any poppy seeds lodged in your teeth.)

Lemon seeded cookies just asking to be eaten

Lemon seeded cookies just asking to be eaten

These biscuits are subtle in flavour and high in texture. The lemon flavour cuts through the crunch for a perfect Spring/Summer snack.  They’re light and not too sweet. (But if you like sweeter biscuits you could add some water icing or melted white chocolate.) They freeze really well too (uniced), so you can keep a constant supply to hand.

I’m very tempted to make another batch and I’m very tempted to jazz them up even further, perhaps with a splash of lemon extract and a handful of chopped aromatic green herbs. Rosemary, Basil, Thyme, Verbana, or Mint would be amazing with the Lemon. Adding another level of sophistication to this already refined biscuit. Lucky  I have 3 and half bags of poppy seeds left to go…

Hungarian Lemon Poppy Seed Cookies

Someone’s trying to tell you something…

Hungarian Lemon Poppy Seed Cookie Recipe

  • 220g (1 cup) Butter
  • 220g (1 cup) Sugar
  • 1 Egg
  • 450g (3 cups) Plain flour
  • 1 1/2 tsp baking powder
  • 1/4 tsp salt
  • Zest of 2 lemons
  • Juice of half a lemon
  • 80g Poppy seeds (I used 70g poppy seeds and 10g chia seeds)
  • *A splash of lemon extract
  • *A handful of finely chopped green herbs (fresh or dry) such as rosemary, basil, thyme, mint or verbana

*Optional

How I made my Hungarian Lemon Poppy Seed Cookies

1. Beat together the sugar and butter until light and fluffy.
2. Beat in the egg until fluffy
3. Beat in the zest of 2 lemons
4. Beat in the flour, salt and baking powder
5. Beat in the lemon juice. Until the dough comes together in one ball.
6. Beat in the poppy seeds (and chia seeds if you’re adding them too, or just stick with poppy seeds!)

*Beat in the lemon extract and herbs if you choose to add them too
7. Wrap the dough in cling film and chill for at least 30 minutes
8. Roll out the dough on a surface dusted with icing sugar
9. Cut out 3 inch rounds (or whatever shape you prefer). I used my stamper here, gently pressing it into the dough.
10. Place on greased lined baking tray, cover with cling film and chill in the fridge for at least 30 minutes (or longer)
11. Bake for 11-12 mins at 175 degrees c for a soft cookie or 15-17 minutes for a crisper biscuit. The cookies won’t take on any colour during baking so if they start to turn brown they’re more than ready!

55. Giant Punschrulle – Swedish Green Marizpan Rolls

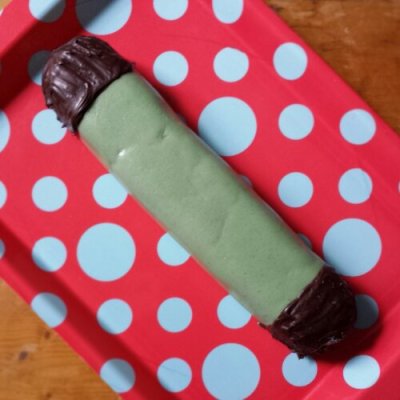
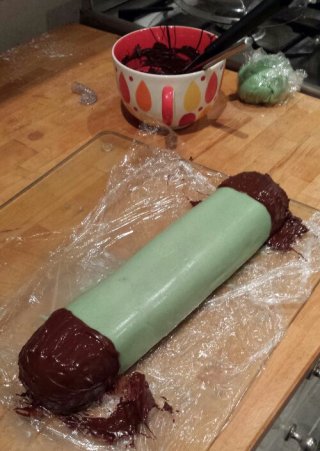
too long for a normal plate - the giant prunschelle

too long for a normal plate – the giant punschelle

The Prince family love marzipan. In every shape, form and colour. There is a a rather well known Swedish shop that sells these amazing little green marzipan rolls called Punschrulle and everytime I go I stock up, mainly on food ignoring all the other homeware options.

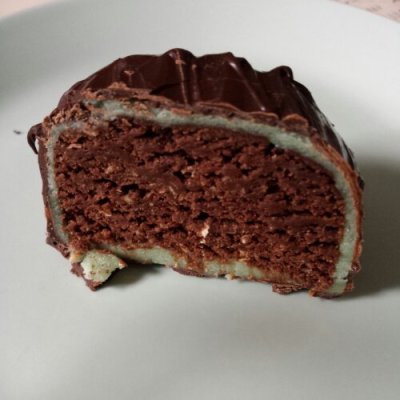
A slice of giant Punschrulle cake

A slice of giant Punschrulle cake

I have been looking for a recipe for Punschrulle or Punsch-rolls forever and was unable to find one that reflected the ingredients described on the back of the packet. The key ingredient was always missing, oats! So in the end I made up my own recipe and tasted it along the way to make sure I had got it as close to the original as possible.

A birds eye view of a giant Punschrulle cake

A birds eye view of a giant Punschrulle cake

The Punschrulle is also known as dammsugare which in English means rather oddly, “vacuum cleaner”. I think this is related to it’s tube like appearance, like a vacuum cleaner’s hose perhaps? But also because this cake gives you the opportunity to use up leftover cakes and cookies, hoovering up the crumbs from yesterday’s baking. What an efficient little cake this is.

6 Earl Grey Cupcakes just begging to be mashed up

6 Earl Grey Cupcakes just begging to be beaten up

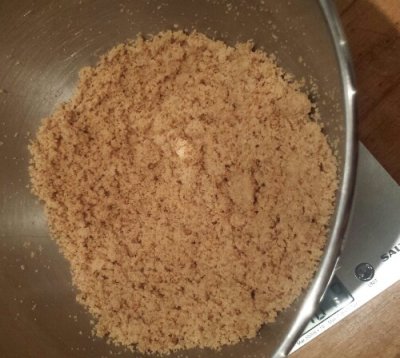
I was lucky to have 6 earl grey cupcakes waiting patiently to be eaten in my freezer from a rather large baking frenzy I had whipped myself into. now was there time to shine. I defrosted the 6 cupcakes and blended them in my kitchenaid (using the beater attachment) to a fine crumb. You could also use a hand blender or food processor if you wish. I simply couldn’t be bothered to unpack my food processor so used the kitchen aid, which does a pretty good job of beating things to a fine crumb, particularly if you break it up a little by hand first.

cake crumbs

cake crumbs

Chocolate and marzipan are my favourite combination. I could merrily eat a block dipped in dark chocolate all to myself, but tried to resist as far as possible. Punschrulle rolls are filled with a rich chocolatey, oaty cake. Further investigation also indicates that they are a rather boozy cake too, with punsch liquor. However I wanted to make a child friendly recipe, not get my little nephew hammered, so I omitted the booze from my recipe. But feel free to whack a bit in if you prefer your cakes alcoholic. I’m not entirely sure where you purchase punsch liquor from in the UK, but I think brandy , vodka or rum would be a good substitute!

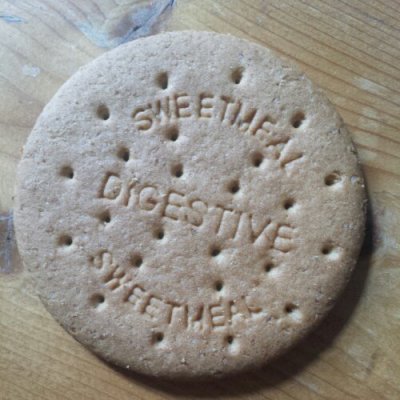
The classic storecupboard essential- digestive biscuits

The classic storecupboard essential- digestive biscuits

Sieving cocoa powder and sugar into the mix I realsied that I needed something more to bulk the cake crumbs up and balance out the cocoa powder. Rooting around in my cupboards I found some digestive biscuits which were perfect for this purpose. Again I crumbled them into the mixer bowl by hand and let the mixer do the work for me.

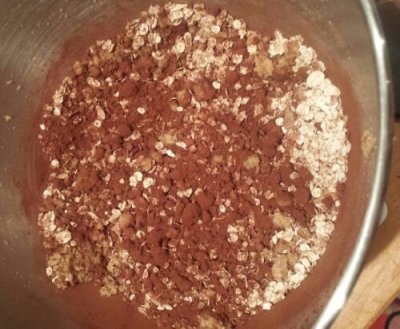
Chuck in the rest of the cocoa powder and sugar

Chuck in the rest of the cocoa powder and sugar

I was worried that the oats would be a bit too large in this mixture so introduced my hand (stick blender) to blitz the mixture to a much finer crumb. As this cake is uncooked, the oats needed a little time to soften in the mixture, you want texture to the cake, but not to make your friends feel like they have oats stuck in their throat.

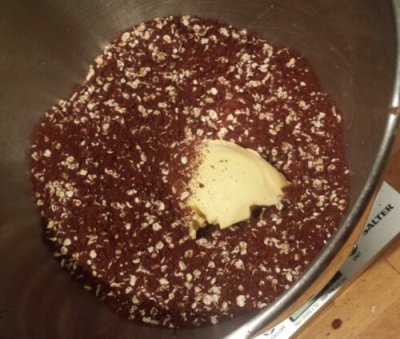
Beat in the butter

Beat in the butter

It’s such a simple cake to make, having completed the baking when I made the cupcakes a few months ago. All that’s left to do is to rub in the butter and shape the mixture into a roll! I wanted to make my punschrulle for my sisters birthday and envisaged a giant punschrulle roll, rather than making individual rolls.

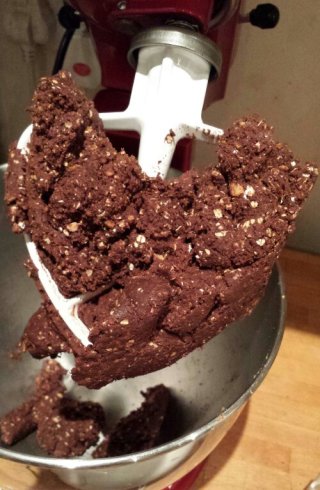
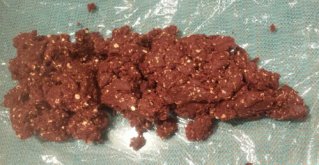
Beat the mixture together until it sticks in one nice lump

Beat the mixture together until it sticks in one nice chocolatey lump

I used cling film to roll the mixture up and flatten at the ends, whilst smoothing the top.

Plonk your buttery cake crumb lump onto some clingfilm and roll

Plonk your buttery cake crumb lump onto some clingfilm and roll

Sealing the ends of the cling film, the roll can then be transferred easily to the fridge to set, while you get busy colouring the marzipan and rolling it out.

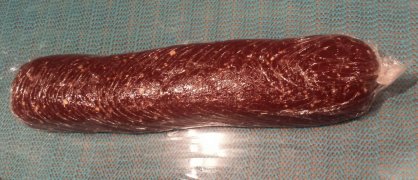
a cling film wrapped chocolate sausage

a cling film wrapped chocolate sausage

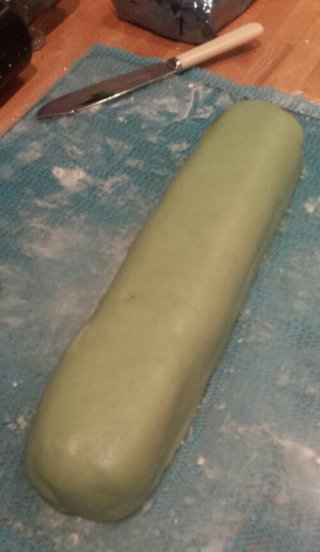
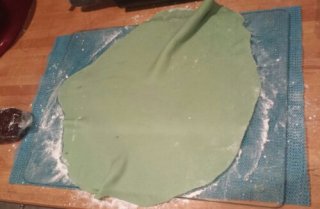
Traditionally Punschrulle rolls are bright green and each end is dipped in dark chocolate. I used a little green gel food colouring and kneaded it thoroughly into the marzipan. dousing the worksurface in icing sugar stops the marzipan sticking and means you can roll it out into a thin rectangle, just enough to cover the entire cake.

Turn your marzipan green and roll out

Turn your marzipan green and roll out

Making sure the marzipan was loose enough to remove it from the worksurface, (The last thing you want is to realise half way through icing you cake is that the marzipan is welded on to the worksurface.)

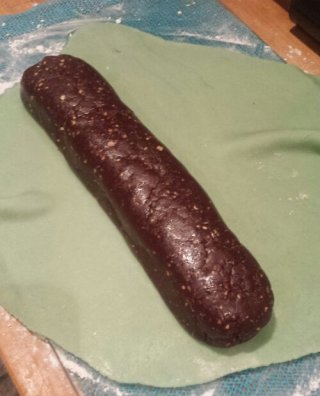
Chocolate Sausage ready to be wrapped in marzipan

Chocolate Sausage ready to be wrapped in marzipan

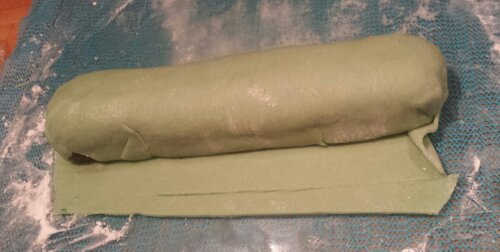
I plonked the roll face down (the smooth side which is to be the top of the cake) face down on to the marzipan and folded the marzipan over to envelope the cake fully. Strategically folding the marzipan to hide the join underneath the cake and tuck the folds along the edges underneath.

Wrap up and tuck in the edges

Wrap up and tuck in the edges

Whilst the bottom of the cake is facing upwards, I melted a bar of dark chocolate in the microwave, reserving one third of the chocolate and stirring every 30 seconds to avoid it burning. Once the chocolate is melted pour in the final third of the chocolate and stir until fully melted. This helps to reduce the temperature of the chocolate and temper it, so it retains a glossy finish and doesn’t look like a sweaty mess when you’re finished.

One chocolate cake sausage encased in marzipan

One chocolate cake sausage encased in marzipan

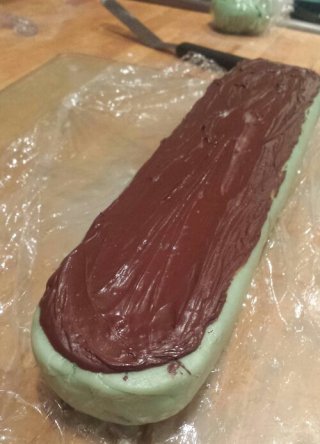
I smeared melted chocolate all over the bottom of the cake in a thin layer and allowed it to set. This means each slice has a layer of chocolate, not just the lucky people who get the end pieces! It also helps to lift the cake when you need to move it later on…

Smear melted chocolate all over the bottom of the roll

Smear melted chocolate all over the bottom of the roll

Once the bottom layer of chocolate has set fully, turn the cake face up and paint the ends of the cake with a thick layer of chocolate. Et voila, you have created a giant Punschrulle cake!

Paint each end with melted chocolate

Paint each end with melted chocolate

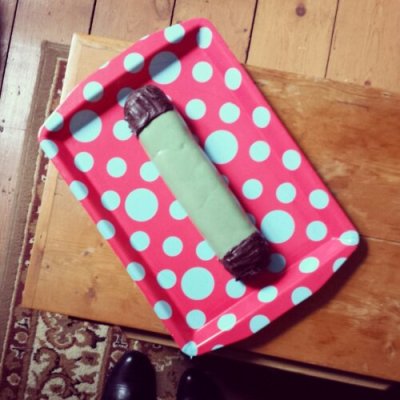
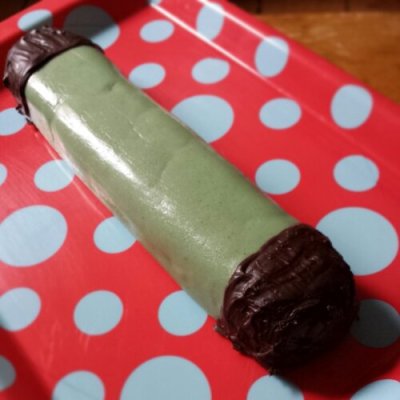
Now this is when I realised that you have to be a member of my family to think this cake looks pretty. On a giant scale, the Punschrulle looks a bit odd… but it tastes great! (Even if I do say so myself.) I don’t own a plate or chopping board long enough to house such an enormous cake, so I had to resort to using a colourful serving tray.

too long for a normal plate - the giant Punschrulle

too long for a normal plate – the giant Punschrulle

The addition of a giant candleabra birthday candle  gave the cake somewhat of an eccentric finish. What Giant Punschrulle cake would be complete without a birthday candleabra? This cake didn’t last long in our house. Despite it’s chocolatey richness, it’s very moreish and disappears very quickly when served with a hot cup of tea. I could easily eat 2 slices in one sitting. The crunch of the dark chocolate is there with every bite, balancing out the marzipan and dense oaty filling.  It’s a great way to use up any leftover cakes and biscuits in your house, so it’s a rather economical and unusual birthday cake. If you want to see how the individual Punschrulle rolls should look, have a pop over to www.nearof.com for a review of the cakes I based my recipe on.

What giant prunschelle cake would be complete without a birthday candleabra?

What giant prunschelle cake would be complete without a birthday candleabra?

Happy Birthday to my wonderful sister! Here’s a interesting interpretation of the Punschrulle cake just for you!

Giant Punschrulle Cake

Giant Punschrulle Cake

Things that I used to make my Giant Punschrulle Cake

  • 6 cupcakes (you could use whatever cake crumbs you have available, chocolate or vannila would probably work best)
  • 10 digestive biscuits (plain biscuits again work well in this cake, rich teas, shortbread or digestives would be good)
  • Sugar
  • Butter
  • Vanilla

Icing

  • 300g marzipan
  • green food colouring
  • icing sugar (for dusting the board)

Chocolate 

  • 100g dark chocolate

Experimental Chocolate Chip Polvorón – Spanish Christmas Cakes or Mexican Wedding Favours

image

I adore Polvorón and wanted to have a go at creating a nut free version. What other flavours could I incorporate into this delectable sweet treat and not diverge too far from the traditional ethos of the the Polvorón which mainly consists of nuts…? What else but chocolate and cinnamon!

image

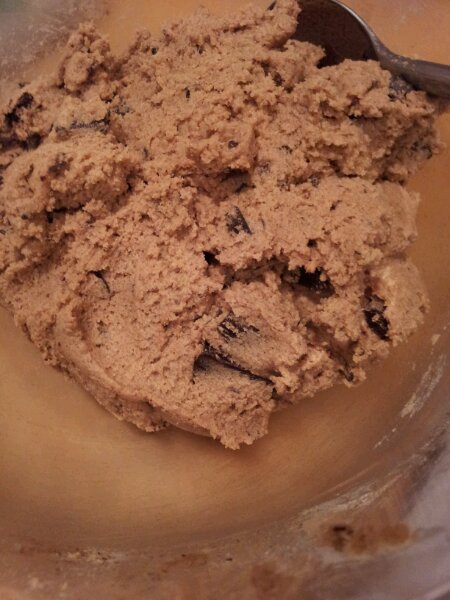
Using the same method as my original Polvorón attempt I replaced the nuts with dark chocolate and added a generous dose of cocoa powder.

And here we have it… a flatter chocolatey and chewier version of Polvorón!

image

Perhaps because they lack the nuts to hold them together and chocolate (unlike nuts) makes when baked, the little chocolate balls spread into perfectly round chocolate chip cookies.

image

I chose to use caster sugar rather than icing sugar to enhance the crunchy texture. It also added a wonderful chewiness to the cookie, with the sugar and chocolate combining to create a toffee in the centre of the crumbly cookie! Yum! They have been very popular in my house!

image

With a light dusting of icing sugar they look very Festive. The hint of cinnamon conquers up Christmas.These are would make a perfect homemade present, or to be eaten by the handful with a large bucket if tea. I really rather enjoyed making this Spanish Christmas cakes/cookie recipe up!

image

I’m looking forward to my further Polvorón flavour experiments!

image

Things I used to make Chocolate Polvorón

Makes about 40 small biscuits

Preparation: 15 minutes

Chilling time: 30 minutes

Baking time: 18-20minutes at 170degrees c

  • 220g butter (1 cup or 2 sticks)  room temperature
  • 250g caster sugar (2 cups or 240 grams) – rather than icing sugar to add an extra crunch that the nuts would normally add
  • 2 teaspoons vanilla extract
  • 250g all purpose flour (2 cups or 240 grams)
  • 100 g (1 cup) dark chocolate coarsely ground/chopped
  • 1/4 teaspoon ground cinnamon
  • 30g cocoa powder
  • icing sugar to dust the biscuits with

image

I’m entering these experimental Spanish Polvores into Chris’s Cooking Around the World Spain Round up. Pop on over to his blog for a round up of some inspirational international cooking! Thanks for reading!

21. Whatcha cooking Lebkucken – Germany

Lebkuchen

I’ve always loved lebkuchen. It always seem like Christmas when the shops start selling these chewy and crunchy pink and white sugar coated cookies. This year seemed the right time to attempt to make my own. I’ve not visited Germany (yet) but if the continental Christmas markets are anything to go by I know that I will love it.

A quick google later and I came up with a simple yet effective BBC Good Food Recipe. (I seem to use this website a lot for my continental recipes!) They seemed fairly easy to make with honey, eggs, spices (cloves, ginger, nutmeg and cinnamon)  ground almonds, a bit of flour, black pepper and butter. Simple! Although in my case I had nothing to smash up the cloves with, so improvising with a sandwich bag and a jam jar I hammered them into rough chunks. It kind of did the job, but some biscuits were definitely more clovey than others…

Spicy Stuff

This is definitely a different type of gingerbread to the Sunderland Gingerbread, very rich and sweet. But like Sunderland Gingerbread you throw this all in a pan and melt it together! Fantastic!

Butter, honey and sugar

Then throw in the dry stuff and spice

It needs quite a good stir to mix it all together..

Seemed a bit sticky but trust in the recipe

At this point I started to get a bit worried as it seemed a bit on the sticky side and I couldn’t imagine how on earth I was a) going to roll the dough out or b) cut it into Christmassy shapes… Nevertheless I continued and read the recipe through again and realised it needed some time to cool down. Throwing it into the fridge I popped the kettle on and had a well deserved rest (whilst starting the washing up!)

Now that's more like it!

In a bid to speed things up I divided the dough in half and froze half for other Christmas baking emergencies. I then folded cling film around the dough to roll it out without needing my pastry board and to prevent it sticking to the rolling pin.

Cling Film Queen

Choosing my most Christmassy cookie cutters I cut out the festive shapes and popped them into the oven for a mere 15 minutes.

Off to the oven with you

Then all they needed was a glossy sugary coating once they cooled down enough. Whisking an egg white up with some icing sugar to create a glaze is something that I’ve never done before. There’s another first to cross off my list.

Glazing

I drizzled it over the biscuits and let them drip dry onto kitchen roll. Once they hardened slightly they were ready for eating and the biscuit tin! They were lovely and chewy on the inside. They aren’t overwhelmingly spicy but rich and I enjoy the kick of the black pepper and cloves. I will be baking these every year from now on. I may even try some new variations. I’ve seen some with a much more crispy coating and with a little jam in the middle too to make them extra gooey!

Glazed

I did whip up the second batch in a baking emergency, during a Christmas baking marathon, so didn’t cut them into shapes but made a dough roll (using cling flm to roll it up of course)  and chopped it up… very quick and easy!

Dough roll (not to be mistaken for a sausage)

Lebkuchen Quick Chunks

16. Anzac Biscuits – Australia

Anzac Biscuits

Anzac Biscuits were very high on my list of things to try when we were in Melbourne, but somehow time got away from me and I missed out. I saw them when we visited the Shrine of Remembrance, in the centre of Melbourne and so I thought it was quite a poignant recipe to choose as last week it was Remembrance Sunday in England where we remember the soldiers who have fought for us.

Shrine of Remembrance, Melbourne, Australia

I read up a little about Anzac biscuits and they were referred to soldier biscuits because they kept well and could be sent out to the soldiers on the front line. They are particularly important to Australian’s and New Zealanders or the Australian New Zealand Army Corps and are baked to commemorate the day they joined forces. Apparently they’re also sold around England to raise funds for the British Legion but I haven’t seen any as of yet. Any one else spotted them?

I discovered the recipe in Mary Berry’s At Home book and even she said they’re really simple to make. Hence an early morning pre work baking extravaganza! Here’s a very similar recipe from the BBC.

Melting all the butter, sugar and golden syrup together

These biscuits were made in a pan. A very novel idea I think and effective. One pan means less washing up! I liked this recipe all the more!

The butter and sugar were melted together in the pan along with lashing of golden syrup.

Stir in all the dry ingredients, oats and coconut

Then in go the dry ingredients, oats and flour.

and finally the flour

Once its all combined I had to dissolve a teaspoon of baking powder in 2 tablespoons of water, throw it in the mix and then all that was left to do was roll it out! simple as that.

Bicarbonate of Soda paste

I was half way through rolling the butter mix into walnut sized balls and placing them onto the baking sheet when I realised that I couldn’t remember how big a walnut is (I only have walnut halves in the cupboard so was imagining 2 of those squashed together….). A quick check of the recipe told me that it was supposed to make 36 biscuit. I was almost finished rolling them all out and I only had 8!  I was definitely over estimating the size of walnuts.

is this the size of walnuts??

I split each ball in half and carried on making smaller versions. Mary emphasised the need to space the biscuits out as they spread. I tried my best but I only have 2 baking sheets that fit in the oven (I accidentally bought a giant one that I don’t think will fit anyone’s open. Please let me know if you have a spectacularly large  oven as you are more than welcome to the baking sheet!)

So once I flattened the walnut sized balls down it was a bit of a tight squeeze on the tray but with 8 minutes on the oven timer I had just enough time for a shower.

Slightly merged into one biscuit (but it's ok!)

The kitchen smelt amazing with the golden syrupy, coconut, and combination. The biscuits had spread a bit but it wasn’t anything a sharp knife couldn’t fix.

Easily solved! Hand me a knife

I had to do a taste test before packaging them up and they were divine. Chewy yet crunchy. I can see why Mary B got so obsessed with them! They made the perfect sweet treat to take to work. I think we are now officially partaking in elevenses at work it’s almost like being in a Jane Austen novel (almost but not quite).

Anzac Biscuits

You can also freeze the baked biscuits for a month and prolong the pleasure. If they last long enough to put them in the freezer that is…