

Brazil is yet another country on my still to visit list. However I do have a lovely Brazilian friend who was an exchange student at my sixth form. We became firm friends over A Level Media Studies and parties. Thinking of you Gabriella when baking my Brazilian Roll or as you may call it in Brazil a Rocambole.

This bake reminds me of Mary Berry’s Chocolate Roulade (one of my very first around the world in 80 bakes more technical challenges). Both are very similar to the wonderful Swiss Roll however the distinguishing factor of the Rocambole and the Roulade is that they use whisked egg whites to fluff up the sponge. This means it’s a fragile cake but very light. Where as the Swiss Roll is more like a sponge cake, less delicate and probably (in my opinion) a bit easier to bake and to handle.
Traditionally the filling in a Rocambole is a Doce de Leite. This is a Brazilian favourite. It’s a creamy milky toffee sauce made from slowly reduced condensed milk. (It’s quite similar to the Italian toffee sauce dolce de leche). It’s reduced down over a low heat until caramelised to produce a thick fudgey gooey paste. As the filing takes quite some time to prepare it’s best to start with this! You need to be really careful with this as if the pan is left to boil dry the can could explode and really hurt yourself (and your kitchen).

Simmer an unopened can of condensed in a pan of water for at least 2 and a half hours
Take one unopened can of condensed milk (Most cans in the UK randomly contain a very precise amount of condensed milk of 395ml. Who knows why? But the process is the same regardless of the size of your tin). Place your unopened can of condensed milk in a pan of boiling water and simmer it for 2 and a half hours. Keep an eye on the pan and keep topping up the water so the water level remains.always around 2 thirds of the way up the can. Allow the can to cool for about 30 minutes before opening it.
Evaporated milk isn’t the same and unfortunately won’t work as a substitute, as evaporated milk doesn’t have as much sugar in it. Never to be defeated I have managed to make doce de leite with evaporated milk. If you’re up for an experiment and evaporated milk is all you’ve got, you could get away with adding sugar to evaporated milk and dissolving it slowly over a low heat to create your own toffee sauce. (I have free styled this recipe before and it gave a rather more liquid toffee sauce so it can be done! Just add enough sugar until you reach your desired level of toffee colour and taste.)

The grand reveal! My doce de leite looks suspiciously like condensed milk. No hint of toffee here. Back in the pan you go
Unfortunately I failed to let the water bubble (being a little too cautious – very unlike me!) so when I opened my can it still looked like condensed milk, just a bit thicker. However undeterred I threw it all into the pan and heated it on the stove to make my doce de leite directly in the pan. It does require a bit more attention and elbow grease however…

The slightly reduce condensed milk straight from the can, the bottom of the can revealed the beginnings of some thicker doce de leit. It’s a bit lumpy so needs a good whisk
I’m a little impatient and wanted it to thicken up quickly so kept increasing the heat and whisking by hand until it bubbled, then removed the pan from the heat to allow the residual heat to continue to cook the condensed milk. You need strong arms to keep whisking continuously as the milk thickens! (My arms weren’t feeling the strongest after a full day of Yoga handstands the day before but I still managed)

Whisking the condensed milk over a low heat to make doce de leite
My impatience led my doce de leite to become extremely thick and it pulled the head off my hand whisk! However a little cold milk reduced the heat of the sugar to calm the doce de leite down. It allowed me to get the sauce back to a slightly more spreadable state. To stop the cooking process I placed the hot pan into a sink of cold water. In my ‘wisdom’ I then dipped my finger into the doce de leite to test if it was cool enough to spread! It was most definitely NOT cool enough and welded to my finger. I managed to pull the molten lava doce de leite off my finger and ran it under the cold tap. Did you know a piece of frozen melon makes a wonderful cold compress to take the heat out of a burn? Clutching my melon I managed awkwardly to continue to whisk the sauce still undefeated by my blistering finger. I ended up clutching on to more frozen fruit whilst spreading the doce de leit and rolling up the cake.

After a good 5 minutes of whisking and heating it turns a golden brown colour and becomes quite thick! Add a bit of milk to loosen the mixture if it needs it.
The cake itself takes hardly any time at all to prepare. The whisking is the most time consuming part of the Rocambole. Like a Roulade you have to whisk the ALL of the egg whites (there’s 5 eggs in this cake! That’s a lot of egg!) on a high speed setting. (If you have an electric whisk, if not prepare your arms for a bit of a work out!) until stiff and shiny. This takes about 5 to 7 minutes. The egg whites will double in size. I love this bit!
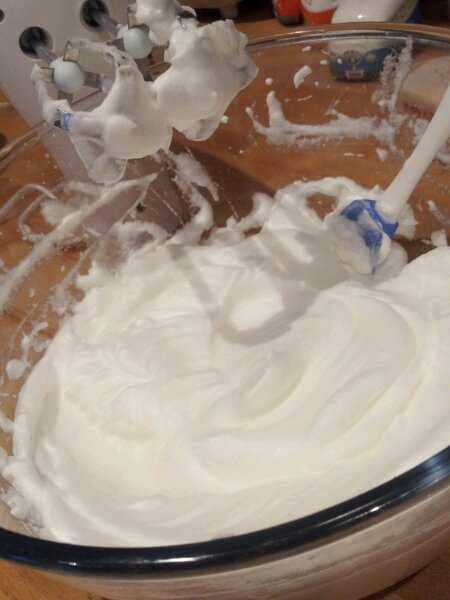
Whisking the egg whites to make Rocambole
One slight difference between the Rocambole to a Roulade is that the egg yolks are then also whisked into the egg whites. (With a Roulade you whisk the yolks with the sugar and chocolate then fold it into the egg whites.) The Rocambole is a bit quicker banging it all together and whisking to your hearts content. You don’t want to knock any of the air out of the egg whites, so it’s best to beat the yolks lightly first so they are runny. You can then pour the egg yolks in as you whisk.

Whisking in the egg yolks to the egg whites – lovely creamy yellow colour and very fluffy!
Then to whisk in the sugar. The traditional Brazilian Rocambole recipe doesn’t include any flavourings or spices, it is a plain egg sponge. (A bit like my Chinese Egg Yolk Sponge favourite!) Ever the experimenter I wanted to add a bit of flavour to this bake so I used vanilla sugar. I made this really simply by shoving a leftover vanilla pod, which I had scraped the seeds from for another bake, into a bag of sugar. I then left it to infuse it’s vanillary goodness for a couple of weeks. It smells lovely and gently flavours the sugar with a hint of vanilla. It’s a good way to get your moneys worth out of those more expensive ingredients as I hate to throw the pods away. I often pop a vanilla pod into any spirit that I have in my cupboard too. Vanilla Brandy or Vanilla Rum anyone?

Then to whisk in 5 tablespoons of water into the eggs and sugar
The eggs should be seriously expanding and threatening to overflow the bowl by this point as they inflate rapidly. You need to continue to whisk the fluffy and shiny eggs whilst pouring in 5 tablespoons of water. This takes around 5 minutes of whisking.

Fold in the tiny amount of flour and baking powder
In order to maximise the air in the cake and to avoid knocking the air out of the wonderfully fluffy eggs, sift in all 5 tablespoons of plain flour and half a teaspoon of baking powder. Then using your best metal spoon fold in the dry ingredients gently. This is probably the smallest amount of flour that I’ve ever folded into a cake. It felt a bit odd as the flour just disappeared to the bottom of the bowl, but trust in the recipe, it definitely works!

Carefully pour the mixture into a rectangular baking tin
Line and grease a rectangular baking tin. I used a tin 37cm long by 22cm wide and 5cm high. Use a deep tin as it will rise in the oven. This mixture is really delicate so to avoid knocking the air out of it, hold your bowl of mixture as close to your tin as possible and pour. It’s a very liquid mixture so try to pour it into all of the corners so you don’t have to move it around too much in the tin. Gently level the mixture with a spatula to avoid an uneven bake.

A fully cooked and curled Rocambole
After baking it in a preheated oven (350 F/170 degrees Celsius) for 15-20 minutes, it will become golden brown and feel slightly firm and springy to the touch. I always check that a cake is cooked by using a cocktail stick, if it comes out clean from the sponge you know it’s done. Unfortunately I was trying my Mary Berry recommended foil backed parchment paper and it doesn’t always do what it’s told. In the heat of the oven it curled up and into the cake! Maybe a wider variety of paper is needed for this tin so that it reached the edges of the tin and can be scrumpled down over the lip of the tin to hold it in place?
")
Carefully lift your cake from the tin and prise any baking paper out of the sponge (if needed)
Allow the cake to cool in the tin slightly so it holds it’s shape. Then carefully lift the cake out of the tin, by the baking paper. But don’t remove the baking paper.

Spread the Doce de Leite carefully onto the sponge – try not to take the cake with you
Using a spatula and a palette knife , I tried to spread a thin layer of doce de leite across the cake. This is easier said than done whilst holding a piece of frozen fruit on your burnt finger. The Doce de leite is very gooey and if it’s as thick as mine, it could pull holes in your cake (note the holes in my sponge above…) But who is going to check the inside of your cake? When it’s rolled up no one will notice and it’s going to taste gorgeous anyway so throw it on as best as you can.

Carefully does it … Roll Roll Roll your Rocambole (excuse my slippers)
There is a bit of a knack to rolling up a Rocambole. I decided to neaten up my slightly rough edges, trimming the longest edge as straight as possible with my very best sharp knife. It’s not the easiest cake to trim as the sponge is very moist and delicate (so it sticks to the knife!). I only trimmed one edge in case I destroyed the other side. This cake was to accompany me to the Clandestine Cake Club and I didn’t have time to make another one (or anyone condensed milk!). Trimming the cake does have it’s benefits however, I could make sure it tasted good before serving it up to my friends!

Ta da! One rolled up Rocambole! (And one pan of soapy boiling water on the stove to dissolve all of the doce de leite)
Before I even attempted rolling the cake I made sure I had loosened all of the edges from the baking paper gently with my fingers to avoid tearing the sponge. It’s best to keep the sponge on the paper so you can use the paper to coax the cake over. I started the roll off by pressing a knife into the sponge about half an inch in from the shortest edge. I then folded this lip of sponge over to start the roll and give a really tight spiral. Then to let gravity do it’s job! Lifting the paper over, letting the cake fall into place whilst coaxing it into a roll with your hands. Once you start it’s easy to get carried away! Hence my lack of photos of this process the Rocambole was all rolled up before Chris could get into the kitchen to take a photo for me!

Gently ease any slightly stuck bits of cake off the paper using your finger tip…
All of the pictures I could find of a Rocambole seemed to show a cake with a very long spiral with a very thin sponge so I chose to roll mine from the short edge to the short edge, to maximise my spiral. If you wanted to get more slices out of your Rocambole you could roll from long edge to long edge and get a much longer cake.

Just rolled Rocambole – trimmed edge to the front!
Once you’ve rolled up your Rocambole all it needs is a liberal dusting with icing sugar and you’re good to go! I recommend eating it quick as the doce de leite has a tendency to ooze out of the sides when left for a night. But if you like this effect then see if you can hang fire for a bit for an extra level of goo. I can confirm that this a tasty cake. It’s definitely a winner if, like me, you have a sweet tooth as most of the flavour is derived from the sugar in the cake and the milky caramel doce de leite! It’s an extremely tender sponge that almost melts in your mouth. I’ve heard very good things from my Brazilian friend, who’s Grandma makes Rocambole. She covers the entire Rocambole in chocolate buttercream and adds some texture with a fork to create a chocolate log Rocambole! Now there’s a good idea for another Christmas bake to add to my list!

Glorious Cake Collection at the Clandestine Cake Club Newcastle at Pink Lane Coffee
I took my little Rocambole along with me to the Clandestine Cake Club at the lovely Pink Lane Coffee shop in Newcastle where we were baking around a ‘New’ theme. This could mean a new recipe, new baking tin, new ingredients. This was perfect for me as pretty much every recipe I bake is new to me and a bit of an experiment. There were some amazing cakes that night, my favourite being a chocolate and peanut butter layer cake (7 layers in total!). Check out Lisa’s blog for more gorgeous pictures of the beautiful cakes from all of the bakers who braved the January snow. When there’s cake nothing will get in my way. It was immense. I must admit I took an extra sneaky piece home for later too. I was so happy that all of my Rocambole got eaten.
So if that has whetted your appetite for a spot of Rocambole here’s what I used to make mine.
Ingredients
Doce de Leite Filling
1 unopened can of condensed milk (395 ml)
Alternative fillings…
If you don;t fancy simmering a can of condensed milk down in a pan I’m sure you could put a jar of nutella or jam or guava marmalade (another traditional Brazilian Rocambole filling) to good use here too.
Cake
- 5 eggs
- 5 tablespoons of vanilla infused sugar (or just normal sugar will do)
- 5 tablespoons of water
- 5 tablespoons of plain flour
- 1/2 teaspoon of baking powder


 throw in the dessicated coconut and Bob's your uncle you've made coconut custard!")


