55. Giant Punschrulle – Swedish Green Marizpan Rolls

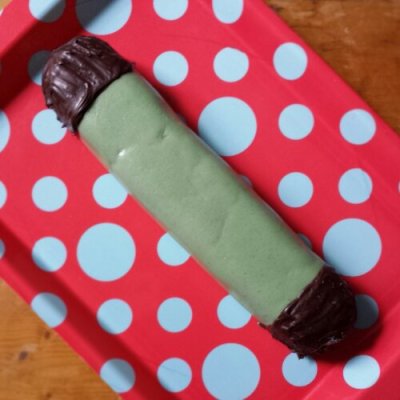
too long for a normal plate - the giant prunschelle

too long for a normal plate – the giant punschelle

The Prince family love marzipan. In every shape, form and colour. There is a a rather well known Swedish shop that sells these amazing little green marzipan rolls called Punschrulle and everytime I go I stock up, mainly on food ignoring all the other homeware options.

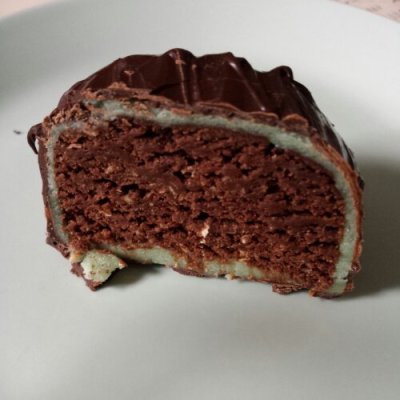
A slice of giant Punschrulle cake

A slice of giant Punschrulle cake

I have been looking for a recipe for Punschrulle or Punsch-rolls forever and was unable to find one that reflected the ingredients described on the back of the packet. The key ingredient was always missing, oats! So in the end I made up my own recipe and tasted it along the way to make sure I had got it as close to the original as possible.

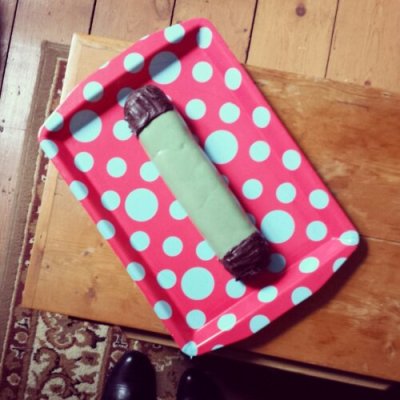
A birds eye view of a giant Punschrulle cake

A birds eye view of a giant Punschrulle cake

The Punschrulle is also known as dammsugare which in English means rather oddly, “vacuum cleaner”. I think this is related to it’s tube like appearance, like a vacuum cleaner’s hose perhaps? But also because this cake gives you the opportunity to use up leftover cakes and cookies, hoovering up the crumbs from yesterday’s baking. What an efficient little cake this is.

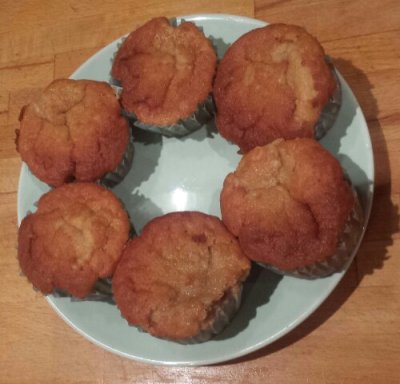
6 Earl Grey Cupcakes just begging to be mashed up

6 Earl Grey Cupcakes just begging to be beaten up

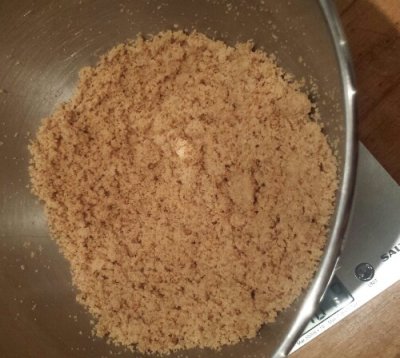
I was lucky to have 6 earl grey cupcakes waiting patiently to be eaten in my freezer from a rather large baking frenzy I had whipped myself into. now was there time to shine. I defrosted the 6 cupcakes and blended them in my kitchenaid (using the beater attachment) to a fine crumb. You could also use a hand blender or food processor if you wish. I simply couldn’t be bothered to unpack my food processor so used the kitchen aid, which does a pretty good job of beating things to a fine crumb, particularly if you break it up a little by hand first.

cake crumbs

cake crumbs

Chocolate and marzipan are my favourite combination. I could merrily eat a block dipped in dark chocolate all to myself, but tried to resist as far as possible. Punschrulle rolls are filled with a rich chocolatey, oaty cake. Further investigation also indicates that they are a rather boozy cake too, with punsch liquor. However I wanted to make a child friendly recipe, not get my little nephew hammered, so I omitted the booze from my recipe. But feel free to whack a bit in if you prefer your cakes alcoholic. I’m not entirely sure where you purchase punsch liquor from in the UK, but I think brandy , vodka or rum would be a good substitute!

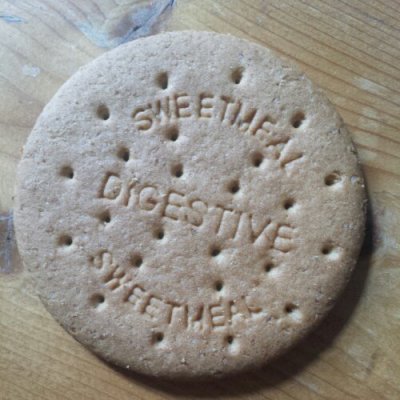
The classic storecupboard essential- digestive biscuits

The classic storecupboard essential- digestive biscuits

Sieving cocoa powder and sugar into the mix I realsied that I needed something more to bulk the cake crumbs up and balance out the cocoa powder. Rooting around in my cupboards I found some digestive biscuits which were perfect for this purpose. Again I crumbled them into the mixer bowl by hand and let the mixer do the work for me.

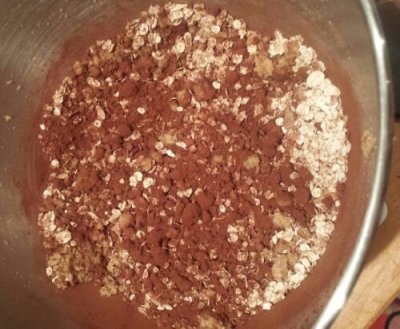
Chuck in the rest of the cocoa powder and sugar

Chuck in the rest of the cocoa powder and sugar

I was worried that the oats would be a bit too large in this mixture so introduced my hand (stick blender) to blitz the mixture to a much finer crumb. As this cake is uncooked, the oats needed a little time to soften in the mixture, you want texture to the cake, but not to make your friends feel like they have oats stuck in their throat.

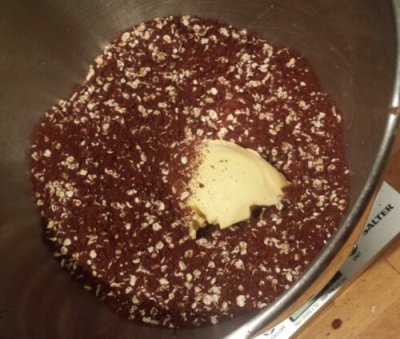
Beat in the butter

Beat in the butter

It’s such a simple cake to make, having completed the baking when I made the cupcakes a few months ago. All that’s left to do is to rub in the butter and shape the mixture into a roll! I wanted to make my punschrulle for my sisters birthday and envisaged a giant punschrulle roll, rather than making individual rolls.

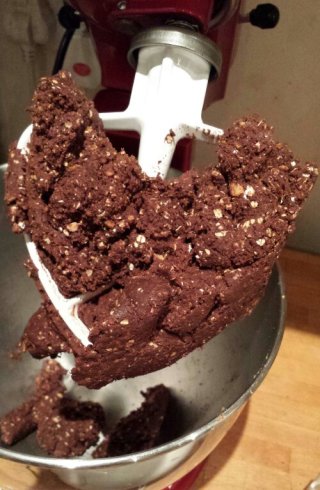
Beat the mixture together until it sticks in one nice lump

Beat the mixture together until it sticks in one nice chocolatey lump

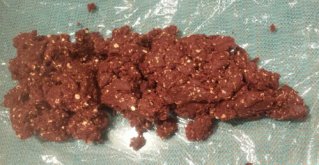
I used cling film to roll the mixture up and flatten at the ends, whilst smoothing the top.

Plonk your buttery cake crumb lump onto some clingfilm and roll

Plonk your buttery cake crumb lump onto some clingfilm and roll

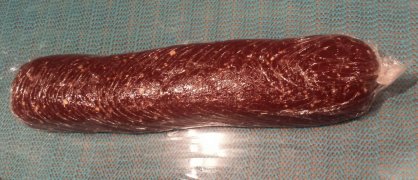
Sealing the ends of the cling film, the roll can then be transferred easily to the fridge to set, while you get busy colouring the marzipan and rolling it out.

a cling film wrapped chocolate sausage

a cling film wrapped chocolate sausage

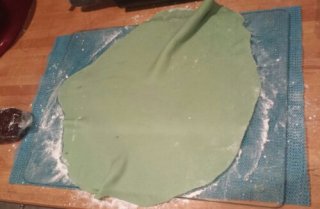
Traditionally Punschrulle rolls are bright green and each end is dipped in dark chocolate. I used a little green gel food colouring and kneaded it thoroughly into the marzipan. dousing the worksurface in icing sugar stops the marzipan sticking and means you can roll it out into a thin rectangle, just enough to cover the entire cake.

Turn your marzipan green and roll out

Turn your marzipan green and roll out

Making sure the marzipan was loose enough to remove it from the worksurface, (The last thing you want is to realise half way through icing you cake is that the marzipan is welded on to the worksurface.)

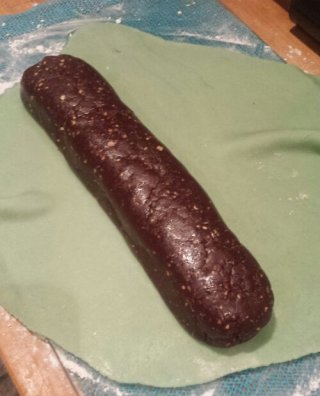
Chocolate Sausage ready to be wrapped in marzipan

Chocolate Sausage ready to be wrapped in marzipan

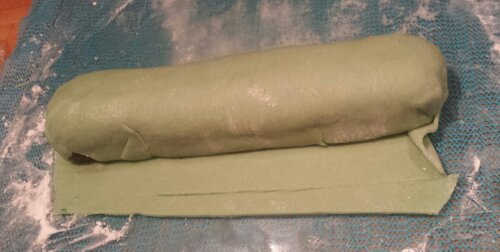
I plonked the roll face down (the smooth side which is to be the top of the cake) face down on to the marzipan and folded the marzipan over to envelope the cake fully. Strategically folding the marzipan to hide the join underneath the cake and tuck the folds along the edges underneath.

Wrap up and tuck in the edges

Wrap up and tuck in the edges

Whilst the bottom of the cake is facing upwards, I melted a bar of dark chocolate in the microwave, reserving one third of the chocolate and stirring every 30 seconds to avoid it burning. Once the chocolate is melted pour in the final third of the chocolate and stir until fully melted. This helps to reduce the temperature of the chocolate and temper it, so it retains a glossy finish and doesn’t look like a sweaty mess when you’re finished.

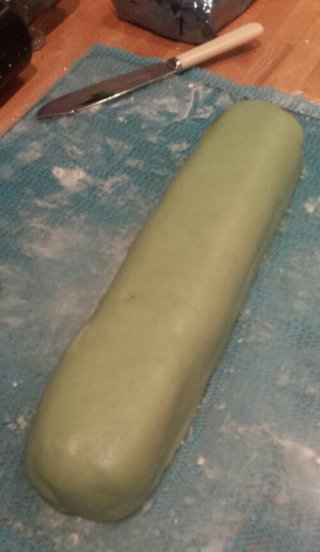
One chocolate cake sausage encased in marzipan

One chocolate cake sausage encased in marzipan

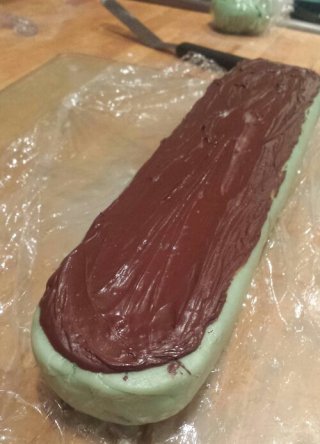
I smeared melted chocolate all over the bottom of the cake in a thin layer and allowed it to set. This means each slice has a layer of chocolate, not just the lucky people who get the end pieces! It also helps to lift the cake when you need to move it later on…

Smear melted chocolate all over the bottom of the roll

Smear melted chocolate all over the bottom of the roll

Once the bottom layer of chocolate has set fully, turn the cake face up and paint the ends of the cake with a thick layer of chocolate. Et voila, you have created a giant Punschrulle cake!

Paint each end with melted chocolate

Paint each end with melted chocolate

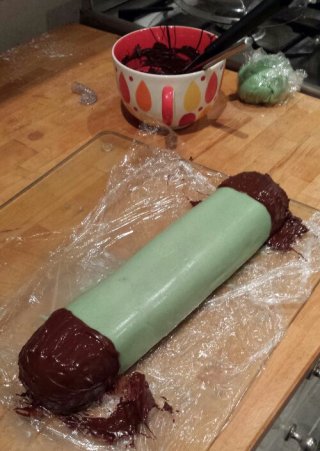
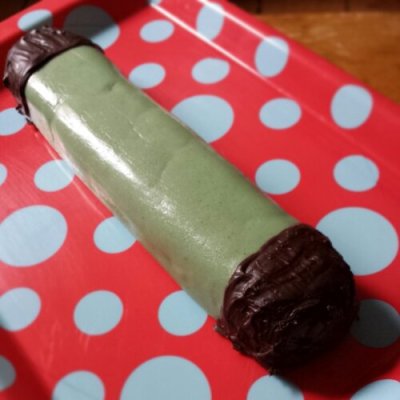
Now this is when I realised that you have to be a member of my family to think this cake looks pretty. On a giant scale, the Punschrulle looks a bit odd… but it tastes great! (Even if I do say so myself.) I don’t own a plate or chopping board long enough to house such an enormous cake, so I had to resort to using a colourful serving tray.

too long for a normal plate - the giant Punschrulle

too long for a normal plate – the giant Punschrulle

The addition of a giant candleabra birthday candle  gave the cake somewhat of an eccentric finish. What Giant Punschrulle cake would be complete without a birthday candleabra? This cake didn’t last long in our house. Despite it’s chocolatey richness, it’s very moreish and disappears very quickly when served with a hot cup of tea. I could easily eat 2 slices in one sitting. The crunch of the dark chocolate is there with every bite, balancing out the marzipan and dense oaty filling.  It’s a great way to use up any leftover cakes and biscuits in your house, so it’s a rather economical and unusual birthday cake. If you want to see how the individual Punschrulle rolls should look, have a pop over to www.nearof.com for a review of the cakes I based my recipe on.

What giant prunschelle cake would be complete without a birthday candleabra?

What giant prunschelle cake would be complete without a birthday candleabra?

Happy Birthday to my wonderful sister! Here’s a interesting interpretation of the Punschrulle cake just for you!

Giant Punschrulle Cake

Giant Punschrulle Cake

Things that I used to make my Giant Punschrulle Cake

  • 6 cupcakes (you could use whatever cake crumbs you have available, chocolate or vannila would probably work best)
  • 10 digestive biscuits (plain biscuits again work well in this cake, rich teas, shortbread or digestives would be good)
  • Sugar
  • Butter
  • Vanilla

Icing

  • 300g marzipan
  • green food colouring
  • icing sugar (for dusting the board)

Chocolate 

  • 100g dark chocolate
24. Knished! – Eastern Europe

After watching a Woody Allan film ‘Whatever Works’, I was intrigued to find out exactly what a Knish is , the food that Larry David’s character loves so much.

image

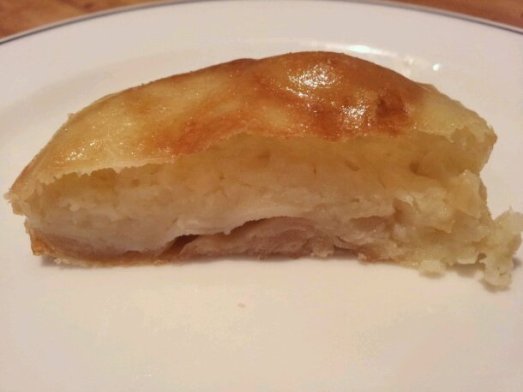
It turns out that it's a traditionally Jewish Pastry usually filled with oniony mashed potato. Curious, I signed myself up to the Knish challenge.

All of the recipes online varied massively. One site gave a recipe for 5 dozen or 58 knishes. This would be a bit excessive for me and my 5 friends to eat. I settled for a more basic version and (yes you guessed it) modified it slightly.

image

I peeled and boiled 3 large baking potatoes but then proceeded to drop lots of them (and the glass pan lid) into the sink. So after disposing of the sink potatoes I guess I actually had about 2 and a half potatoes mashed up in the end.

image

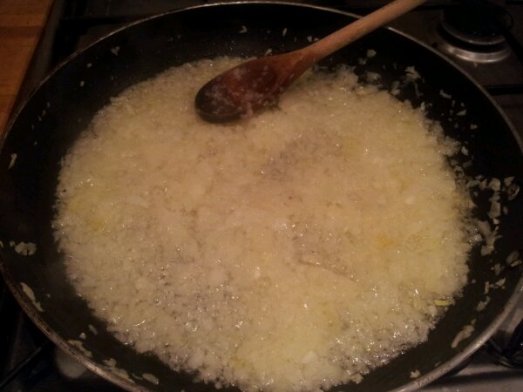
The chopped onions had to be fried in rather a lot of vegetable oil until soft and translucent whilst I messed around with pastry making.

image

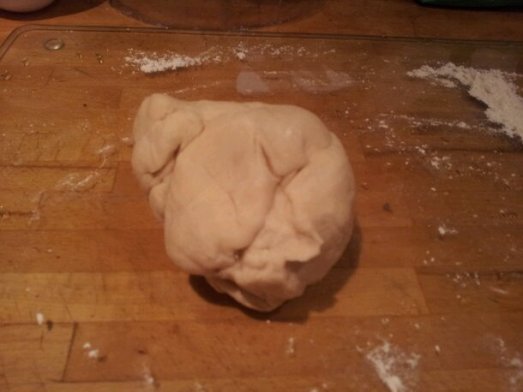
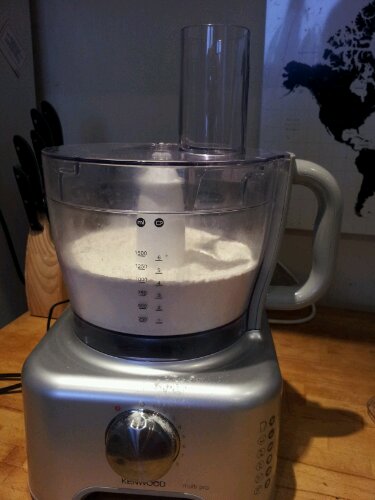
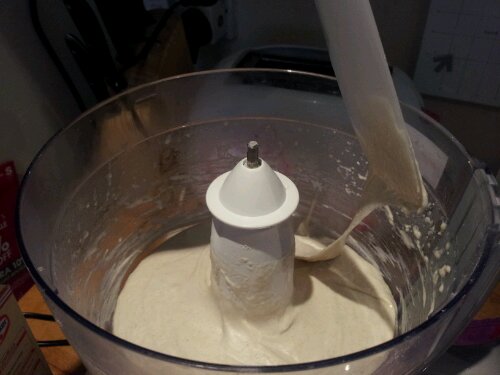
Its a very simple recipe with flour, oil and water. Again I threw it in the food processor to bring all the ingredients together but you could use a spoon instead 🙂

image

needed kneading

It needed kneading until smooth then it needed a rest in the fridge for 30 minutes. Enough time for a cup of tea and to stir the onions.

The pastry seemed a bit dry. This might be because the recipe that didn’t include an egg, where as some of the other put 1 or 2 eggs in the pastry. To remedy this I kneaded a little more water in until I was happy with it.

image

Divided

/>

I chopped the dough into 12 pieces and rolled each piece into a thin circle about 7 inches in diameter.

image

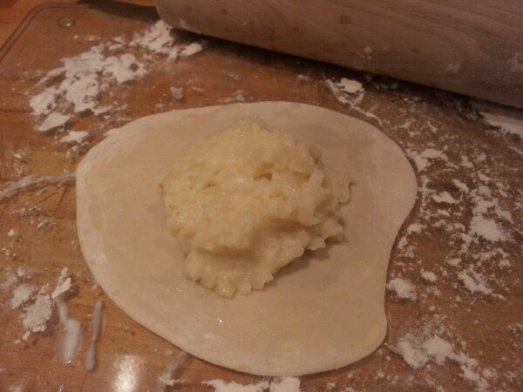
Then a quick slick of vegetable oil on the pastry before dolloping a lot of oniony mashed potato in the middle. There is no way I accurately measured this. Perhaps a handful of potato? (I’m sure this is how the professionals do it.)

I tucked up the edges and spread a little egg wash where pastry met pastry to help it seal shut (in theory).

12 Knish balls later and they were ready for a generous egg wash and the oven.

image

In hindsight I should have popped a little air vent in the top of each Knish to avoid this Knish mass explosion. There was more mashed potato on the tray rather than in the Knish. This is another danger of making it up as you go along after catching a fleeting glimpse of what it should look like in a film.

image
Knish Catastrophe

Nevertheless they tasted pretty good. If I’m being a little critical perhaps a tad on the greasy side, but I bet it would be a  perfect hangover cure!

image
If you ignore the mashed potato hanging out the sides of the Knish it looks exactly like how I imagined it would…

There are other flavour variations you can try too if you’re not a mashed potato fan, like meat. I thinkimage its a bit like a pasty so you can have fun with it!

image

Sideways Knish

Things I used:

Pastry:
1 and half cups of plain flour
1 top baking powder
Half a cup of water ( and more as needed)
1 tbsp vegetable oil

Filling:
2 and a half large baking potatoes
2 large white onions
Salt
Cracked black pepper (to season)
A cup of vegetable oil

1 egg to seal and wash pastry with

22. Blood, Sweat and Baklava – Greece

This is without doubt the most epic bake that I have ever attempted. I’ve eaten Baklava in Greece, Turkey and Morocco. It is divine and very moreish with its honey soaked pastry. It’s one of my favourite sweet treats. I’ve been planning on attempting it for a while but was a bit hesitant to attempt Filo pastry from scratch as every book, including my Greek cookery book, said to buy it ready made pastry!

image

Baklava

Undeterred I asked my foodie friends for some advice on Twitter and was very kindly assisted by @bakingelements who sent me a Michel Roux Filo recipe from his ‘Pastry’ book. Thank you so much for your help. Without those photos I couldn’t have done it!!

Filo requires a lot of time and patience. It’s really not for the faint hearted. The dough itself is quite a basic concoction, flour, water, salt mixed in the food processor with a dough hook. Seems simple enough…

image

Then pour in oil while its mixing and wait until its all combined.

image

It becomes rather sticky and stringy at this point.

image

My new food processor was thoroughly christened in sticky dough in the process too… Cotton buds to the rescue!

image

Then it required about 5 minutes of extra working on a cornfloured board. I had to add a lot of extra flour as it was SO incredibly sticky

image

When it was worked sufficiently I measured it precisely (can you believe it? With scales and everything!) into 60g chunks. They had to rest in a cool place for 2hours on a floured tray covered in cling film so it didn’t dry out.

image

Pain in the pistachios

This gave me enough time to de shell and husk a whole bag of pistachio nuts. (Note to self. Please buy nuts without their shells in the future.) This is 45minutes of my life I will never, EVER get back. I broke a couple of nails and showered the kitchen in shells when in desperation I smashed the nuts with the stick bit of the pestle and mortar. Not to mention the nips and cuts the little blighters gave me.

image

Mixed Nuts

Into the food processor 1lb of mixed nuts I threw, the damn pistachios, whole almonds and walnuts. A quick whizz to chop them up and I added sugar, cloves, cinnamon and some pre chopped almonds.

image

To help speed up the chilling process I popped the pastry into the fridge for a bit whilst prepping the pastry board and a vast supply of cornflour.

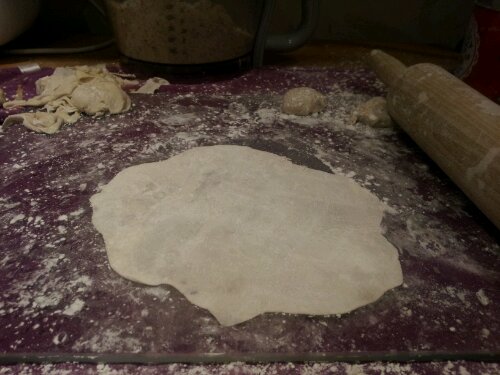
Now for the tricky and even more time consuming bit. Michel Roux had sensibly instructed me to prepare 60g balls of dough so I had manageable chunks to roll out. However I was also working with 2 separate Baklava recipes which suggested working with a round cake tin and a rectangular tray. Whilst trying to stretch this delicate pastry out I realised there was no way on earth I was ever going to get it to the length and width needed to fit such a long tray and of course roll it to the required 0.5mm thinness!!

image

Still a bit too thick...

I decided to use a smaller square tin and ad lib from all 3 recipes that I was following. I greased and lined the tin in preparation.

image

The first piece of rolling was lovely, dusting it with flour and gently rolling it out. I can’t believe I actually thought ‘brilliant this is going to be fun’. I lost count of how many sheets of Filo I rolled but as soon as you kind of get it to the right size and try to pick it up, it stretches, so its too big for the tin! Then it tears! And somehow your supposed to brush it with butter evenly too whilst it crinkles up and become more of a patchwork quilt. I had to trim bit here and there and add extra bits to cover the holes but I got there in the end.

image

The first fantastically even and smooth layer. Look it reaches the edges (almost)!

I realised that 60g was too much per layer so had to divide each chunk into 4 to get the right thinness and to ensure I had enough layers to go round. I have feeling you’re supposed to let the pastry rest after rolling it but I didn’t have the time. I also had to stretch each piece to fit inside the tin so it was really practicable either.

image

The actual amount of dough per layer pre rolling

image

Post rolling (not quite a square...)

I also missed the step in the recipe that said you’re supposed to start with 8 layers of pastry on the bottom before you add any layers of nuts and sugar. I had 2 bottom layers and there was no going back. I was in Baklava lasagna mania and only had 2 hours to finish the whole thing.

image

So so thin

I’m not sure how much butter I used but I had to refill the pan 3 times along the way.

image

Excuse the messy Filo jigsaw

My theory was 2 layers of pastry then a layer of nuts. I attempted to butter both sides of the Filo that was to sit on top of the nuts, which is probably totally unnecessary but the paranoia of dry Filo was setting in. Each time I added a layer I had to cover the pan in cling film too to stop it drying out too.

image

The top layer with 8 layers of Filo and a generous butter coating!!

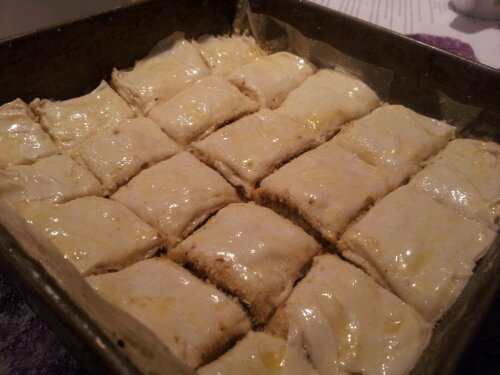
Before cooking it I took my sharpest knife and cut it into cubes

image

Precarious cutting through many layers.

I popped it in the fridge (but forgot the cling film!!) then set about simmering the syrup of honey, lemon juice, sugar, water and cinnamon. I added some rose water too.

image

Start of syrup.

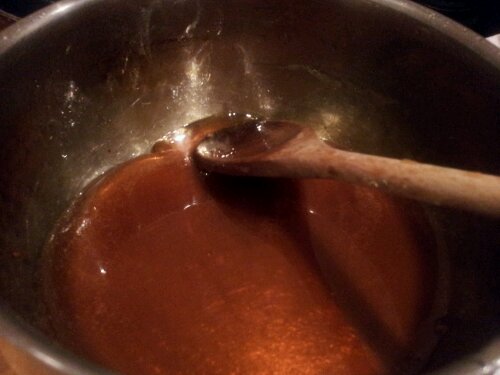
The Baklava needed 35mins of baking while the pan simmered. I almost burnt the syrup as I wanted to reduce it further and salvaged it by dunking the hot pan into cold water to stop it cooking.

image

Nicely caramalised... Definitely not burnt.

Once the Baklava was crisp and golden it was ready to be drown in thick syrup.

image

Crisp and golden Baklava

image

Syrup soaked

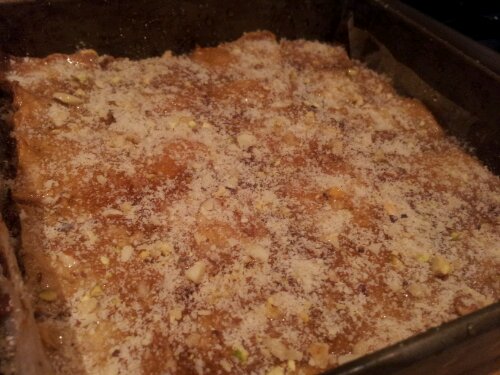
I added a garnish of chopped nuts (I still have a bag left over so probably wouldn’t make as much next time) and some more syrup to top it off. Apparently it needs 4 hours to cool so I wrapped it in a towel and carried it to my friends house for our pudding. It definitely didn’t last long enough to cool for 4 hours!!

image

Toppings

image

Baklava Heaven

I was hoping after all the time and effort it would be ok and it really really was. The syrup soaked into every layer making a gorgeously sticky delight! Even with less pastry on the bottom it held together and cooked all the way through!

image

Piles and piles of Baklava

I’m happy with my Filo experiment. I generally hate making pastry and this almost killed me. There was a lot of energy spent in making this so I don’t feel guilty in the slightest that I ate 2 massive pieces in one go. It did take an entire day to make but what an achievement! Now I’ve made Filo once I know I can do it but perhaps I might buy some ready made if I was going to attempt it again.

I’m now going for a lie down 🙂

*Recipes taken from:

Filo Pastry Michel Roux – Pastry Requires: 400g plain flour; 6g fine salt; 330ml water heated to 50 degrees C; 30ml olive oil; cornflour to dust

Baklava Recipe  Requires: 1 quantity of Filo Pastry; 1lb chopped nuts, cloves, cinnamon, 1 cup of butter, 1/3 cup of sugar

Syrup: 1 cup water; 1 cup sugar; 1/2 cup honey; 1 cinnamon stick; (I added an extra sprinkle of ground cinnamon); 2 tablespoons of lemon juice and I added 1 tablespoon of essence of rose water too.

The Traditional Greek Cookery Book Toubis Edition 2006


<a href=”http://www.bloglovin.com/blog/3326777/around-the-world-in-eighty-bakes?claim=mngmk6jv65c”>Follow my blog with Bloglovin</a>

5. Viennese Apple Strudel – Austria (The 4 Foot Pastry Monster- most tricky bake yet)

This week I may have baked myself into oblivion. Following my muffin experiment I wanted to explore a country that I am still yet to visit, Austria. (which I am assured is not in Germany and Prussia no longer exists). We went to our friends’ beautiful wedding last weekend where I was kindly given a boatload of homegrown apples. Congratulations and thank you James and Lara they are very tasty! This is my second bake using said apples.

James and Lara's Wedding Apples

I wanted to find an authentic recipe for something a bit more challenging, stepping up the baking ante. I chose a rather traditional Viennese Apple Strudel Recipe. This involved an enormous amount of apples and butter and yet another pastry effort.

Peeling and chopping a mountain of apples and simultaneously sauteing my previous homemade baguettes in butter I got stuck in.

Best Oxfam purchase ever

Sauteed Baguette

The pastry was epic! My poor little electric whisk started to smell like the blown out birthday candles and I fear it will never be the same again. There’s pastry still trapped inside, even after a took a knife to it, to coax it out!

Poor little whisk

The recipe called for a 4 foot length of cloth to stretch the 4 feet of pastry out on. I’m not even sure my workbench is 4 foot long?! With limited resources yet again I found a subsitiute for cotton, in cling film. (I don’t think this is the traditional method in Austria,) Selotaping vast amounts of cling film to the bench seemed to be my best bet. I felt like the Cling Film Queen. Christening my new fabuolous rolling pin, I set to work flattening it all out and stretching the pastry to within an inch of it’s life.

Miles and Miles of Pastry (new rolling pin!)

Then to add the filling and breadcrumbs quickly before the pastry fell apart. It was very delicate. I had to coat the inside in even more butter, in addition to the extra chunks of butter the recipe requested to accompany the apples and raisins! I hope my guests like butter…

I thought the next bit would be really difficult, folding the pastry over to roll it all up. I was very proud of myself when I got to this point. Who needs 4 feet of cloth to wrap up a strudel?! I thought whimsically. It wasn’t easy, I hasten to add, as the cling film kept tearing but what was still yet to come almost had me in tears…

Roll Up! Roll Up!

Entering in to my second hour of preparation I was getting to that almost frazzled point and needed some stroke of genius to enlighten me as to how I was going to a) get this 4 foot pastry monster out of the cling film and b) on to my quite small baking tray.

I made sure this time I greased the paper very well! But every little attempt to move the strudel made the corners of the apple chunks inside poke through the pastry. Patting down the increasingly thin pastry I went for the Band Aid Method, throw it into the tray and rip off the cling film. I was up to my elbows in butter by this point. Hallelujah! It was on the tray in a Horseshoe shape. Phew!

A Horseshoe Shape?

Now you may notice the obvious mistake here. Despite having the recipe printed out in front of me (without any photos) I still managed to misread it! This is getting beyond a joke. Is my eyesight or my brain failing me? I may have to start wearing my glasses whilst baking. The recipe prescribed half of the bread crumbs to be put into the mix which I successfully did. Then in all the excitement of rolling it up, I thought it said to sprinkle the rest on the strudel. I realised, to my horror, after I sprinkled them all over the final product I had missed a step. The recipe said to put them inside the strudel just before rolling. Damn!! I had a good giggle at my stupidity though. It wasn’t life or death, but I was worried the breadcrumbs would burn and smell like burnt toast.

I'm ready for my close up and look a little twisted but that's ok

Thankfully it was ok in the end! It smelled quite lovely, but as it was now 11pm I wasn’t in the mood for sampling it. Also we had friends coming over the following evening for food so I wanted to save it for them.

No smell of burnt toast at all 🙂

A quick reheat in the oven and lashings of custard and the strudel was a success!

It was well received

The sweet apples and raisins contrasted nicely with the savoury pastry. It should also feed the 5 thousand as it’s enormous. 4 of us hardly put a dent in it! Please send tupperware, or even bring a plate and you can have a slice!

The Final Slice

I may have now reached my pastry capacity now. I may explode. Next bake will have to be something a little different I think…

2. My Oh My! My First Apple Pie! England

If I’m ever going to fit in baking eighty things I realised that I need to get cracking. After a little post work trip to the pub I decided to make use of all the apples that we have in the house and attempt my first ever complete pie!

My Nana used to bake an Apple Pie for Sunday tea every week when all the family would congregate at her house in Sunderland. So it seems right that I bake a proper English Apple Pie. I (loosely) used this recipe for the Ultimate Apple Pie.
I didn’t really consider how much time it would take to peel, core and slice 1kg of apples,. After almost taking off a finger tip or two, I succeeded in chopping up rather a lot of apple. I couldn’t quite figure out if the recipe required 1kg of apples pre- chopping and coring or after, so I threw in a couple more for good measure.

Unfortunately I forgot to purchase an adult sized rolling pin so the pastry was a bit on the thick and lumpy side. The recipe called for golden caster sugar, which does not exist in my cupboard.  Instead I concocted my own, from muscovado brown sugar and granulated sugar. This resulted in a rather grainy textured pastry. Probably not what the professionals would do but by this time I had invested too much to start again, so on I ploughed.

miniature Rolling Pin ( Also note Hello Kitty toaster in the background)

I probably should have checked that I owned the correct size pie dish before I began. But who ever thought about planning that far in advance? This didn;t occur to me til I noticed that I had a ridiculous amount of pastry for my little enamel pie dish and that I had rolled it to a similar thickness of turf. I tried to roll it out a little more, but how on earth do you get it into the dish without tearing it?!! I seem to have perfected what can only be described as a ‘pastry flip’, almost like what you do with a pancake, but using pastry flattened onto cling film instead. It did the job and I tried to thin it out further by hand.

In addition to the new sugar combination I decided to stray further from the recipe to my peril. I thought surely with that vast amount of pastry the base will need a bit of blind baking, so I ad libbed. Dangerous. I didn’t have a clue what I was doing but it seemed like a good idea at the time. Then came the fun bit, trying to squash as many of the cinnamon apples into the tin as possible. They look a bit like chips…

Chips or Apples?

Then to carry out another pastry flip. On with the lid. It wasn’t that easy to join the lid to the partially baked base (Maybe that’s why they tell you not to blind bake it? So you get a proper seal?) The result? It didn’t really look anything like what my Nana would bake. More like a pie Desperate Dan may have mistaken as containing an entire cow…

Too many apples inside? Desperate Dan would be proud.

I still had loads of pastry left so I thought I would invent something else. Using my Yorkshire Pudding tin I made some mini apple pies, or cricket balls filled with apple. All that was left to do was to slap on a coat of egg wash with my new pastry brush and whack them into the oven.

Apple filled cricket balls in a Yorkshire Pudding tin.

There seemed to be a lot of apple escaping from my modest steam vent and coating the bottom of the oven, but fret not. They looked a good colour! By this time it was about 11.30pm so it was way past apple pie eating time. I let it cool overnight and then kept it in the fridge for a Sunday treat. I just had a piece and I was very happy with it! I think the lumpy sugar must have melted in the oven, as there was not a chunk to be seen.

The end product

Although it was quite difficult to remove from the tin (a spoon had to be deployed) the pastry was most definitely cooked. I’m not completely sure if there’s supposed to be such a gap between the lid and the filling, but it all tastes the same. Complimented by a splash of custard of course too. The little cricket balls were rather pastry heavy but the Yorkshire Pudding tin worked a treat.  A perfectly handsized pudding and a good accompaniment to our road trip, providing much needed sustenance when we broke down yesterday! I’ve created a slideshow below of all the photos…

ps. Still no news from Paul Hollywood. I guess my Tarte au Citron efforts weren’t up to his standards… I’m very excited to watch the final Great British Bake Off on Tuesday!!! I’ve already ordered the book and Mary Berry’s very 70’s cook book which may help to alleviate the GBBO withdrawal symptoms.

This slideshow requires JavaScript.

1.The First Bake! France – Tarte au Citron

First stop on my gastronomical tour of the world is France. I’ve only been once to Paris 4 years ago rather spontaneously and I loved it. Plenty of croque monsieurs and orangina to be consumed and of course beautiful sights to be seen.


Paris 2007


I decided to embark in an all day baking frenzy on Sunday. Beginning with my first experimental venture into pastry making stumbled slightly after my trip to the supermarket, sans ingredients list, meant that I had to make a second trip to purchase cream and lemons, those two vital ingredients to Tarte au Citron.

I love Tarte au Citron, but even when I was in Paris I didn’t actually get to sample it. I vividly remember an amazing tarte au pomme however. I mainly eat this desert whenever I go to Thorntons Cafe. I could eat it everyday, which is good because I will be eating this for this entire week.

After one false start, all systems were go. I threw caution to the wind mixing up the pastry ingredients. Now from watching the Great British Bake Off (from hereonafter I will soley refer to as GBBO as I will refer to it excessively throughout), I know that pastry can be frozen to make it more pliable, so into the freezer the sticky mess went. I also picked up how to roll the pastry between cling film to stop it sticking to everything. Which was a life saver or in this case, a tarte saver.

I had to buy a special tin to make the tarte in and so my other cooking equipment is somewhat rudimentary to say the least. I am using a childs size silicon rolling pin which doesnt make for even rolling of pastry, with it being more suited to childrens play dough, nevertheless I pressed on.

With a few mumbled shouts of, ‘I hate pastry!!’ and ‘this is so difficult!!’, eminiating from the kitchen and one or two failed attempts to get the semi flattened dough into the tin; after dropping said tin onto the floor and having to wash it again. I managed to successfully wrestle the dough into the tin and press it into shape. If only I had remembered GBBO tip of using a wedge of pastry to press the stuff into the tin! That would have been good, but c’est la vie.

Again, making do with the cheaper version, I poured a whole packet of kidney beans into my tin and blind baked the tarte. Perhaps I added a smidge too many beans as the bottom was still raw after it’s allotted time. A little thinking on my feet and a bit more baking and it was good to go. A skewer came in handy to lance the pastry that had grown a bit too much in the oven and it was time for the filling.

I love my electric whisk. It made whisking all the eggs, cream, sugar and lemon so easy and salvaged the mess I made of it. Note to self. I must read recipes properly!! This is not an unusual error on my part. I generally get creative with recipes and guess measurements and substitute ingredients for what ever is in the cupboard… BUT this time I totally misread the method, throwing everything in together only to be soaked in cream and eggs when I switched on the mixer. That will teach me for using my smart phone to bake from. Too much touch screen and unlocking of phones makes for a sloppy chef. Apparently it’s advisable to whisk the eggs first. To fix this cream-up-walls and all over me issue, I wrapped a towel round the bowl to capture all the escaping cream and protect the walls. Whisking it all up until it looked a bit frothy. (That’s the technical term for this, right?)

It seemed to work! I christened my new cooling rack, bought special for the occasion (no more using the microwave stand for me!). After a bit of time in the fridge and a light dusting of icing sugar it was ready to eat. It did not disappoint!

Le Tarte au Citron in all it's technicolour glory

Sharp and smooth, with perfectly cooked pastry! Not soggy, nor dry and overcooked. Somehow I got it right!?! And I would know, having watched all those judges on GBBO! On a side note I have also tweeted #Hollywoodbaker GBBO judge my Tarte au Citron pictures to enter the twitter technical bake challenge… let’s see what he thinks!

Look at that pastry!

I declare this pastry technical challenge complete (and suprisingly a success!)

So that was France, where to next???

The Rules

Russian Doll Measuring Cups

Although I loathe to admit it, it would be useful to set out some guidelines to help track any achievements and/or failures. I usually prefer to just see what happens and muddle my way through but if I at least set some parameters it might be a good place to start. So…

1. The items must be baked in the oven. (Is that a bit obvious?)
2. The items do not need to be baked in any particular geographical order. (My geography is atrocious, yesterday I discovered Peterborough is not in the North of England. I’m ashamed of myself.)
3. I will attempt to bake the signature or classic dish from every country I have been to.
4. I will take recommendations on the best dish to bake from others who have been to the countries I haven’t been to yet.
5. The dishes will be either sweet or savoury. Or both sweet and savoury. (Why limit myself?! The possibilities are endless and who knows what innovative recipes I will discover along the way.)
6. Some countries may be baked from more than once.
7. I will be baking everything from scratch.
8. I will be only baking things that I’ve never attempted before.
9. I will be baking unaided, venturing into the wilderness of intrepid baking.
10. I will take photographic evidence of all baked goods.
11. I will wear my racy apron during all baking efforts.
12. I’m aiming to bake one new thing a week… But we will see how it goes..

13. I will post all of the experiments on my blog!

14. I will hopefully test the results out on willing, friends and relatives. Please be prepared to eat a lot.

15. I will increase my running and yoga schedule to compensate for all the butter and cream I’m going to consume.

Please feel free to suggest recipes. The more authentic the better! Also any items of bakeware that you would like to donate will be gratefully received!! Any willing guinea pigs please also get in touch.

Thanks for reading and the first effort from France will follow shortly.