Cooker Chaos and the Fiery Beast in my Kitchen

An Armenian Gluten Free Orange Cake with Orange Blossom icing and candied peel

An Armenian Gluten Free Orange Cake with Orange Blossom icing and candied peel

January has been a busy month filled with baking and frustration with the new-to-me-yet-old-to-our-house oven which has no temperature or oven settings remaining on it. Leaving the delicate science of oven temperature in the lap of the gods or in my case the sizzle of the grill.

This month I have successfully

  • set fire to my oven gloves and a pan lid!
  • grilled a puff pastry pie
  • charred a cake that took me 4 hours to make
  • threw 5 inedible cakes away – even Super Hans turned his nose up at them and he has been know to eat raw sourdough starter when it’s been dropped on the floor
  • and sobbed silently at the oven window glued to my newly purchased thermometer checking the temperature hasn’t yet reached ‘towering inferno stage’ and frazzled my Madelines.
Grilled pie anyone?

Grilled pie anyone?

I must admit I considered throwing the fiery beast in the bin, but the bin isn’t quite big enough… so back to patiently burning my cakes and starting over, and over, I went.

I guess this oven is a bit like baking with an Aga? (Having never used an Aga I may be making this up) I put my limited Aga knowledge to good use and attempted to control the heat by placing extra baking tins in the oven, to protect my precious cakes from the uncovered elements in the oven and ward off the extra hot spots. Adding tin foil hats to my cakes wherever possible to guard against the scorch. If you have any suggestions on how to bake in a small, yet very hot, electric fan oven please send them my way!

Undeterred I continued and eventually managed to bake some edible and rather lovely cakes, although I had to admit defeat on some of the more delicate bakes. It seems I shall be baking only robust cakes and breads that can withstand the heat until I can get to grips with the animal in my kitchen.

This month I’ve taken the opportunity to recreate some of my most favourite around the world in 80 bakes with a slightly new twist. Mainly that I have crammed as many international elements and Middle Eastern flavours that I could possibly think of into one cake. And the result? My 4 layer Iranian Pistachio Cake with cardamom; home made lemon curdTurkish Delight and Rose Italian Meringue. Which means I finally conquered the ever elusive Turkish Delight using a very good Rachel Allan recipe. I even treated myself to 2 new cake tins that are the same size! Unheard of in my house, so now I can actually make cakes that sandwich together. Hurrah! I predict there will be many more layered cakes in my future.

Cramming many international elements into one cake: A 4 layer Iranian Pistachio Cake, with homemade lemon curd, Turkish Delight and Rose Italian Meringue

Cramming many international elements into one cake: A 4 layer Iranian Pistachio Cake, with homemade lemon curd, Turkish Delight and Rose Italian Meringue

I also re imagined my Armenian Gluten Free Orange and Almond Cake into a bundt cake with ribbons of orange blossom icing and home made candied peel. Much less syrupy than my last attempt with thick piped glace icing which gave a great sweet contrast to the slightly bitter orange and almond cake.

An Armenian Gluten Free Orange Cake with Orange Blossom icing and candied peel

An Armenian Gluten Free Orange Cake with Orange Blossom icing and candied peel

Thanks for reading and I hope January is treating you well. I’m looking forward to hopefully baking not burning some new and exciting international recipes very soon.

52. Armenian Orange and Almond Cake (incidentally also Gluten Free)

Armenian Orange and Almond Cake

Armenian Orange and Almond Cake

This Armenian Orange and Almond cake almost screams health (in a rather pretty way). It contains 2 whole oranges! (yes that’s right the pith and peel and everything), no butter, a relatively small amount of sugar and a whole bunch of almonds. Of course almonds are full of minerals and vitamins (vitamin E and Bs) and healthy fats that you need to live a lovely life, so surely this is a cake that you should be eating as part of you balanced healthy lifestyle! Oh and I did I mention it’s also gluten free? No flour required so even better for those with gluten intolerances/allergies too.

A very moist slice of Armenian Orange and Almond Cake

A very moist slice of Armenian Orange and Almond Cake

We’re flying into the final 28 bakes of my aroundtheworldin80bakes adventure now and what a cake to take us up to bake 52. This recipe was very kindly given to me by a fantastic lady that I work with who is from Armenia. I asked if she had any traditional cake recipes that I could try as it’s another country that I’m still yet to visit and she produced this from her repertoire.

I Heart Cake. Do you?

I Heart Cake. Do you? You could win a lovely cake mould if so!

I lovingly recreated the handwritten recipe in my kitchen using a pretty heart shaped mould that Mustard Gifts sent me to try. Thank you very much! I love my heart shaped cake mould. Next on my list of things to try is a heart shaped jelly. Not only does it look pretty whole (part of me wanted to decorate it like a flower!) but when you cut yourself a nice wedge it comes out as a perfect heart shape. The cake will make 6 heart shaped slices or 12 finger shaped sliced (depends on how much you love your friends and family as to how big a slice you’d like to give them…) You could also win one of these gorgeous cake moulds worth £15! (Competition has now closed.)

My orangey bakey heart

My orangey bakey heart

I knew I had to bake this cake to take along with me to the Clandestine Cake Club gathering this week, at the Knit Studio at Blackfriars. Our theme this week was history. I thought the Armenian Orange Cake would be a great recipe for me to use, full of Armenian tradition and handed down to my friend through her family. It did not disappoint. I managed to work my through the entire cake collection sampling a wonderful array of cakes along the way. I love Cake Club!

Clandestine Cake Club Newcastle - History theme

A fine selection of cakes at our History themed Clandestine Cake Club Newcastle, at the Knit Studio, Blackfriars

One of my favourite things about this cake is that it’s really quick to make. Boiling the whole oranges is the most time consuming part of this entire cake. They need to be boiled for 2 hours, covered in water and with a  lid on the pan to help retain the heat. I boiled my oranges the day before so I was extra prepared.

Boil 2 whole oranges for 2 hours. Simple

Boil 2 whole oranges for 2 hours. Simple

Once the oranges have reached boiling point allow them to simmer on a low heat for the full 2 hours. The oranges smell amazing, and it floats around the house carried by the steam from the pan. Leave them to cool (so you don’t burn yourself) and then blend them up to a pulp.

Soft boiled oranges

Soft boiled oranges

They’re so soft and tender they pretty much fall apart in your hands. I used a stick blender to blitz mine into a thick smooth orange paste. You could also use a food processor.

Blitz the boiled oranges to a smooth paste

Blitz the boiled oranges to a smooth paste

Next thing is to basically whisk all of the eggs together with the sugar until frothy and a little air is incorporated. Then whisk in the ground almonds and baking powder. Then whisk in the orange paste. No fuss, just whisk the entire thing in one bowl. Even better there’s not a lot of washing up involved in this cake!

Whisking up all the eggs

Whisking up all the eggs and sugar

The cake batter doesn’t take long to whisk together. Whisk it until it is a beautifully smooth, thick and glossy. You will see the gorgeous orange flecks throughout the batter. It’s very easy to pour and spread into the shapely mould.

A thick, glossy smooth orange flecked batter. Easy to pour and spread into the shapely mould

A thick, glossy smooth orange flecked batter. Easy to pour and spread into the shapely mould

Once everything is fully incorporated simply pour it into your greased baking tin/mould and bake in a preheated oven for 30-45 minutes at 200 degrees C /400F

Thoroughly greased I Heart Cake Mould

Thoroughly greased I Heart Cake Mould

I like to use spray on cake release to grease my cake tins and having not had much success with silicon bakeware in the past I may have gone a tad overboard with the old grease spray here. The I Heart Cake mould worked like a dream, the cake baked evenly and not a single bit of the cake stuck to the mould. Success!

Ready for the oven

Ready for the oven on a pre heated baking tray

One way to ensure your silicon mould is supported and heated evenly I’ve found, is to pop it directly on to a baking tray that has been heated as the oven warms. This makes it even easier to lift the supple mould in and out of the oven and ensures the heat touches the mould evenly.

Fresh from the oven - Armenian Orange and Almond Cake

Fresh from the oven – Armenian Orange and Almond Cake

Now I did think when I read the recipe that 200 degrees C is rather a high temperature for a cake, normally a sponge with baking powder might bake at 180 C as a maximum. 200 C is more like a bread baking temperature which can take that kind of heat, however I wanted to follow the recipe to the letter. I was slightly alarmed to see how dark the cake had turned in the oven however it didn’t make the slightest bit of difference, it tasted perfect and was moist all the way through. Not a dry edge in sight, but just for peace of mind I might reduce the heat next time to 180 after the first 15 minutes of baking.

Cooling gently on a greaseproof covered cooling rack

Cooling gently on a greaseproof covered cooling rack

I left the cake to cool slightly in the mould to retain it’s shape and merely tipped it out onto a greaseproof covered wire cooling rack (to stop the cake marking or falling through the gaps). It’s quite a robust cake with all of the almonds in so it can take a bit of handling. The cake slid smoothly out of the mould and looked impressive before I even added a layer of icing to it.

A good layer of Orange blossom icing

A good layer of Orange Blossom Water sugar icing

I’ve never really been successful with making my own glaze icing and yet I continue to persevere. I decided to add a layer of icing to the cake to add a little more sweetness. I clearly got the measurements wrong (yet again when will I learn!) as the icing wouldn’t set despite being left over night!) so I ended up scraping it off and leaving the cake with the syrupy goodness from the icing seeping into every pore instead. This made one extremely moist cake. Similar to some of my other Arabic creations Baklava and Basboosa.

One orange blossom water syrup soaked Armenian Orange Cake

One orange blossom water syrup soaked Armenian Orange Cake

Icing sugar is probably not the best choice of decorative tool when dealing with a syrup soaked cake, however I wanted a quick white decoration to contrast with the golden sponge. Armed with a paper doily, icing sugar and my trusty tea strainer I placed the doily on the cake and dusted it liberally to ensure the cake got a good coating. I think its a brilliant (and cheap!) way to create an impressive decoration. I think I may be a little obsessed with this now as you can see with my Crack Pie stencilling

Armenian Orange and Almond Cake

Doily decorations all round – Armenian Orange and Almond Cake (ps. no one will notice the dent I put in the top of the cake when scrapping off the icing with a spoon will they…)

To continue the heart theme I sliced up some homemade candied orange peel into dinky heart shapes and placed one in the centre. As Mary Berry always says it’s good to decorate your cake with a little of what’s on the inside to give a hint of what it’s offering

Practice makes perfect - slicing candied peel into hearts

Practice makes perfect – slicing candied peel into hearts. No fingers were lost in this process

Armenian Orange cake is the most intensely orange cake I’ve ever tasted. Perfect if you like a fruity cake that’s not too sweet. The almonds give it a wonderful texture and the added sweetness from the icing lifts the slightly bitter tang of the orange peel.  An interesting cake with a healthy twist, it’s a wonderfully moist and light summery bake. The full oranges give the cake a whole other level of moisture and depth of flavour. Another cake that would be perfect with a strong cup of tea or an espresso. This is great cake for those who enjoy a good pound cake and who aren’t a great fan of buttercream icing. Although you could ice this in any which way you prefer if you’re a buttercream fan go for it. I heart all cake! Yum!

Armenian Orange and Almond Cake
A perfect piece of my heart - armenian orange and almond cake
Armenian Orange and Almond Cake

Armenian Orange and Almond Cake

Things that I used to make my Armenian Orange and Almond Cake

  • 2 oranges
  • 6 eggs
  • 230g sugar
  • 230g almonds
  • 1 tsp baking powder
  1. Boil the oranges for 2 hours
  2. Blend the soft oranges into a paste
  3. Whisk the eggs and sugar until frothy
  4. whisk in the almonds and baking powder
  5. Whisk in the orange paste until all is combined
  6. Bake for 30-45 minutes in a 9 inch tin at 200 degrees C or 400F

Icing

  • 150g icing sugar
  • 2 tbs orange blossom water
  • the zest of one orange
  • a little water to thin the icing if need

Mix it all together until smooth and thick. Pour over the cake.

*Or dust with icing sugar! The choice is all yours


That icing sugar sure disappears fast!


Happy Christmas – The Rosca de Reyes results are in!

A very decadent Rosca de Reyes - 3 Kings Cake

A very decadent Rosca de Reyes – 3 Kings Cake

Wow what a year this has been indeed! We’ve made it over half way around the world in 80 bakes, ran my first half marathon (raising over £700 for Oxfam!), baked (and devoured) some wonderful (and some not so wonderful…) cakes AND been very lucky indeed to win the Blog North Best Food and Drink Blog Award.

Great North Running

Great North Running

And that’s not even the end of this amazing year’s excitement, it doesn’t all finish there! I’m very excited to let you know that I won the online bake off and £500 of holiday vouchers for my Rosca de Reyes 3 Kings Cake! Amazing! Thank you all so much for reading, commenting and also voting for me. I can’t thank you enough for your support and love. We will be using the £500 of Cosmos Holiday vouchers to book our honeymoon in the new year, a trip somewhere hot and relaxing will be perfect after our wintery wedding (which is taking place in less than 2 days…)! Fingers crossed the cake stays upright!

A golden Rosca de Reyes

A golden Rosca de Reyes

The lucky winner of the £50 very.co.uk voucher is Jenny B. The company will contact you directly to arrange your voucher. Thank you so much for voting!

I can’t go without mentioning the 4 brilliant bakers and bloggers, in the Rosca de Reyes bake off. They are exceptionally good bakers and I’ve been enjoying their blogs for over a year now and follow them all on twitter. I really recommend checking out their blogs, if you haven’t done so already. They are very talented and inspirational foodie bloggers.

I hope you all have had a wonderful Christmas and are looking forward to the New Year as much as me. I will be returning shortly as a married baker, with a new name and everything. Looking forward to letting you know how my biggest challenge so far pans out… my 5 tier wedding cake!

Lots of love and happy new year!

Lauren x x x

p.s Now would be a perfect time to have a go at baking your own Rosca de Reyes to celebrate the Epiphany on January 6th.

p.p.s. My golden Rosca de Reyes – 3 Kings Cake even got a mention in the The Mirror within an article about Christmas eats and treats around the world!

44. A Healthy Christmas Pudding? – a very English recipe

image

Can this be real? Is there such a thing as a healthy Christmas Pudding when you soak your fruit in booze and add copious amounts of sugar? Well according to the Great British Bake Off (series 2 cookbook) it is. So what’s the difference you may wonder? It’s breadcrumbs, would you believe and no suet!!

image

Obviously I can never leave a tried and tested recipe alone so I accidentally modified it… I decided to make it nut free, adding the equivalent amount of dried fruit in place of the nuts to soak in the booze. Then promptly forgot about my decision and added the nuts as well. This will surely be an extra fruity pudding!

I have only attempted one Christmas Pudding, an original Bero recipe, full of suet and other wonderful stuff. However it didn’t cook all the way through despite it’s initial 3 hours of steaming and the additional steaming on Christmas Day itself.

I got a bit carried away when purchasing fruit for my enormous wedding cake   (which actually turned out to be a good thing – it’s a LONG story- but in a nutshell I ruined 3 cakes in the process of baking my 5 tiers so had to bake 8 fruit cakes in the end!) Even with the additional 3 cakes bakes I still had enough dried fruit to bake 2 Christmas Puddings! Hurrah! (I also have plans for my rather sad 3 wedding cake tiers, they will not go to waste!)

image

As with all good festive fruit recipes I started with soaking the fruit in Booze, Brandy to be exact, along with some lemon juice. The recipe only requires a soak over night but I decided to soak it in a tupperware pot in the fridge for a few days instead. Surprisingly the most effort in this entire pudding is the weighing of ingredients and bread crumbing. (Totally discounting the watching of the pot bubble for 3 hours of course…)

image

The breadcrumbs required a little preparation so a quick blast in the hello kitty toaster and a whizz with the blender makes some lovely breadcrumbs and decorates the kitchen beautifully in bread dust.

Whilst the bread is toasting you have time to whisk together the butter, honey and sugar until light and fluffy. Then to whisk in each egg individually. The more you whisk the lighter the pudding, so whisk away!

wpid-2012-11-25-18.16.09.jpg

Whisked up and fluffy butter, sugar, honey and eggs with a smattering of grated apple

Then to stir in the grated apple, spices, (nuts) and brandy soaked fruit.

Stirring in the spices, nuts and grated apple

Stirring in the spices, nuts and grated apple

With the grand finale stirring in the toasted breadcrumbs along with the dried fruit.

image

This forms quite a pale and loose mixture Once it’s all mixed together well it’s ready to be spooned gently into your pre prepared greased pudding bowls.

image

This recipe is enough to make two Christmas puddings. I used a 1lb bowl and a 3/4 1 lb. bowl.

image

Fill the pudding basins until at least 3/4 full and make sure the pudding is level by pushing the mixture level with a spatula and tapping the bowl gently on the worksurface to release any air bubbles.

image

Then for the exciting bit! I’ve read so much about wrapping puddings in greaseproof paper with a pleat (a double fold about an inch wide) in it to allow room to expand as the pudding steams, but never before have I actually had a go at it!

image

Both puddings needed a lid made out of a layer of greaseproof paper and tinfoil (both with wonderful pleats) before being trussed up like a turkey in lashings of my trusty cotton string.

image

There is definitely a knack to this technique. My theory is always to tie stuff as tight as possible, it needs to be water tight, (you don’t want to drown your pudding when you submerge it in your pan of boiling water) and when in doubt add more string and tin foil. I added a full coat of tin foil, wrapping the pudding basin from the bottom to ensure the water couldn’t seep into the pudding. It seemed to do the trick. I added an additional length of string, tying it to the string around the edge if the puddings to create a handy handle for lifting out in and our of the pot too.

image

Dinner plate face down in the pan

I had planned to economise and steam both puddings together however I failed to measure the pan…. So 2 separate pans were required to steam the little beauties.

image

Pudding basin balanced on top of the plate inside the pan

I popped a dinner plate (face down) into my largest pan and a saucer into my smaller pan to balance the puddings on. I boiled the kettle and carefully poured the boiling water into each pan until it reached 2/3 of the way up the side of the pudding basin. Then to pop on the pot lid (an essential bit of the steaming process to keep the heat and moisture in) and let the puddings steam gently in the simmering water. It’s a good idea to allow some of the steam to escape by creating a vent (I tilted my pan lid and as my other pan lid was broken many moons ago I used even more tin foil with a hole in the top to create a lid) This takes about 3 hours on a low heat. I had to keep my eye on the pans and top up the water a couple of times as a pan should never be left to boil dry (this can cause the pan to explode!). So please be careful! My pans and plates made a few worrying noise over the next few hours, clattering about so perhaps a smaller plate would be a better idea to avoid the rattling!)

image

Double Bubble – 2 pans steaming 2 puddings simultaneously

After 3 hours remove the puddings from the pans and allow to cool. Take off their tin foil and greaseproof paper and wrap them with a fresh coat. This will help to create a seal and prevent any mould from forming on your lovely puddings. I placed a clean saucer on the top of mine to weigh down the paper and create a good seal.

image

Freshly steamed and cooled pudding. Ready for a tin foil coat and a sleep in the fridge

These puddings will keep for up to a month in the fridge or up to 3 months in the freezer, but once defrosted they will need to be eaten within a week. If you were making a traditional pudding with suet they can be kept for about a year to mature so you can make them well in advance! I’ve just read that freezing your pudding helps to speed up the maturation process. So this could be a good option if you haven’t had a chance to prepare it in advance. My puddings are currently having a snooze in the fridge until 15th December as we’re celebrating Christmas a little early in the Prince household! I may even give them both a little drink of brandy to help keep them warm for the next 3 weeks. 🙂

The puddings looked a little paler than I expected after their 3 hours in their steam bath, I think this is due to the breadcrumbs and lack of flour. But I could tell that they were done as one pudding had shrunk back slightly from the side of the basin.  Unfortunately I can’t tell you how they taste yet, as I need to steam them for 3 more hours on Christmas Day (or 15th  December in my case – some of us have a wedding to prepare for and a 5 tier cake to finish decorating!) I will pop back to let you know how they turn out

Things I used to make Healthy Christmas Puddings 

  • 70g dried apple
  • 330g sultanas
  • 200g mixed peel
  • (total 700g of dried fruit – any combination could be used! I added more fruit to replace the nuts if you wanted to make a nut free version just omit the nuts below)
  • Zest of one grapefruit ( I had ran out of oranges so replaced this with the only citrus fruit I had to hand…)
  • 5 dessert spoons of Vanilla Brandy (to soak the fruit in)
  • Juice of 1 lemon (to soak the fruit in)
  • 50g sliced blanched almonds (I accidentally added the nuts which I had added more fruit to compensate for -you could reduce the amount of fruit you use by 100g if you would like to include the nuts?!)
  • 50g ground almonds
  • 75g brown sugar
  • 75g unsalted butter
  • 75g runny honey
  • 2 eggs
  • 1 medium apple grated (with  the skin on)
  • 125g toasted white breadcrumbs
  • 1/2 teaspoon all spice
  • 1/2 teaspoon cinnamon
  • 1/2 teaspoon ginger

(I heavily adapted this recipe to suit what I had in my cupboards. The original included pine nuts and fresh figs, so feel free to play around with the ingredients, your favourite fruit and nuts and what you can afford to include!)

  • 2 pudding basins (1lb each)
  • tin foil
  • greasproof paper
  • 2 saucepans and 2 saucers
  • Steam for 3 hours on a low heat
  • Refrigerate for up to one month or freeze for up to 3 months
  • On the day you wish to eat your pudding steam for 2 hours on a low heat before serving

image

43. Polvorón – Spanish Christmas Cakes or Mexican Wedding Cakes

image

Polvoron – you are always on my mind

I’ve had Polvorón on my mind for some time. I read about these crunchy little biscuits bites, months and months ago and they’ve been sitting patiently in my ‘Things to bake’ pile ever since.

They are quite an unusual discovery, something I had never heard if before. Traditionally Polvorón are eaten as wedding  cakes in Mexico made with pecans or as Christmas cakes in Spain, kind of like a Spanish Shortbread. Now I’m planning my own wedding I thought perhaps now is the time to incorporate an international flair into the festivities. Intrigued I launched into my own interpretation of the traditional recipe, basically determined by whatever ingredients I have in the cupboard.

image

Chopped up dried coconut

I don’t usually buy pecans or walnuts so they had to be substituted for good old almonds (a nut which is ever present in my cupboard and life…) and chunks of dried coconut roughly chopped.

Due to the speedy baking that was necessary (and seems to be happening more and more often in my house) I improvised yet again. No time to assemble to food processor so I grabbed the nearest heavy item (a glass jar), threw the almonds into a sturdy sandwich bag and hammered them with the jar until they were delightfully smushed. Feel free to use a pestle and mortar if you wish to be a tad more refined than I.

image

Beating the butter to a smooth paste

The ingredients are very similar to basic shortbread, with flour, butter and sugar.

image

Thoroughly whipped butter

This is another brilliant biscuit for busy bakers as I managed to whip up the dough first thing on a Saturday morning, chill it whilst I showered. I used my trusty hand held electric whisk to beat the butter and icing (powdered) sugar together. Then to whisk in the flour and vanilla extract.

image

Whisking in icing sugar, vanilla and finally flour

image

My combination of ground almonds, chopped blanched almonds and chopped coconut.

And finally the nuts of your choice.

image

The dough looks a bit scrambled eggy to start with…

image

Take a small amount of loose dough in your hand

I completely misunderstood the recipe which calls for the dough to be chilled. I shapped the dough by hand into about 35 mini golf balls.

image

squash it together and hey presto you have a ball!

I popped them all onto a greased and lined baking sheet covered them with cling film and popped them in the fridge to chill.

image

All the Polvoron lined up in a row – ready for chilling

(I think you’re supposed to chill the whole dough then shape it?!) But this gave me a chance to shower so in effect helped to speed up the process.

image

Delicately golden Polvoron fresh from the oven

I then spaced the little balls out evenly to give them room to spread whilst they baked. I popped the tray in the oven to bake it at 170 degree C for about 18-20 minutes, until they took on a delicately golden hue, whilst I applied clothes and make up.

image

Cooled and ready for a good dusting of spicy icing sugar

Just enough time to then allow the Polvorón to cool on the tray to set their shape for 5 minutes. Then to cool them fully on a wire rack to stop the butter sweating out of them and give them sticky bottoms.

image

Fully coated Polvoron

Once cooled fully I rolled the Polvorón in a bowl of icing sugar swirled with cinnamon giving them a fluffy white coat. As they set the sugar absorbed slightly into the biscuit adding an extra dimension of sweetness to the treat.

image

Happy Birthday Mel!

I then quickly bagged them up, tied with a pretty ribbon and dashed off with my pretty packages of Polvorón to celebrate my friends birthday! With a champagne fueled (10 minute) train journey to Durham. Followed by more food, cocktails and Polvorón.

image

Obviously I had to ensure their quality before sharing them with friends… they passed the test! Crunchy and sweet Polvoron

We declared them a tremendous cocktail accompaniment (and that’s not the frozen strawberry daiquiris talking).

Polvorón are buttery like shortbread but with an added crunch as they are smaller and denser than a traditional shortbread biscuit. The almonds brought a subtle creamy yet crunchy texture along with the coconut. I expect pecans would add even more bite to the biscuit. The Polvorón remind me a little of biscotti or amaretti biscuits which I also adore. What’s not to love about a delicious bite sized treat. Even better, as they’re so small you can obviously eat a whole handful of them in one go!

Polvoron – up close

I love the method of shaping these little biscuits into balls as I find rolling and cutting out biscuits a bit laborious  I quite enjoyed this hand made alternative and I’m already inventing my own nut free recipe for my friends who can’t eat nuts as I think everyone needs a bit of Polvoron in their lives!.

Things I used to make Polvorón

Makes about 35 small biscuits

Preparation: 15 minutes

Chilling time: 30 minutes

Baking time: 18-20minutes at 170degrees c

  • 220g butter (1 cup or 2 sticks)  room temperature
  • 250g powdered sugar (2 cups or 240 grams)
  • 2 teaspoons vanilla extract
  • 250g all purpose flour (2 cups or 240 grams)
  • 120 g (1 cup) almonds/pecans/coconut coarsely ground/chopped
  • 1/4 teaspoon ground cinnamon

Thank you to Sourdoughtheangrybaker for inspiring me to bake Polvoron! I had not heard of these wonderful cakes until you told me about them. Brilliant blog if you haven’t had a look already, I recommend reading.

40. Chinese Rice Cakes – Half way aroundtheworldin80bakes!

Hasn’t time flown? One year in and we’re already half way Around the World in 80 bakes and what better destination to reach than China, one of my most favourite places in the world!

The Great Wall – look how far we walked

China has always been my ultimate must visit country. We visited just before the Beijing Olympics. Travelling around on over night trains from Shanghai to Beijing, climbing the Great Wall (sometimes on my hands and knees  – those steps are steep!) and sampling all of the delights of tasty chicken spine (!) and dried fish skin (yum).

Chinese Street Food – we didn’t eat the seahorses on sticks

Chinese Rice cakes have always intrigued me. I found the recipe in Marguerite Patten’s book and was surprised to discover how little rice flour they actually contain! However they do contain LARD! You may recall my love of lard from previous bakes such as Wiltshire Lardy Cake


These are such a quick little cake to bake and the results are impressive. Paul Hollywood would be proud of my equal sized rice cakes and even bake.

Chinese Rice Cakes – Paul Hollywood would be proud, look at the consistent size of the batch!

All you have to do is sift the dry ingredients together; plain, rice and corn flour, with baking powder, salt and sugar.

Ready to rub in the lard and rice flour

Rub the lard into the flour… My least favourite bit as I still shudder at the smell of lard. It’s definitely pungent.

Lardy times

Then bring together the mixture by stirring in a tablespoon of water, almond extract and half an egg. What a peculiarly precise measurement from Marguerite! I struggled to decide what half an egg was, so I cracked an egg into my cupped palm, over a bowl. I chopped the yolk in half with my finger and slid half (ish) of the egg into the mix. Keeping the other half for glazing the cakes later on.

Sticky dough ready for shaping

Once the mixture is quite sticky it’s ready to be divided and rolled into equal sized balls and plopped onto a greased and lined baking sheet. It’s easier to use your hands to roll them into smooth balls.

Lined up and ready for my close up – Chinese Rice Cakes

Once they’re on the sheet and spaced out nicely press a blanched almond into the centre and give them a quick egg wash with the other half of the egg. This means they will flatten a little onto the sheet and the almond will stick to the dough as it bakes. You will also get a wonderful golden crust on your cakes.

Perfectly spaced and oven ready Chinese Rice Cakes

Into the oven for for 15 -20 minutes at 205 degrees celsius and…

Just baked Chinese Rice Cakes

Ni Hao Chinese Rice Cakes ah hoy!

The Final Bake – Chinese Rice Cake

What a tasty little cake! The almond extract really comes though although if I were to make it again I probably would add more almond extract and some ground almonds too for more of an extravagant bake and richer flavour. Marguerite Patten’s recipes tend to be a bit more on the economical side, using minimum amounts of ingredients as she was baking during the war and making do with rations and tight budgets. I often double the quantities to make a larger batch and feed my hungry friends and family. The lard adds the extra moisture needed to give a crumbly yet light texture when baking with gluten free flours such as corn and rice which can be a bit dry side for my liking. They keep for quite a while in an airtight container and freeze really well too. Then easy to defrost as and when needed for a rice cake fix.

All in all a very quick, efficient and consistent bake. I would definitely bake these again and know that I won’t be able to resist experimenting with the ingredients.

Things that I used to make Chinese Rice Cakes

Margeurite Patten’s Recipe

This makes approximately 15 cakes

Preparation time: 10 minutes! (My kind of preparation!)

Cooking time: 15 -20 minutes

  • 4 oz (118g)  plain flour
  • 1 oz (30g) ground rice (rice flour)
  • 1/2 oz (15g) Cornflour
  • 3 oz (88g) sugar
  • 2/3 tsp baking powder
  • 3 oz (88g) lard
  • 1/2 an egg (quite difficult to measure!)
  • 1 tablespoon water
  • 1/2 tsp almond essence (I used extract as it’s stronger)
  • pinch of salt
  • blanched almonds to decorate
  • 15-20 minutes at 205 degrees Celsius

Blog North Awards 2012 Aroundtheworldin80bakes has been shortlisted!

I am so so thrilled! This week I got a surprise email to tell me that Aroundtheworldin80bakes has been Shortlisted for the Blog North Awards 2012 in the BEST FOOD AND DRINK BLOG category! 

The Blog Awards are celebrating ‘The best online writing in the North’.

How amazing is that!! I never in a million years thought that I would be nominated for an award, never mind shortlisted from over 400 blogs in the North. There is even a cash prize for the winner!

(Now that would come in very handy for more international baking and for my  wedding cake in particular which I began at this weekend. It truely is the biggest cake I have ever attempted! The first tier is already bigger than my head!)

image

If you would like to vote for me (please) in the Blog North Awards you can do so on the Blog North website www.blognorthawards.com/vote 

Voting closes on 4th October with the winners announced at the award ceremony on 17th October! There are 4 other fabulous foodie blogs in the category too which are a very very good read. Also on my most recommended Northern blogs list is www.newcastleeats.co.uk and foodiesarah.wordpress.com.

image

Thank you so much for reading and your support. It is very much appreciated! I will keep you posted on the results. I shall be keeping everything crossed until then!

39. Bagels Bagels Bagels! Polish Bakery

Bagels! Bagels! Bagels!

Bagels have been on my to bake list FOREVER! Inspired by a recent episode of The Great British Bake Off (new series and I’m guessing everyone else is totally addicted to it like me too?) I uncovered my wonderful (signed) copy of  Thoughtful Bread  ‘Bread Revolution’ for a recipe I could begin late one night. (I’ve even tweeted @thoughtfulbread to let them know I was baking from their book and got some lovely late night baking encouragement.)

We were treated to a short history lesson on bagels by the Great British Bake Off. Although they are more recently considered to be an American bread, they were originally brought from Poland to England and then on to America. They are typically Jewish Food with a wonderfully chewy crust from the poaching of the dough before the bake. (My favourite bit!)

Mixing up all the flour, salt, honey and yeast

A spot of late night preparation was in order to get this dough on the road. I mixed together the flour, dried yeast and a little salt to0. I ran out of strong white flour so made up the difference with brown strong flour, so these bagels were almost healthy too.

Add the water to get a sticky dough and stir!

Then to add the water. I had to add a little more water as I worked with the dough, probably due to the slightly drier brown flour I used.

Ready for some good kneading

When I started kneading the dough I was determined to reach the elusive ‘window pane’ stage where the gluten in the flour has become all stringy and elastic  and stretches out when pulled to create a transparent window when held up to the light in the dough. Alas after the allotted 10 minutes of kneading the rather tough dough by hand I was still windowless. A further 10 minutes of kneading (tracked by my faithful hamburger timer) and I was STILL windowless… I asked Chris to have a go with his brute strength and STILL no window. So I gave up comforted slightly that the dough had been kneaded at least twice as long as it was supposed to be and it did bounce back when prodded with my finger.

Me kneading on tip toes

I think I need lower work surfaces for bread making as I always have to resort to balancing on my tip toes to get the full impact of the kneading…

proving time

I left the ball of dough to prove and double in size over night in a greased bowl covered with greased cling film. Et voila! The next morning I awoke to beautifully risen dough.

Beautifully risen dough

Punching it back I kneaded it thoroughly again (it’s a good job I do yoga press ups!) dividing the dough into 12 (equal-ish) portions I left it to rest for 5 minutes whilst I arranged the next stage. Water bath!

12 chunks of dough

Taking my largest soup pan I filled it about half way with water from the kettle.

Stage 1: The dough sausage

Then to shape the bagels. I tried a few different methods to see which worked best and I think I prefer the traditional method. Roll a long sausage about 20 cms long) of dough and shape it into a circle.

Stage 2: shape into a circle

Fold the loose ends together and squash them together.

Stage 3: Fold the loose ends together

Then put your hand through the ‘hole’ in the centre and roll the join together until the two ends are firmly merged. Then if required roll the rest of the dough ring in the same way to even up the dough and shape it into a bagel.

Stage 4: Squash the loose ends together

The other method is more modern and maybe slightly quicker. Where you shape the dough into a ball, flatten it, poke your thumb through the centre and then whilst holding the dough in your palm squeeze around the dough to widen the hole and shape the dough into a bagel.

I used for each bagel? Poor dough ring on the right is a bit more of a bagel bracelet

Once shaped the bagels need to prove for about 30 minutes under a damp tea towel or greased cling film at which point you can start to warm up the oven and water so it’s simmering nicely.

If you want to add flavouring to your bagels you can add toppings like sesame or poppy seeds after the poaching stage, but if you like your bagels fruity on the inside (like me) then you will have to add your chosen flavour before you shape the bagels. I chose to make half savoury and half sweet.

pre soaked dried fruit, apple, cranberries and raisins

I pre soaked some dried fruit, raisins, apple and cranberries overnight in a little boiling water with a dash of cinnamon. Drained off the excess water and folded in a teaspoon (or 2) of the fruit along with an extra sprinkle of cinnamon into the dough before shaping it.

Step 1: Filling the bagel

It makes the bagel a bit unpredictable with spots of fruit poking out all over the place but I found if I sealed the fruit into the dough and then shaped it, it was a little easier.

Step 2: folding in the edges to make a fruit pouch. Sealing the edges together

Step 3: roll into a dough sausage and follow the stages above to shape the bagel

Then all you have to do is plonk the bagels into your pan of simmering water for 2 minutes (turning them over half way through for an even poach).

Bagels in for a swim

The bagels do expand slightly so don’t over fill your pan, do them in batches so they have room to breathe.

Ever increasing circles

Then out of the pan an into the oven! I used my Nana’s slotted spoon to scoop the bagels out and drain off the water. Then gently pop then onto a lined baking tray (sprinkle on your choice of topping while the bagel is wet) and into the oven they go.

Ready for the oven

This means you can have a continuous run of bagel poaching and baking until all of your bagels are baked. However this meant I was waiting for my breakfast for almost 2 hours. I ended up devouring 2 hot bagels and butter straight from the oven and they did not disappoint! Hot and buttery they were just what I needed.

Fruity Bagels in for a swim

They are definitely easier to split down the middle when they’ve cooled a bit though. The plain bagels were easier to eat and even better toasted too to give an even crisp coating and chewy soft centre. I LOVED this bake. You know you’re making something special when it takes a bit more effort and skill.

Bagels! Hot from the oven

The fruity bagels were a little more moist in the middle, but this is what I had expected. You can’t put fruit into a bagel without adding a bit of moisture.

bagel splitting

Perhaps in the future when I think they’re baked I might also turn them over and return them to the oven for a few more minutes just to ensure the bagels are baked evenly. As I did find that the bagels were quite wet when they went in the oven so they were slightly soggy when they came out of the oven, but a lot of this moisture dried as they cooled (and I guess adds to their chewiness.)

Bagel goodness

I would also add more cinnamon to the bagels as they weren’t quite cinnamony enough for me. All in all a very good bake and I’m adding this to my baking repertoire now!

Bagel sandwiches

Things I used to make this recipe:

Lovingly adapted  from Bread Revolution by the Thoughtful Bread Company

  • 375g strong brown flour
  • 375g strong white flour
  • 3 tsp fine sea salt
  • 2 tsp dried yeast
  • 375ml warm water
  • 7 tsp honey
  • additional strong white flour for dusting the board

Fruit filling

  • A bowl full of dried fruit (cranberries, raisins, dried apple)
  • cinnamon

Optional Toppings

  • I used sesame seeds and just sprinkled enough to coat the bagels on each one
  • You could use anything such as poppy seeds, sunflower seeds,

Cath Kidston Flour Sifter – so handy when you’re covered in sticky dough

The Hamburger Timer – so handy for timing all those batches of bagels

36. Wiltshire Lardy Cake – Let Them Eat Lard! – 18th Century Clandestine Cake Club – EAT Festival

Wiltshire Lardy Cake at the Clandestine Cake Club

Lard in a cake? Sounds vile doesn’t it? I’ve always been perplexed by this notion of animal fat in food. Long gone are the days when we made Yorkshire Pudding with blisteringly hot fat and yet we still use butter and such like in all our cakes which I guess is a tad more appealing than pork blubber.

Wiltshire Lardy Cake

I purchased a pack of lard to bake some Chinese cakes but never found the right occasion to bake the Lardy beauties. I was greatly amused in my favourite Chinese Bakery to see little signs in front of some of the buns proclaiming “I contain lard”. Like they were sharing a guilty secret with us. This was another case of serendipity,  me having the perfect random ingredients required to bake something unusual for a very special EAT Festival Clandestine Cake Club.

Clandestine Cake Club – 18th Century Cakes – note the oranges and cauliflour!

The theme was 18th century cakes. (It’s harder than you would think to find a genuine 18th century recipe online.) A bit of research/googling later I realised in the 18th cake was spicy (the spice trade was blooming) and mainly contained readily available ingredients such as Lard and yeast!

I reverted back to good old Marguerite Patten and found Wiltshire Lardy cake. A very traditional English recipe. (I realise I’ve baked A LOT already from England but I promise to be more exotic again soon.)

Marguerite instructed me on making a basic yeast dough. I could tell how authentic (and genuinely old this recipe is as it uses the measurement ‘gill’ I have never heard of this before and it took a bit of deciphering!)

Now attempting to follow a recipe and instructions located in 3 different sections of a book is sure fire way to get me to make mistakes. I did not fail. Was it the late night baking efforts or my recipe coordination skills that are lacking?! Probably a bit of both!

The Food Processor did a wonderful job of distributing the yeast and rubbing the butter into the flour. Saved me a job!

The recipe instructed me to make a yeast paste. I ignored this as I know dried instant yeast doesn’t need to be mixed with liquid first. If I was using fresh yeast (which is a bit more difficult to find these days and more tricky to encourage) I would have followed the recipe to the letter, using blood temperature water and whatnot. With the instant yeast all you need to do is chuck it in with the flour and give it a stir to distribute it throughout. Simple.

Proving Time

After creating the basic yeast dough and leaving it to prove I fully embraced the lard. The technique required is very pastry like and it requires a little planning and preparation.

I set out my;

– glass work surface protector on top of a damp tea towel to hold it in place
– rolling pin
– flour for dusting
– lard
– spices, sugar and dried fruit

Proven Dough

Pastry is not my strong point I’m unashamed to admit. I’ve only tried to make flaky pastry once and I shed a few tears over the sheer effort and complicated origami folding required. It was distinctly lacking in flakes too after all the hard work!!

To start with the dough needs to be knocked back and kneaded gently to distribute the yeast and warmth again. Then on a floured board it needs a good flattening with the rolling pin. Roll it into a rectangle.

Rectangular Rolling and dotting of LARD

Then to dot dollops of lard all over, (but leaving the final third empty)! I was in the throes on smearing the distinctly stinky lard in dots onto my flattened dough and crazily folding it into envelope shapes when Super Hans (the cat) joined me wailing for a bit of lard.

One Fold

Two Folds

Seal the edges with the rolling pin

Roll it out and repeat!

Turn clockwise and roll into rectangle

The animal fat smell most surely lured Super Hans into the kitchen. Is this a good sign?! I guess if it’s good enough for the cat to eat it’s good enough for me. Lard most certainly passes the Super Hans taste test. However a wailing cat is not conducive to pleasant baking experience…

Super Hans the noisy Cat. He enjoys a nice bit of lard.

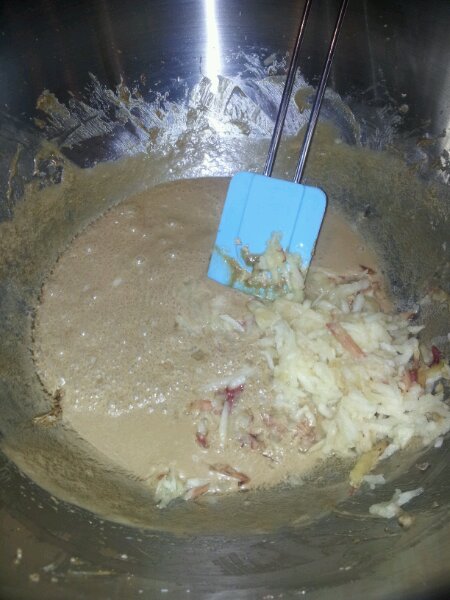
I merrily proceeded to fold the dough up as required and smeared all the lard into it, then returned to the Lardy Cake recipe to discover I was supposed to have folded the fruit and spices into the dough along with the lard! Damn. Back to the rolling pin and floured board for me to fold in the remaining ingredients. My Lardy dough had a very through folding and rolling! It is a bit more difficult to roll dough when it has dried fruit sandwiched in it, but don’t despair if a few raisins pop through. I think it gives it character.

Folding (again) this time WITH the sugar, fruit and spices!

Folded and ready to be rolled with fruit, sugar and spices

Rolled out and ready to be folded again

Second half of the fruit and sugar and yet more folding!

Another fold (don’t worry the fruit is going to peek out in places!)

This Lardy cake definitely has ‘character!’

I was very lucky that my friends Jill and Jonny brought me back some amazing spices from their Indian Honeymoon including some cinnamon bark, which I whizzed up in my spice mill on my food processor. It smells AMAZING, much fresher then my normal ground cinnamon. I added rather a lot of my Indian spices to the sugar mix.

Hand Shaped chunky lardy cake

Once I had folded everything into the dough, it needed to be shaped and coaxed by hand into a chunky square. I plonked the square dough into a round, greased and floured cake tin. Then to squash the dough into a round, ensuring there are no gaps along the edges or on the base of the dough to avoid any holes in the cake. It needed a bit more time to prove and then into the oven!

Squashed-into-a-cake-tin Lardy Cake

While it was baking away I prepared my glaze to pour over the cake as soon as it came out of the oven.

Just Baked – Wiltshire Lardy Cake

I was very nervous taking this cake along to the Clandestine Cake Club as it wasn’t as pretty as the other 18c cakes, which included a Wedgewood Iced Pepper Cake (beautiful!!), a basket of oranges! (marzipan encased chocolate and ganache cakes! So very realistic!) and I brought along LARD!? I made sure I sampled my cake first in case it was horrid and I needed to remove it from the table. But I was very pleasantly surprised.

Post Glaze – Just Chilling – Wiltshire Lardy Cake

It actually tastes rather nice. It’s a distinctly brown cake. The sugar glaze adds a nice crunchy texture and the lard (dare I say it) gives the cake a slightly savoury feel, a little bit like the Herman the German Cake. I couldn’t see any layers despite all the meticulous folding but perhaps I messed that up with my accidental double folding and rolling. I’m not entirely sure it’s supposed to result in layers either! Marguerite doesn’t really go into that much detail.

A sideways glance of Wiltshire Lardy Cake – No layers in sight but plenty of fruit and spice

But as you may realise by now I am a sucker for a fruit cake and this ticks all my boxes, fruity, spicy, sugary. It’s always the way isn’t it? The things that are the least healthy, taste the best!

A fine selection of 18th Century Cakes

The Clandestine Cake Club was held in the Alderman’s House, which is absolutely beautiful. I’ve walked past so many times and it is only open on special occasions. It was perfect for our 18th century cake feast. As it was part of the EAT Festival we had additional guests to entertain with our cakes. It was a fabulous atmosphere with lots of tea flowing, cake demonstrations and sugar craft too. I’m looking forward to our next meeting in August.


Alderman’s House – Clandestine Cake Club

More Clandestine 18th Century Cakes


Rose cupcake decorating – look what I learnt!

Wiltshire Lardy Cake

Ingredients

Plain Yeast Dough

  • 12oz Plain flour
  • Pinch of salt
  • 1oz margarine
  • 1-2oz sugar
  • 1/2oz fresh yeast or 14grams instant dried yeast
  • Approx 1and ½ ‘gills’ tepid water, milk & water or milk (7.5 imperial fluid ounces or 213ml)

If using fresh yeast…

  1. Cream the (fresh yeast) yeast with a tsp of sugar
  2. Add tepid liquid and a sprinkling of flour
  3. Put into a warm place until sponge ‘breaks’ through

If using dried yeast ignore these 3 steps above and add instant dried yeast directly to the flour at this point

  1. Sieve flour and salt into a warm bowl
  2. Rub in margarine and add sugar
  3. When ready work in the yeast liquid and knead thoroughly
  4. Put into a warm place to prove for about 1 hr until it doubles in size
  5. Knock back and knead again until smooth


Lardy Cake

  • 4 oz Lard
  • 4oz Sugar
  • 4oz dried fruit
  • Little spice (mixed spices, cinnamon, ginger, cardamom,)
  1. Roll our the plain yeast dough into an oblong shape
  2. If it’s a bit sticky flour the board well
  3. Divide the lard and sugar into 2 equal portions, cutting the lard into tiny pieces
  4. Dot  half the lard onto the all over the dough and half the sugar and fruit, with a light dusting of spice on to the dough
  5. Fold in the same way as for flaky pastry
  6. Fold the dough over one third at a time, closing it like an envelope.
  7. Seal the edges by pressing it with the rolling pin
  8. ‘Rib’ the dough with the rolling pin. (Press the rolling pin into the dough lengthways to create ridges equally spaced across the dough)
  9. Turn the dough clockwise and roll out flat to a oblong shape
  10. Add flour as required to prevent the dough sticking to the board
  11. Re-roll the dough and repeat with the remaining lard, sugar, fruit and spice
  12. Fold again and roll into a neat square or oblong shape
  13. To fit into a 7 or 9 inch tin
  14. If using a round tin mould the dough with hands to the required space
  15. Put the mixture into a warmed, greased and floured cake tin, making sure it comes no more than two thirds of the way up the tin.
  16. Prove for 20 mins in a warm place
  17. Bake in the centre of a hot oven (425-450F or Gas Mark 6-7) for 15 mins
  18. Lower heat to 375F/Gas Mark 4 for 20-25 mins
  19. Either dust the cake with caster sugar when cold or brush with glaze when hot (1 tablespoon sugar and 1 tablespoon water)
  20. Enjoy with a big cup of tea and revel in the lardy glow

Running Wild With Raw Almond Butter

image

Apparently it’s very easy to make your own Raw Almond Butter and it’s supposed to be really good for you. (Especially, if like me, you’re training to run half marathons.) I had to give it a whirl.

image

Perserverance is the key to making your own almond butter. It should only take 10 minutes of whizzing up almonds in a food processor to produce wholesome wonderment… However an hour later my head and ears were buzzing from the incessant food processor screeches and I was getting a bit annoyed.

image

You may remember that in my wisdom this year, I have decided to run The Great North Run (all 13.1 miles of it) to raise money for Oxfam.I am trying my best to train as much as possible to gradually reach my target distance, but a few niggles have made the path to fitness nirvana rather steep.

So far I’ve;

  •  Been chased and bitten by an overly excited dog

image

  • Been pursued by cows (Please note cows seem to like red running tops)
  • Bruised my spine running with my haversack on after work (Note: do not attempt to run home wearing a pair of cowboy boots and a jar of jam on your back)
  • Bought and broke 2 running haversacks
  • Cut my collarbones (see the previous statement)
  • Developed shinsplints and rhinitis
  • Endured 4 ice baths to ease the shinsplints! (For those unfamiliar with the extreme pleasure of an ice bath they are best enjoyed with your pants ON, a cup of tea, almond butter toast and wearing a hoodie)
  • Entered (and completed) 3 competitive races!
image

with more races still to come… Gateshead 10k

  • Cut my toes and didn’t even notice (perhaps this is what people mean when they talk about ‘getting into the zone’?!)
  • Purchased a running wardrobe. (There’s a lot of fluorescent pink in there now.)
  • Eaten an inordinate amount of cake (running makes me hungry!)
  • Developed muscles I didn’t know I owned
  • Practiced a lot of yoga to stretch out those weary muscles…
image

Carpet Yoga (note Super Hans’helping’ in the background)

Yet I’m undeterred! In fact I’ve even threw myself in at the deep end. Running in the UK monsoon conditions, which others may call ‘the Summer’, with my eyes closed as it’s too difficult to keep them open (perhaps this is a talent that I didn’t know I possessed?) and an all terrain 10k trail run.

image

A spot of flash flooding up North to keep us on our toes

Almond Butter, promised me a miracle. It’s a high protein food that is full of Vitamin E and supposed to help prevent sore muscles and ease my aching legs! Hurrah! AND I had a bag of almonds already in the cupboard. It had to be made.

I threw a 200g bag of almonds (with their skins on) into the food processor and turned it up high. It wasn’t particuarly happy with this challenge, but with a little encouragement it ploughed through the almonds.

image

Looking like ground almonds

About 4 minutes in (and a bit a scrapping down the sides of the bowl)the almonds looked like ground almonds, the kind you would use in macaroons. So you could make your own ground almonds from scratch too if you wished.

The instructions said to keep going and blitz them up as much as possible. About 10minutes in the almonds should ‘release’ their oils. This means that the almonds should then ball up in to a nice big lump of almond butter.

image

Looks like the oils are being ‘released’ -scrambled nuts

However mine did not. It just kept looking like scrambled eggs made out of almonds and sticking infuriatingly to the bottom of the bowl. I religiously scraped the bowl with my spatula to ensure all of the almonds were getting an even blitzing, so much so my spatula got a bit sliced up on the blade and had to go to spatula Heaven. RIP trusty spatula.

image

Adding coconut oil and honey – starting to come together….

Apparently you probably don’t need to add any oil to the mix as the almonds have enough oil to suffice. However I couldn’t get mine to stick together so I gradually added coconut oil, another super running food full of energy and good stuff (I clearly known my science stuff here) to help with those extra miles, until I got it to more of a paste like consistency. I also added a good slosh of honey to sweeten the mix, tasting it as I went to make sure it was to my liking.

Eventually I realised that I wasn’t going to get a peanut butter smoothness or glossy texture so I declared my Almond Butter done and popped the lot into a jam jar, ready for my pre run toast.

It is a little on the dry side and almost savoury (maybe I didn’t add enough honey or oil?!) but I quite like it. It doesn’t have any preservatives in it and it almost tastes healthy. You could use rapeseed oil or any other oil that you prefer too.

As it contains no preservatives, it needs to be stored in the fridge as the almond oil may go rancid. However the honey may help to preserve it as it’s the only natural substance that does not go off!

I’m going to see if I can incorporate my Almond Butter into some international baking too, but for now I’m going to just enjoy it on toast and spread on various fruits and vegetables too. Or if I’m feeling particularly lazy (or in a hurry) I might save myself the effort and chew on a handful of almonds instead…

The Final Product! Raw Almond Butter

Things I used to make my Raw Almond Butter

  • 200g of whole almonds with their skins on
  • A liberal splash of coconut oil (any oil would suffice)
  • Runny honey ( 1 to 2 tbsp)
  • A Strong Food Processor