
If you suggested that I put chocolate, coffee and onions into a loaf of bread a year ago I would have probably checked if you were feeling ok. It sounds vile doesn’t it? But then often the most unexpected ingredient combinations produce the most interesting results. Intrigued by the traditional Russian Black Bread I stocked up on espresso, caraway and fennel seeds ready for this strange bake.

Russian Black Bread
I was not disappointed. This is an extremely flavoursome and dark loaf. I found this recipe originally in a Jamie Oliver magazine but adapted it (as per usual) to fit my ingredients. It was supposed to be for 2 loaves. As I was expecting this bake to be a bit on the odd side, I wasn’t convinced that I could consume 2 entire loaves of it. So I scaled it down. (Feel free to double the ingredients if you would like to stockpile Black Bread.)
Who wouldn’t love a slice of Russian Black Bread?
Considering how much sourdough bread I’ve been baking recently I have transferred some of my newly acquired bread skills into this bake as I like to split my bread baking into manageable chunks to fit in around work and enjoying life. Using the fridge to prove my dough overnight is a great help. This means the flavours develop slowly and deepen. it also makes the dough easier to handle, especially if the dough is a wet and sticky or enriched with butter. Fridge proving produces a firmer more pliable dough, that needs very little kneading! Result!
Russian Black Bread Recipe
- 7g instant yeast
- 1/2 tsp sugar
- 2 tbsp/70g treacle (molasses)
- 40g butter
- 40ml espresso
- 13g dark chocolate (at least 70% cocoa)
- 350ml water
- 2 tbsp cider vinegar
- 30g strong wholemeal flour
- 200g strong white flour
- 200g rye flour
- 70g bran
- 10g salt
- 1 tbsp caraway seeds
- 1/2 tsp fennel seeds
- 1 small shallot (diced)
- * approx 100g Rye Flour (you may need more or less) to help bring the dough together if it’s too sticky when kneading
Russian Black Bread Method
1. Heat butter, espresso, treacle, and water in a pan until butter is melted
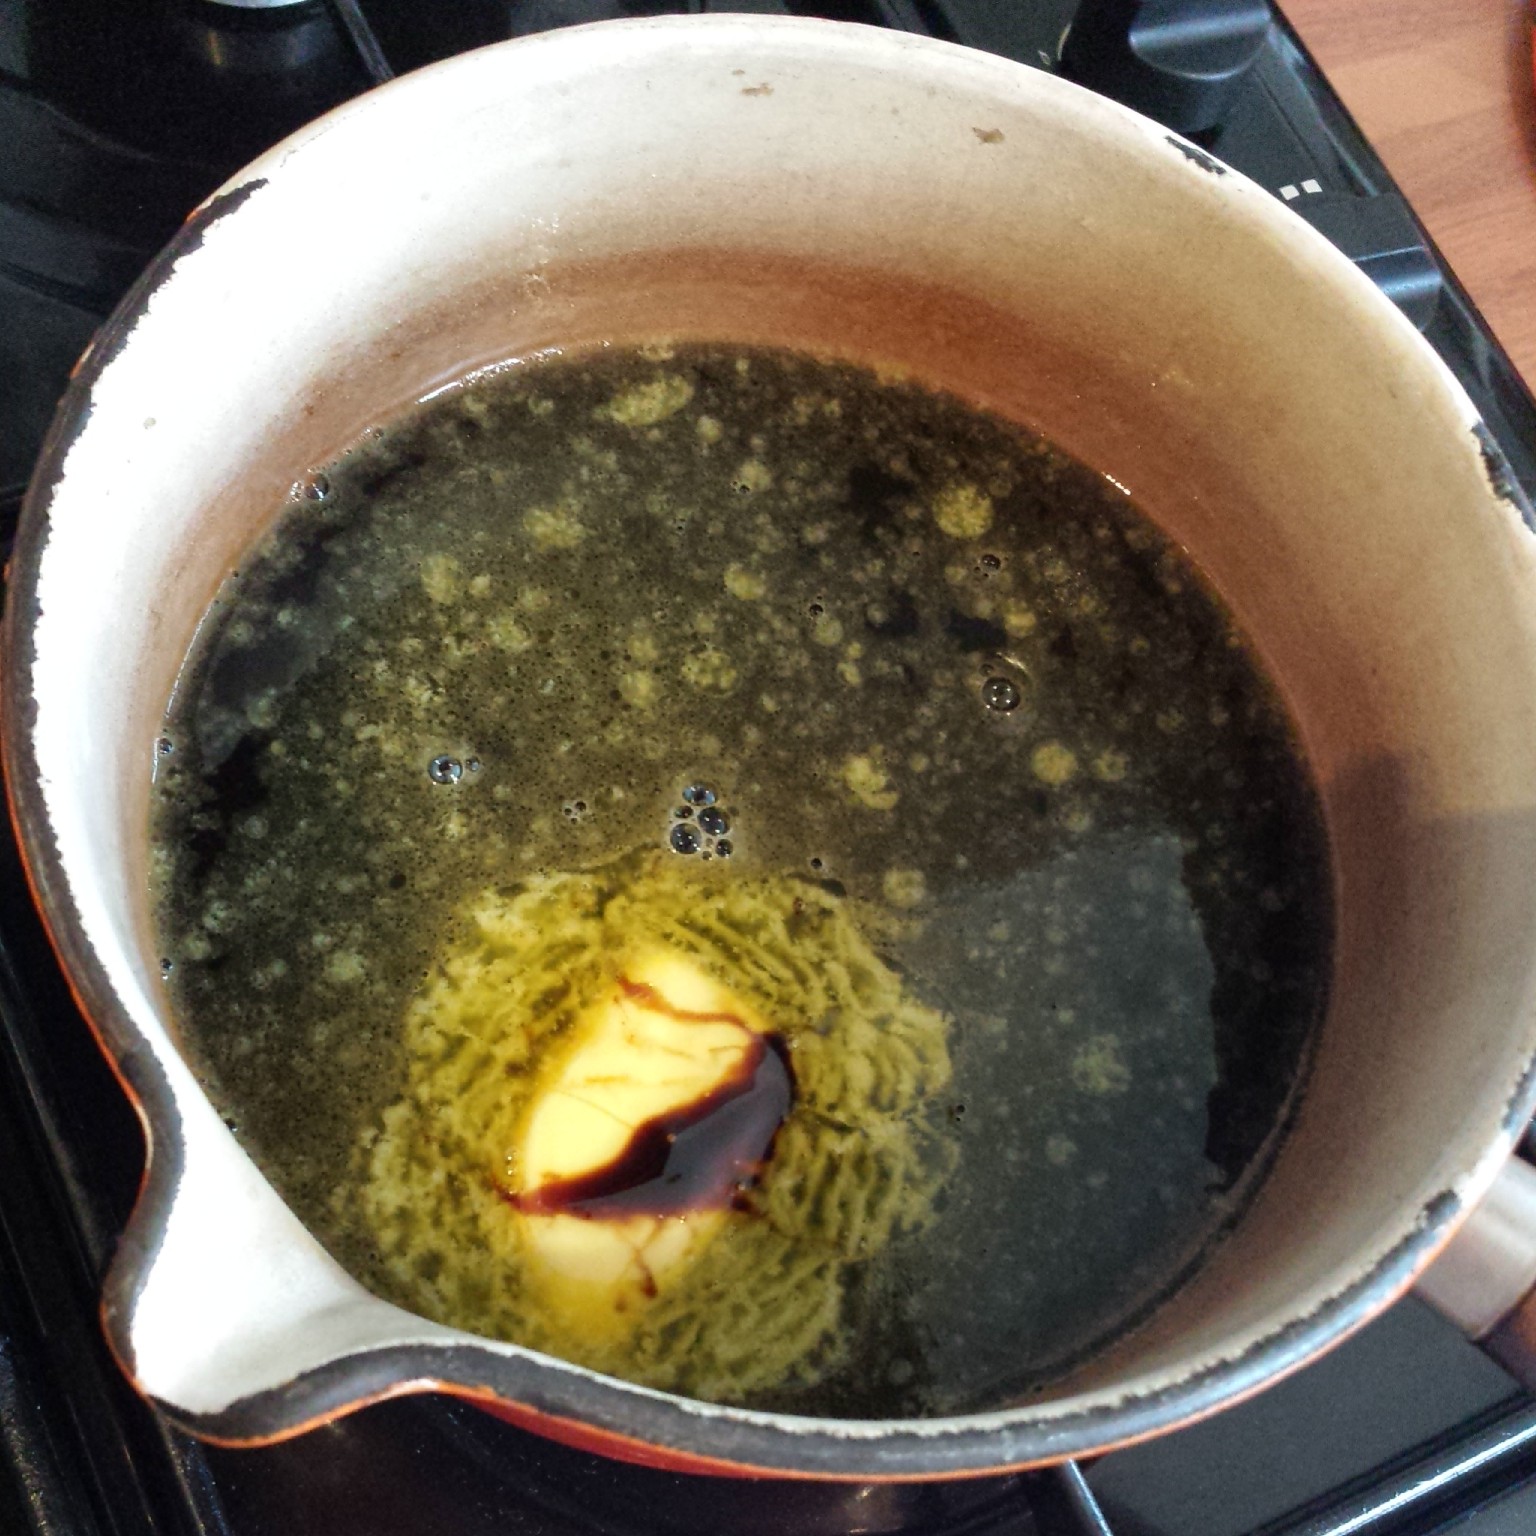
Heat butter, espresso, treacle, and water in a pan until butter is melted
2. Add cider vinegar
3. Measure all of the yeast, flours, bran, salt, sugar, diced shallot and seeds into a large bowl.
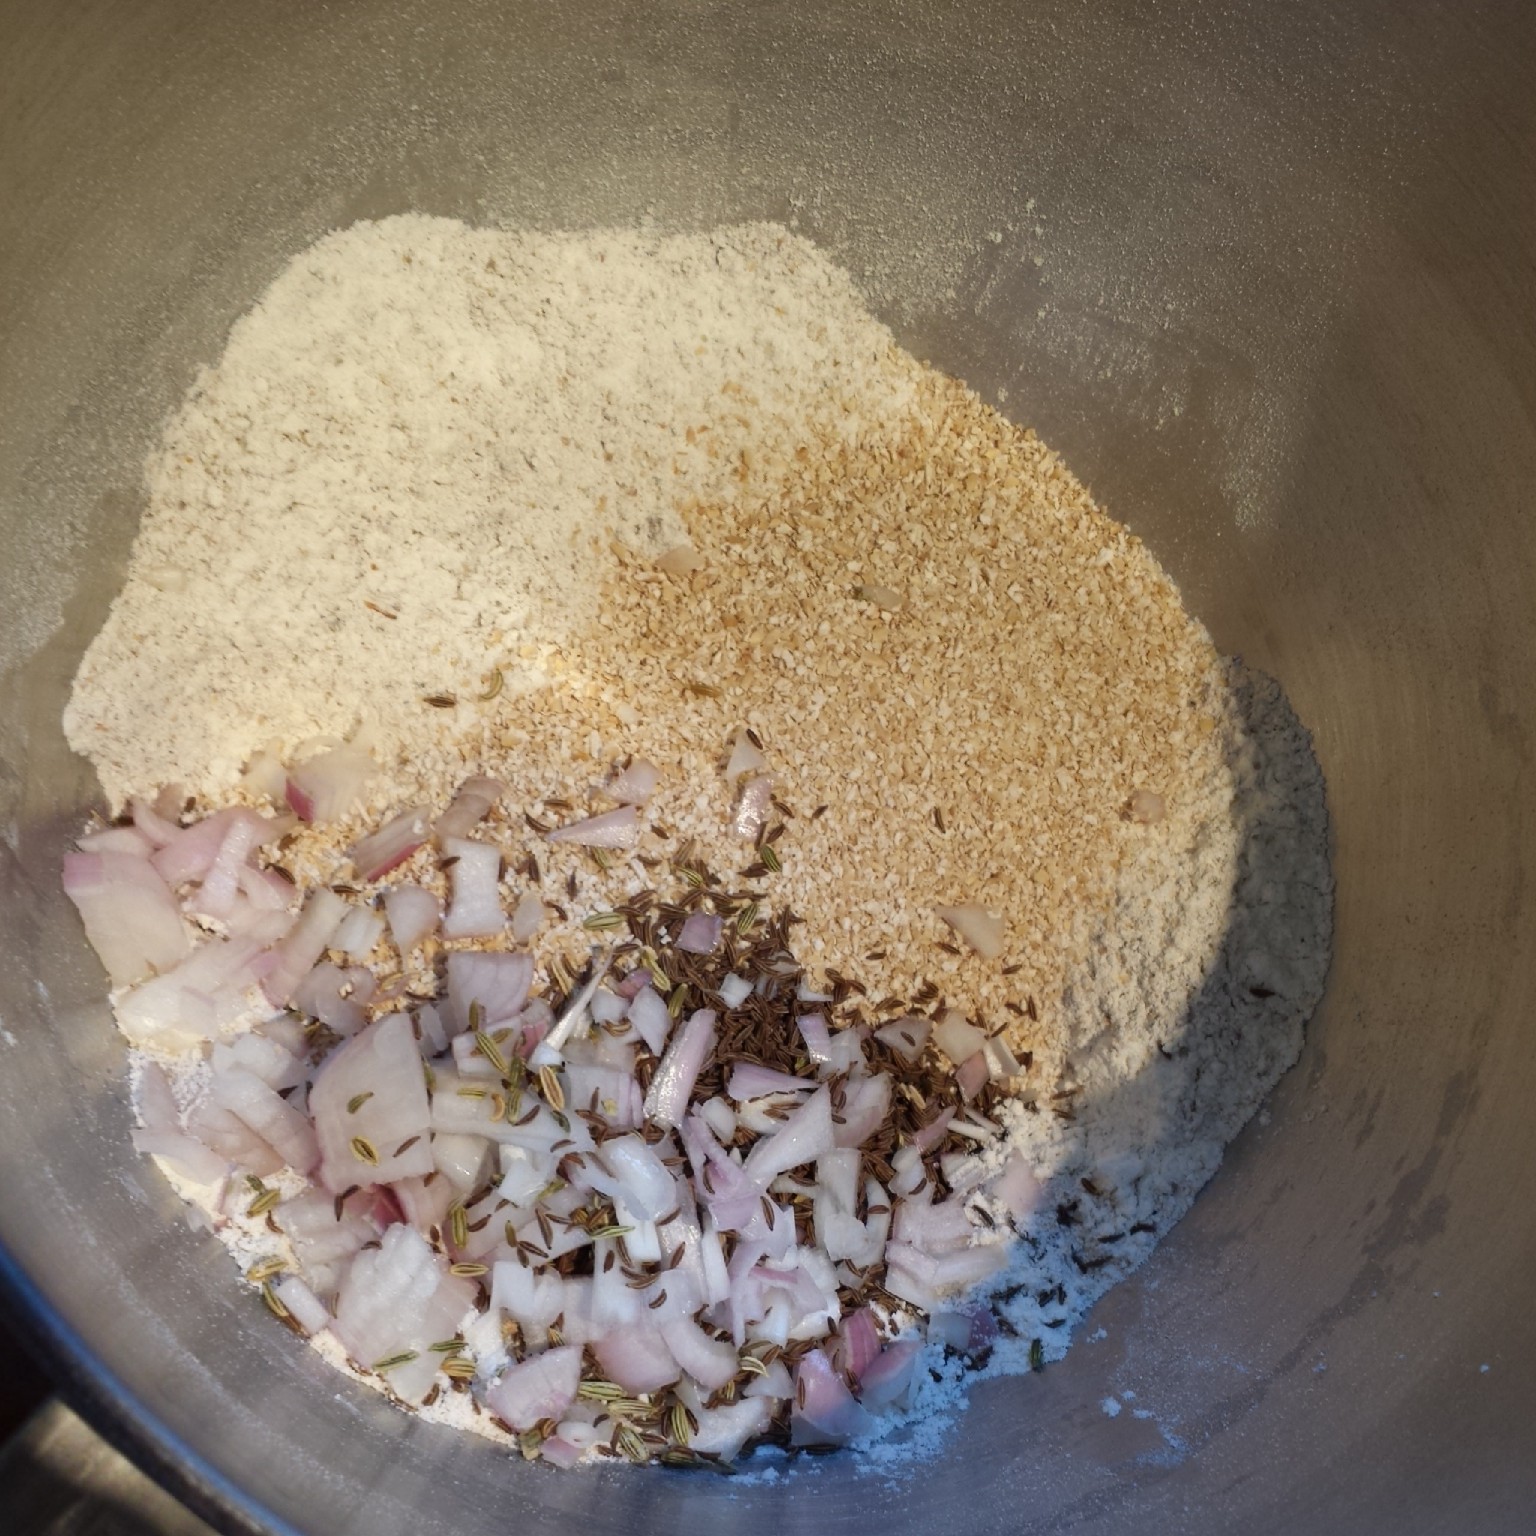
Measure all of the yeast, flours, bran, salt, sugar, diced shallot and seeds into a large bowl.
4. Pour in the chocolate liquid and mix together either with a wooden spoon or electric mixer. You may not need to add all of the liquid, or if the dough becomes too sticky, gradually add a little more rye flour until it comes together into a ball, (or a slightly less sticky mess.)
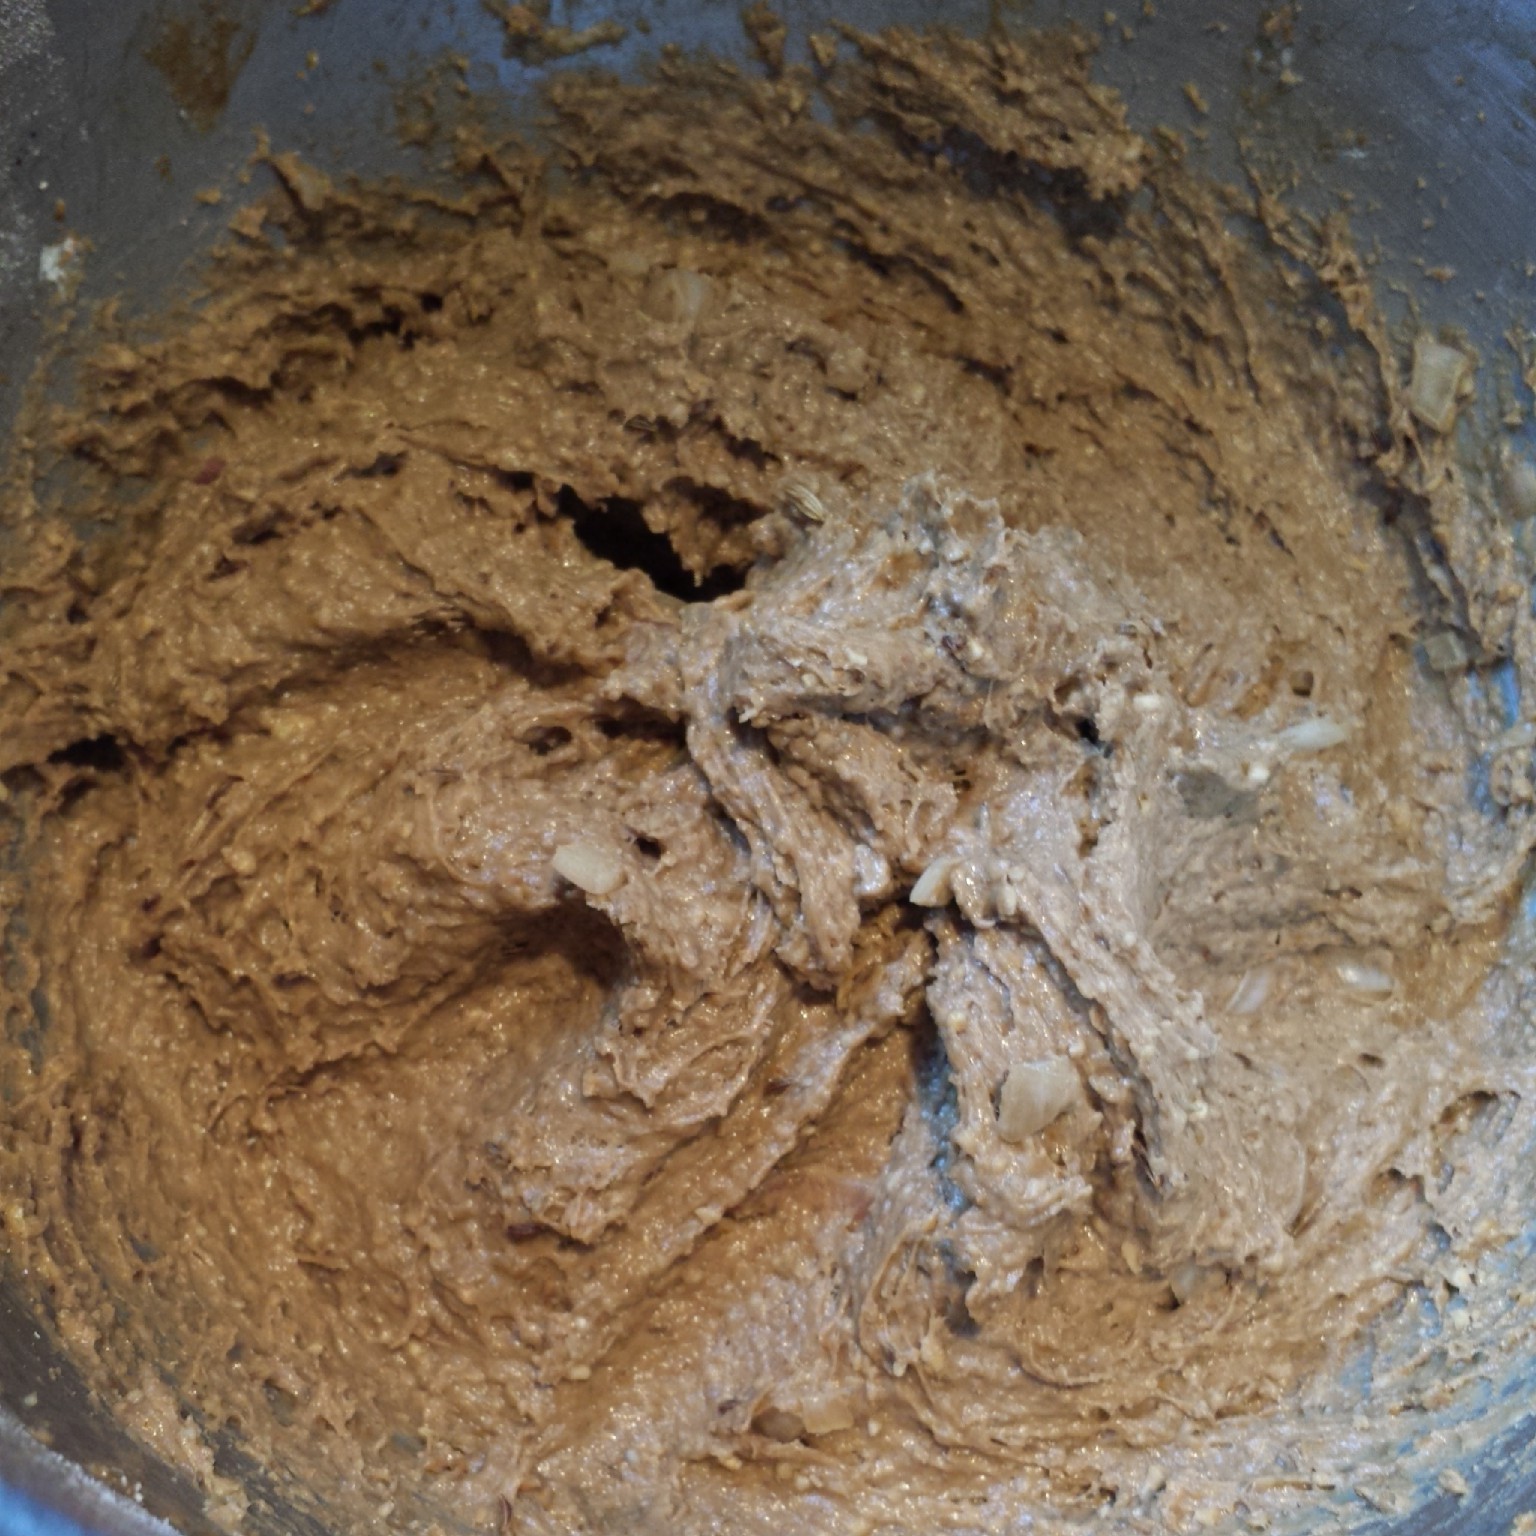
Mix the wet and dry ingredients together, adding more flour as necessary before kneading for 10 minutes
5. Knead for 10 minutes (by hand or using an electric mixer – I used my Kitchenaid dough hook).
6. Cover your dough in a large bowl with cling film and prove either overnight (up to 24 hours) in the fridge or at room temperature for 1-2 hous until it’s doubled in size.
7. Knock back the dough after it’s first prove. Knead it on a lightly floured surface and shape into a smooth ball
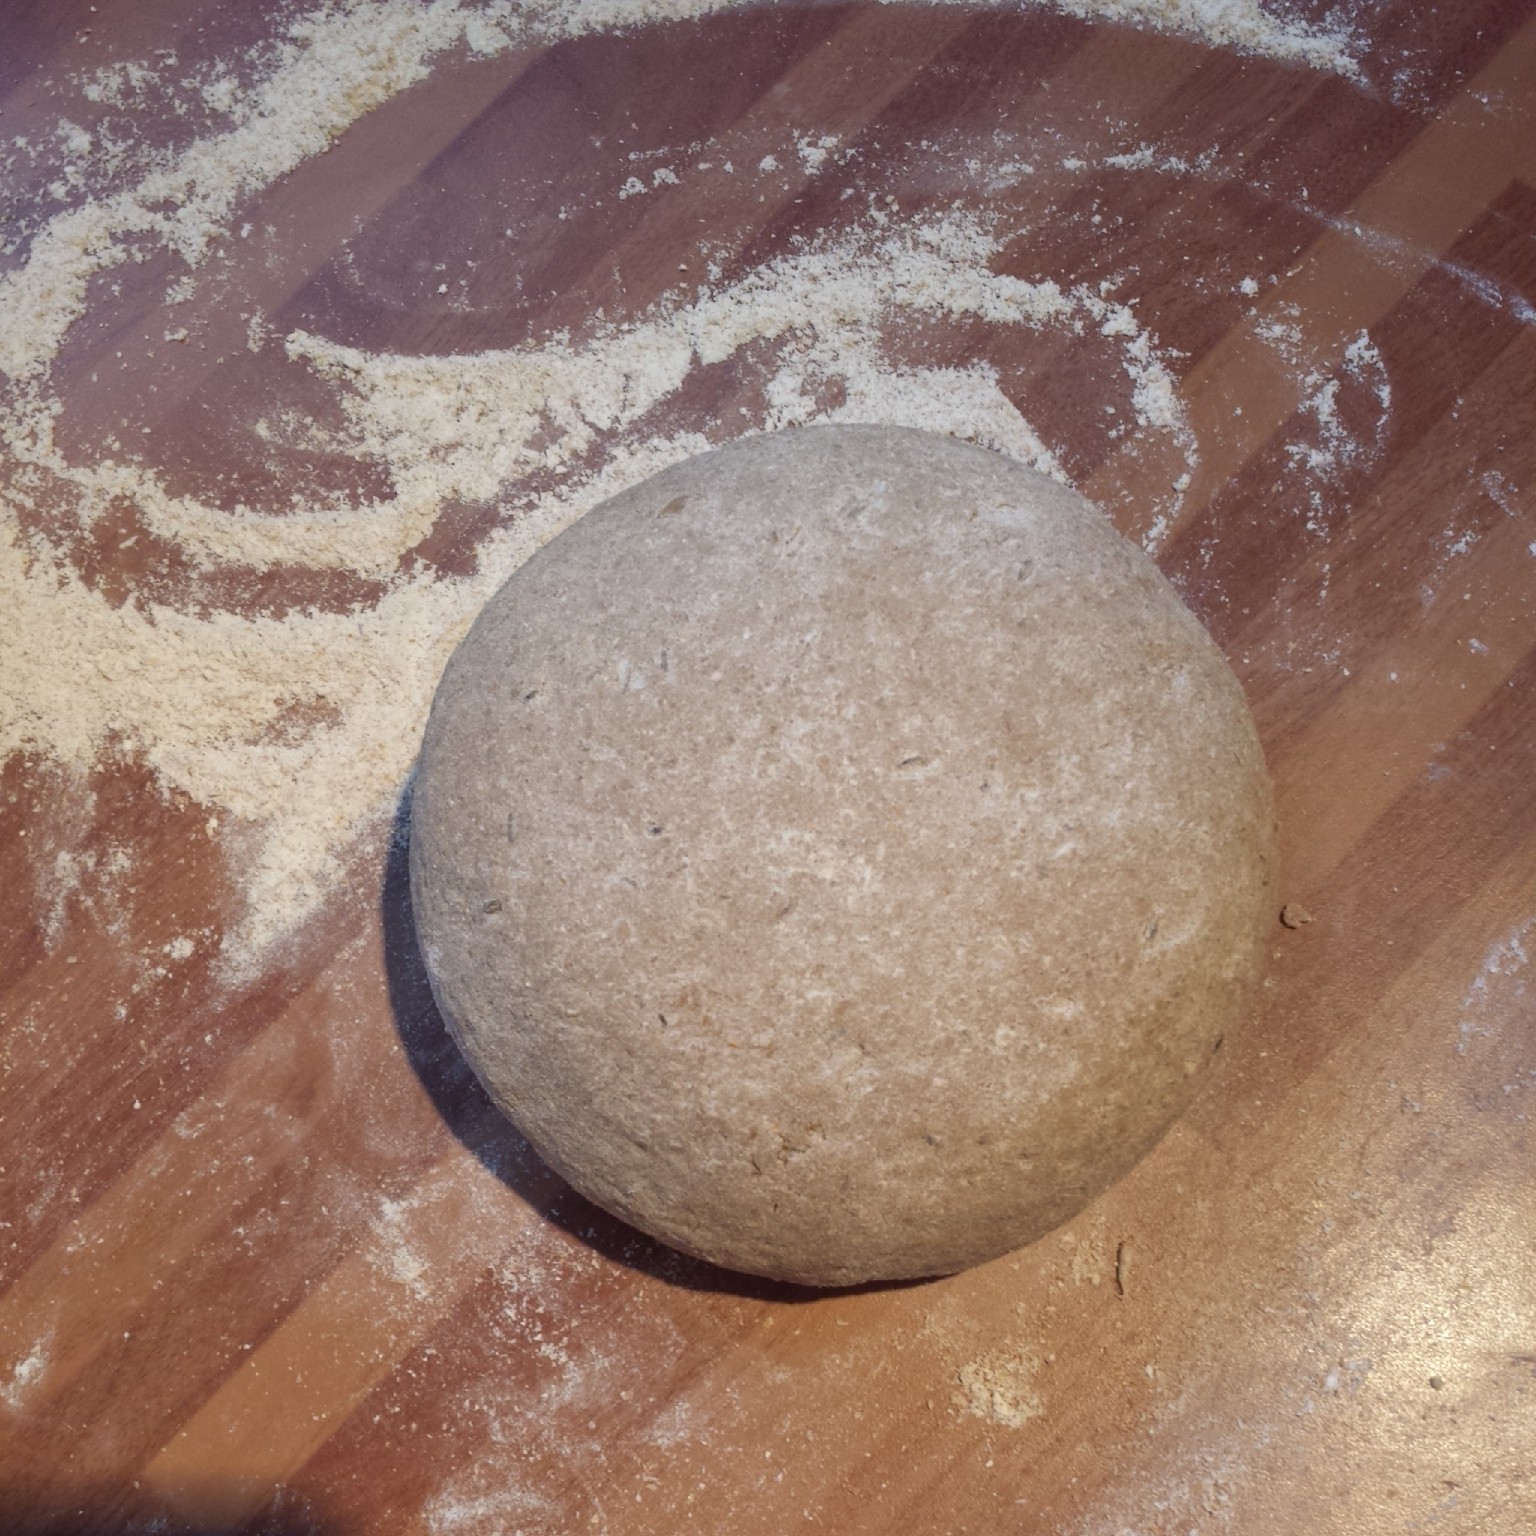
Knead it on a lightly floured surface and shape into a smooth ball
8. You could prove it directly on a baking tray if it’s firm enough so it won’t spread too far. I wanted to make mine pretty so I proved it in my round banneton basket, which I coated with wholemeal flour first.
9. Cover your loaf with a shower cap or oiled cling film and prove for 2 hours at room temperature.
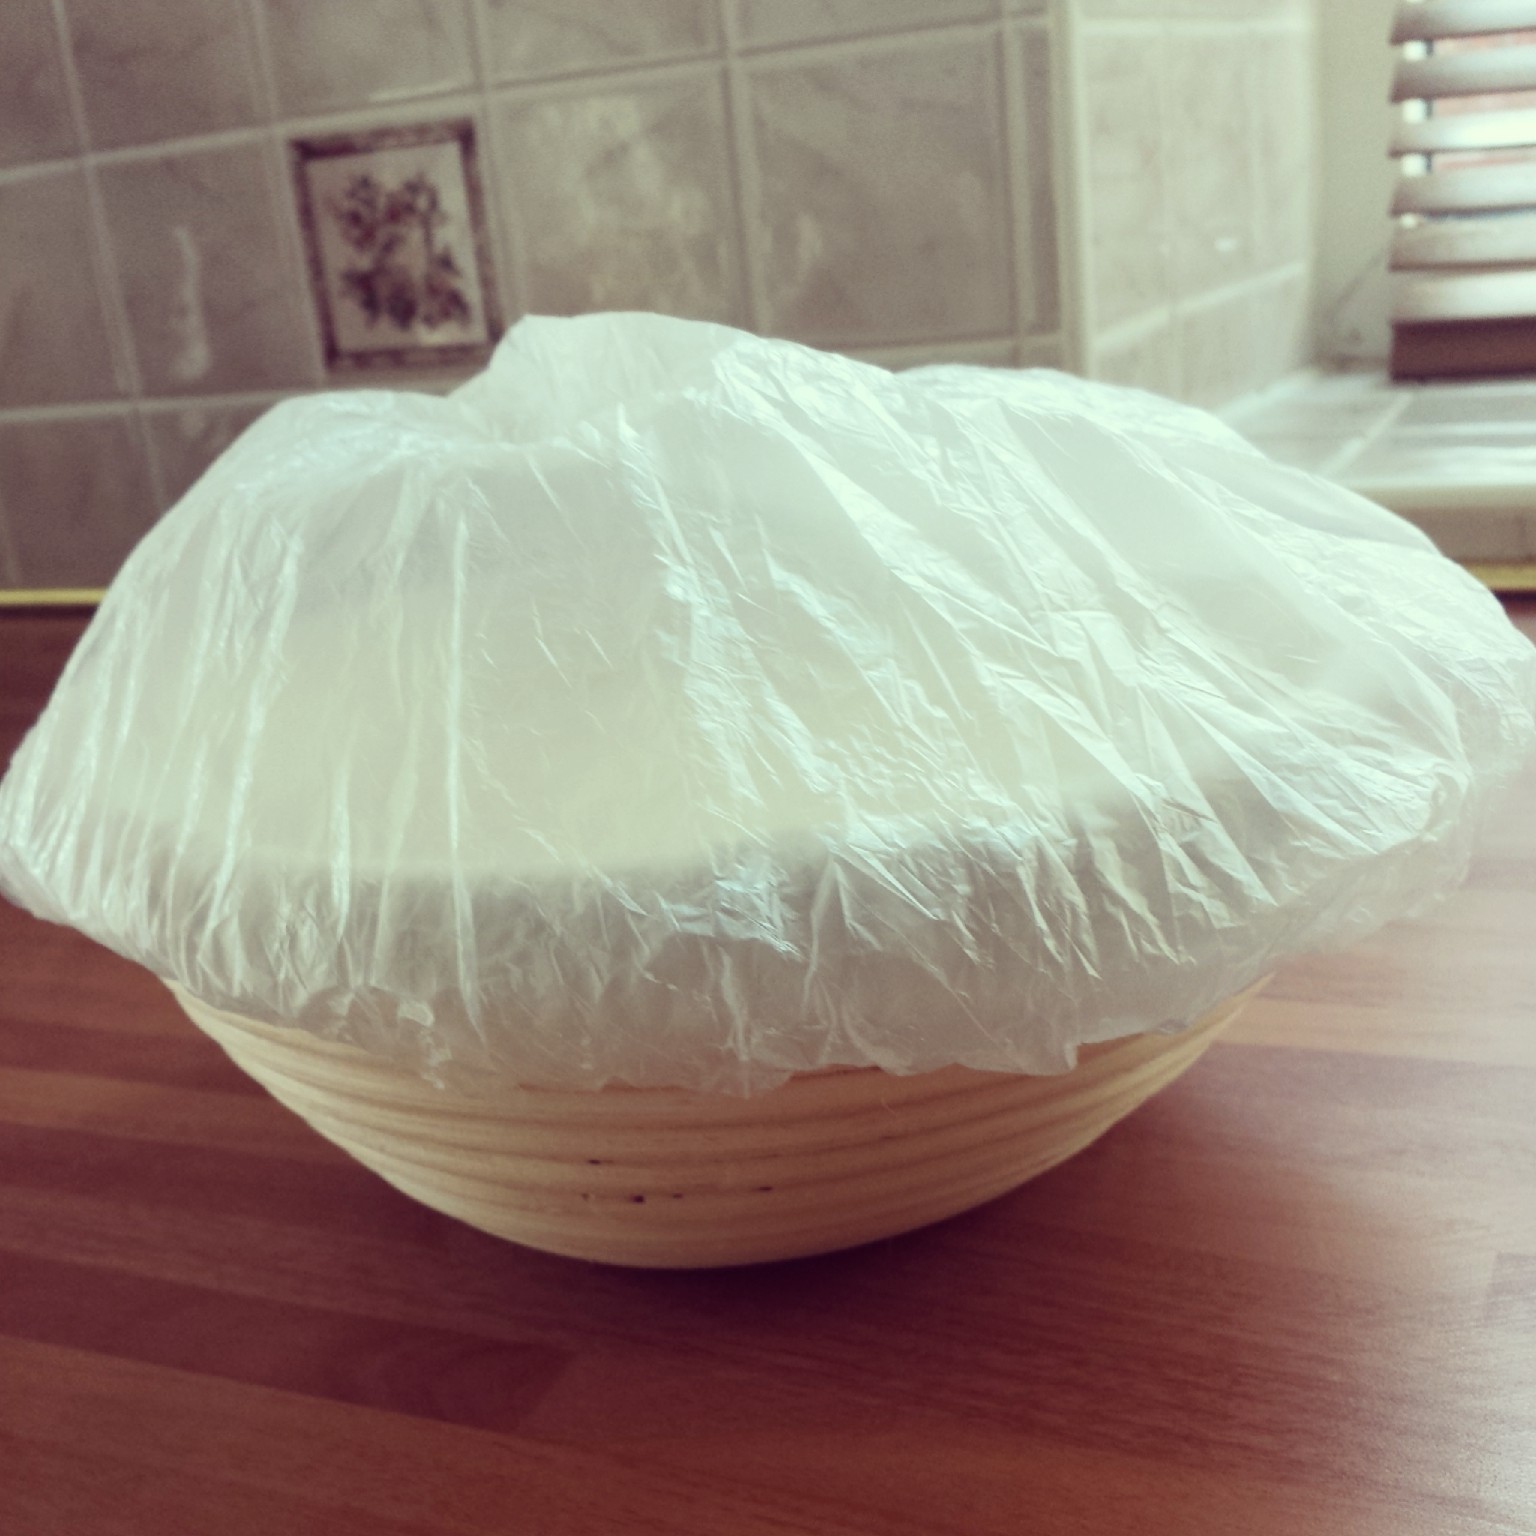
Ready to prove in the fridge over night or at room temperature for 2 hours
10. Pre heat the oven (and a casserole pot with a lid) 30 minutes before the end of your loaf proving time at 250 degrees C. (See the Hot Pot sourdough method for more details)

Second prove done. Ready for baking!
11. Sprinkle the bottom of the hot casserole pot with ground semolina and gently tip the proved loaf from the banneton into the hot pot. Use a razor blade to score a design into your loaf to help it cook evenly. (I went for a heart shape but you could try a few other designs.)
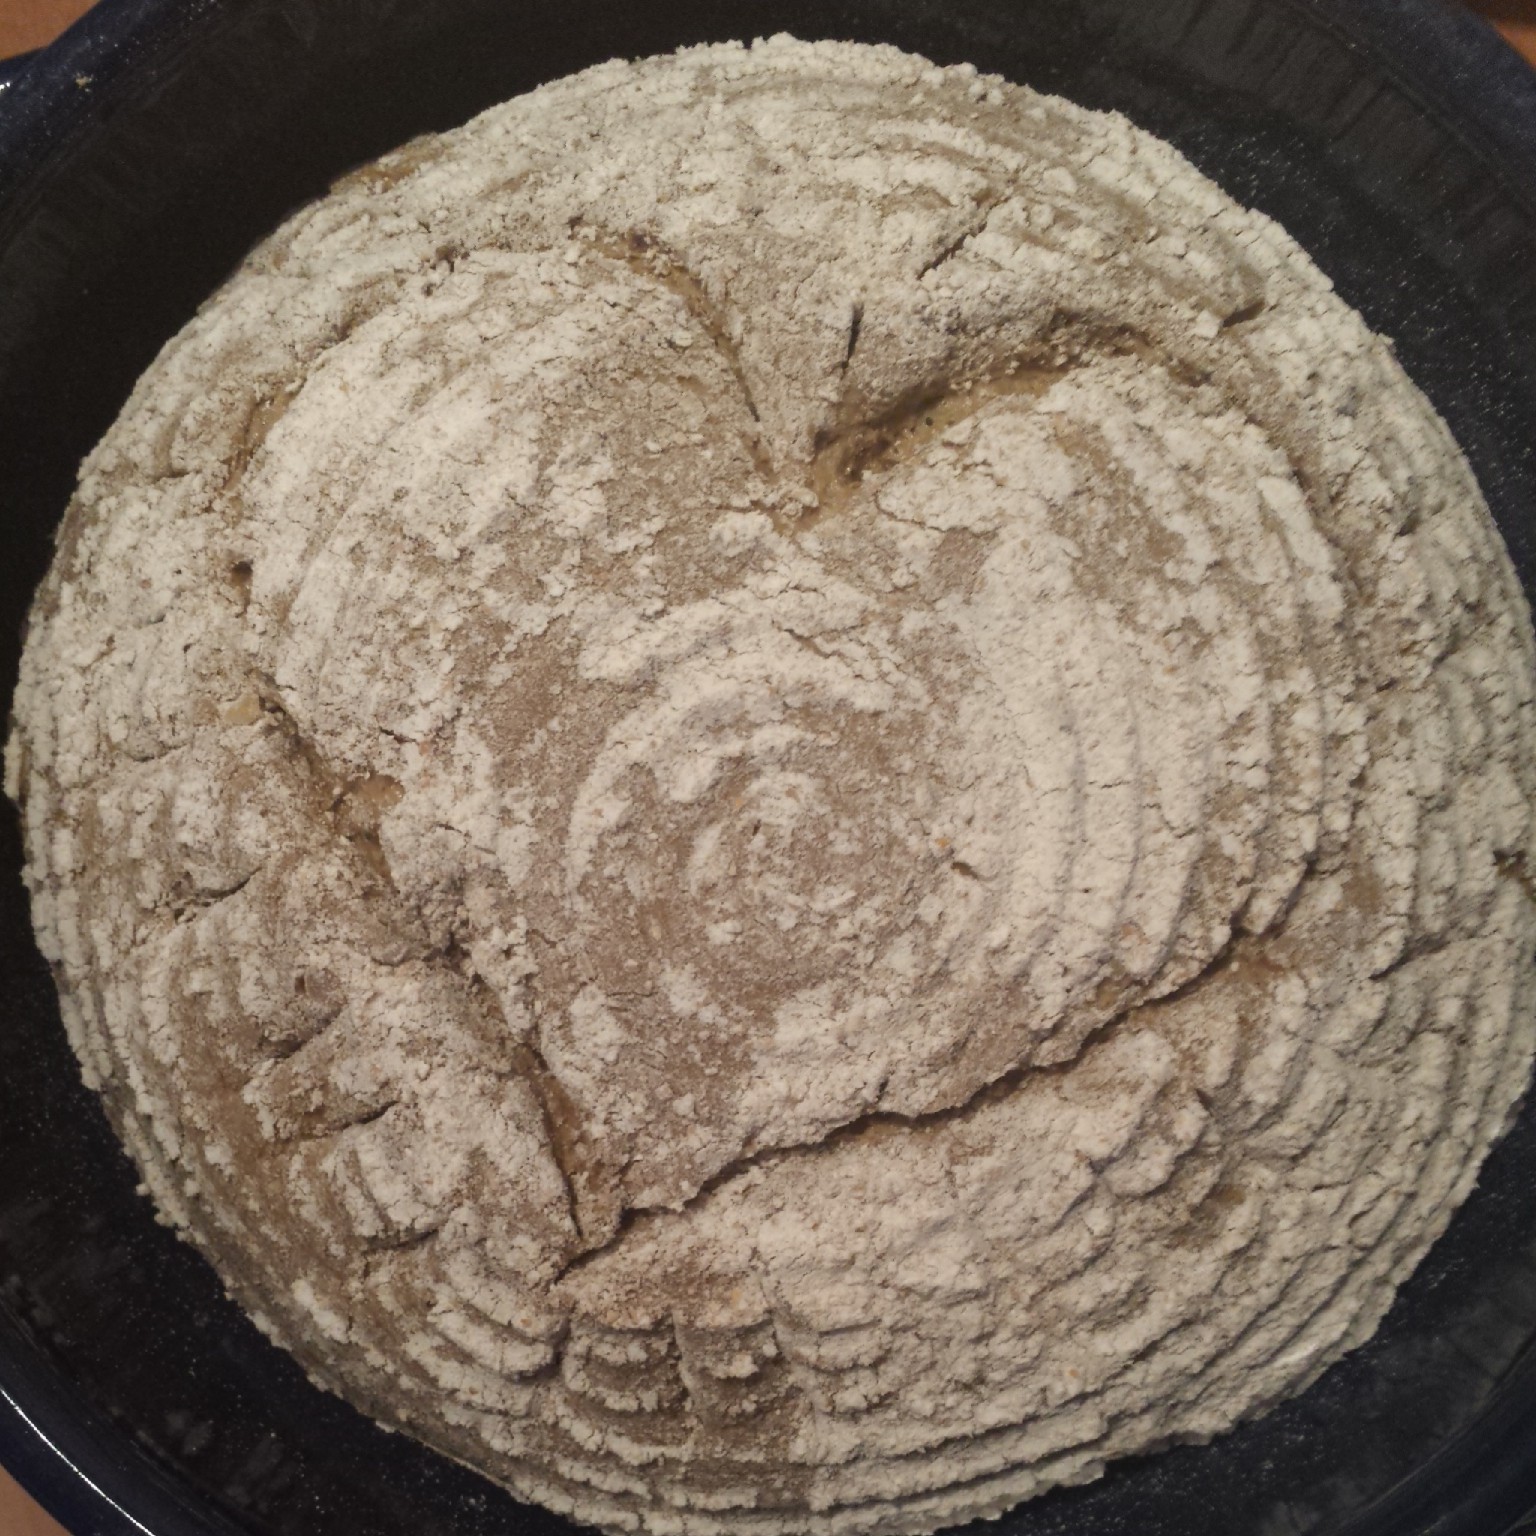
Getting creative with the razor blade. Heart shaped Russian Black Bread
12. Bake with the lid on at 250 degrees for 20 minutes. Turn it down to 220 degrees for the final 40 minutes. Check that the bread is baked by tapping the bottom of the loaf. If it sounds hollow it done. If not, pop it back in the oven in the pot with the lid on for 5-10 more minutes.
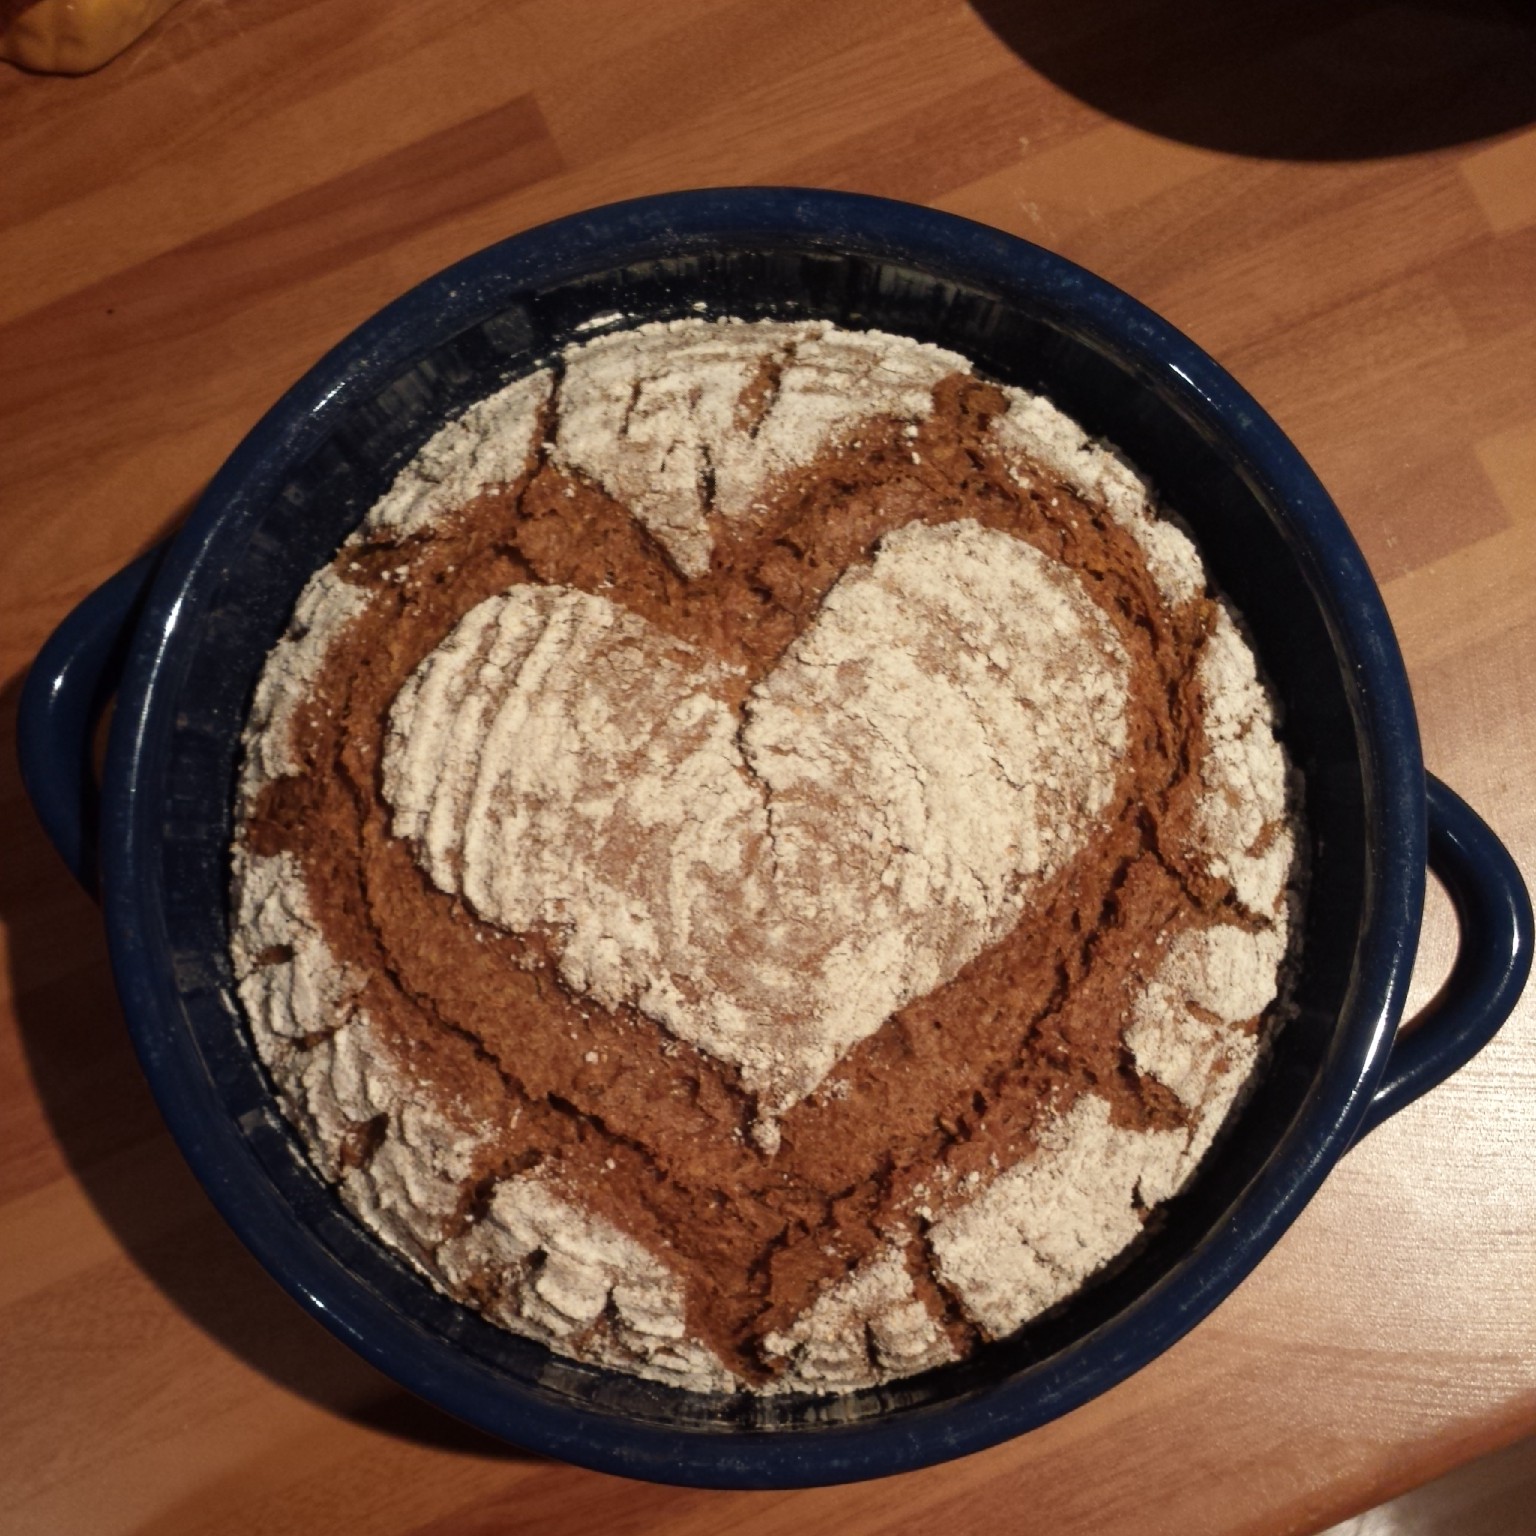
Russian Black Bread baked in a hot pot
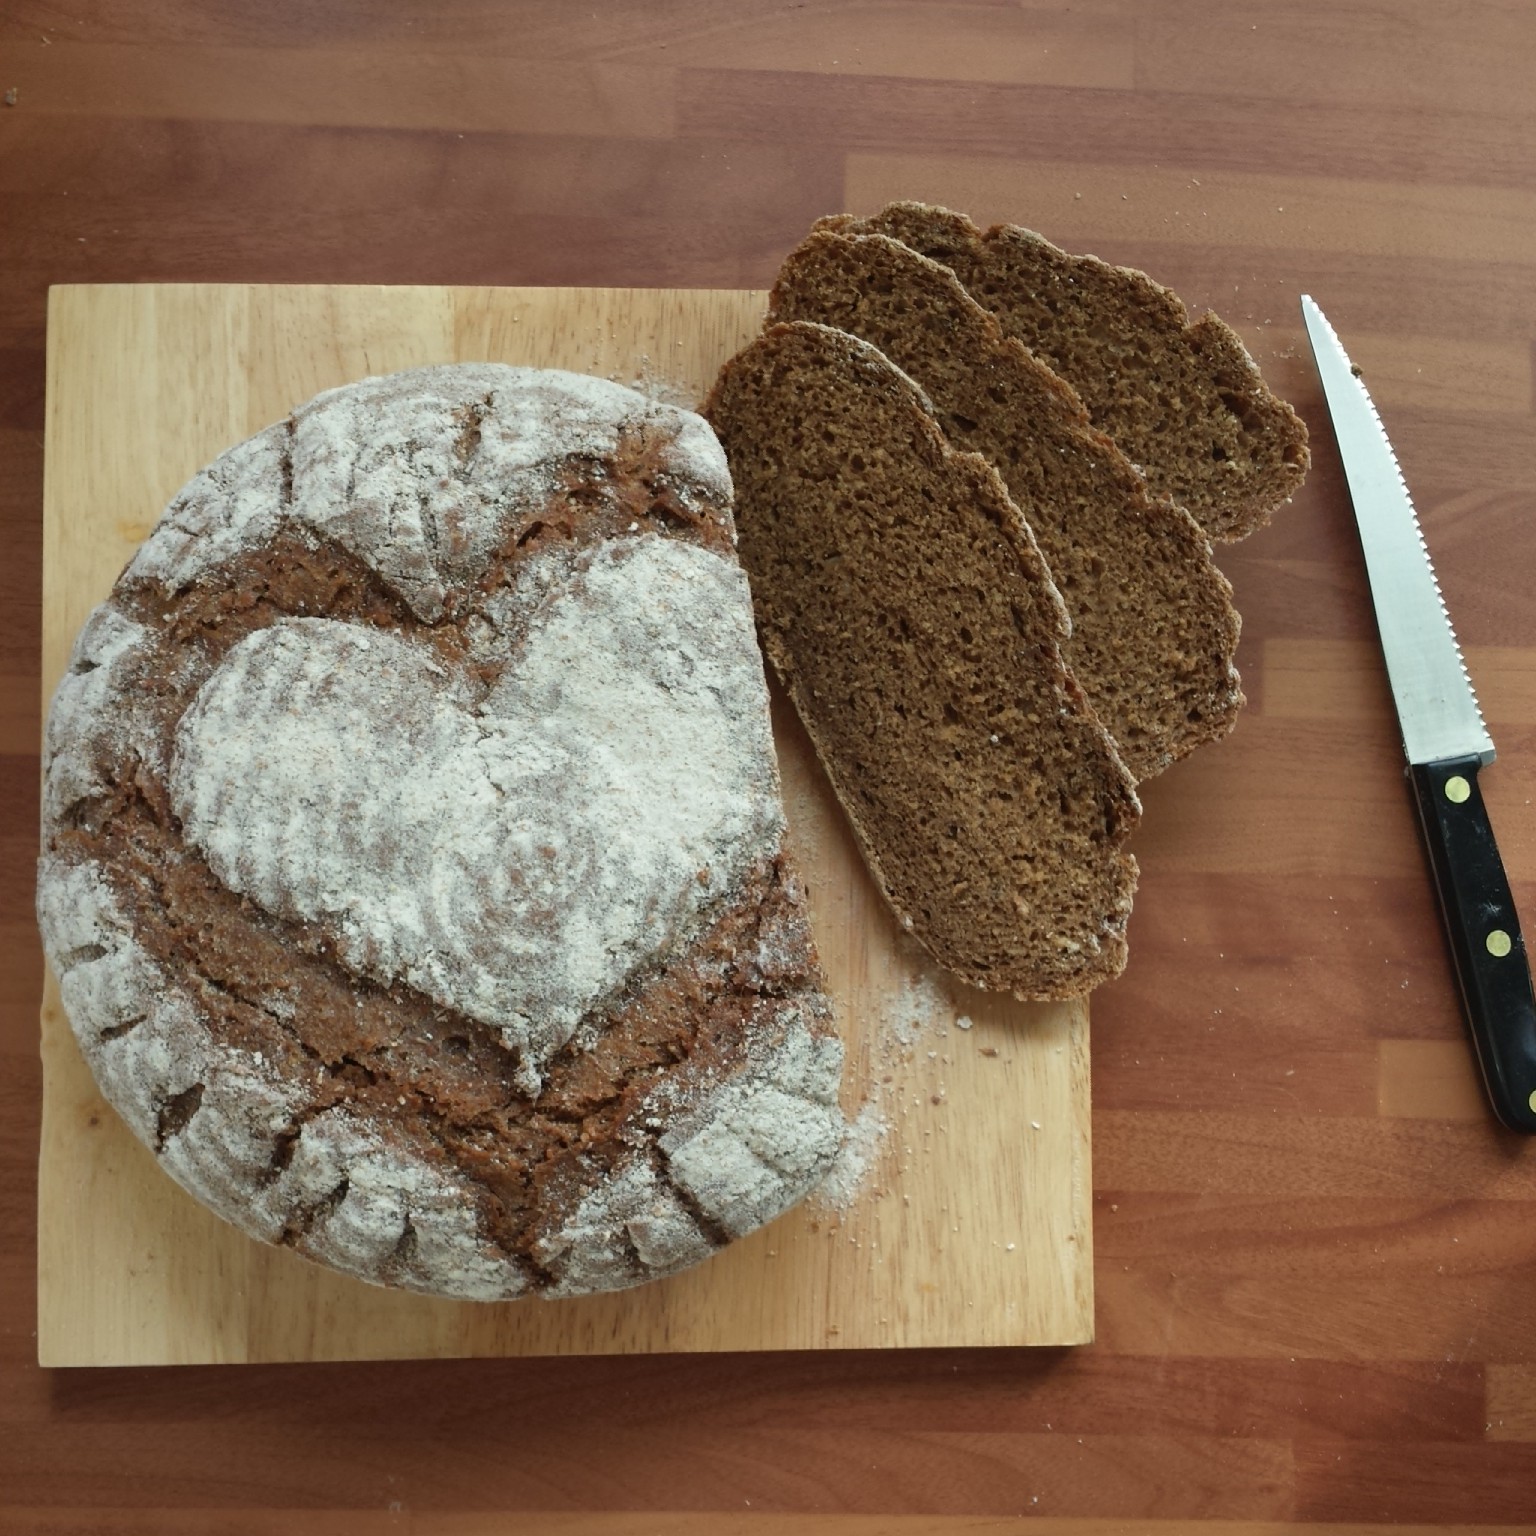
I love how the wholemeal flour (that I used to dust the banneton with when proving the dough) bakes into the loaf, providing the perfect contrast against the rich brown bread peeking through the heart pattern. It even holds onto it’s circular imprint.

Russian Black Bread
Apparently Russian Black Bread is best served with lashings of butter or caviar! The Russians sure know how to live! This bread is soft, pillowy and very rich. It’s a very unusual bread with hints of aniseed and licorice from the caraway and fennel seeds. The treacle also adds depth to the licorice tones without making the bread overly sweet.
Who wouldn’t love a slice of Russian Black Bread?
It’s a wholesome, fluffy and filling bread. The bran, rye and wholemeal flours are balanced with a dash of white flour giving an unexpected light texture. I could imagine this bread being a perfect accompanyment to a hearty stew or soup with a thick coat of butter. It is very rich so, as predicted, I didn’t manage to finish the loaf this week, it’s resting in the freezer for my next round of extra special sandwiches.

Pickled herring and seaweed caviar on Russian Black Bread
It just so happened that I purchased some pickled herring and seaweed caviar (a much more affordable caviar at £2 a pot!) from Ikea last weekend so I had to hand some pretty impressive sandwich making ingredients. In hindsight, pickled herring may be a bit of an extreme pairing for Russian Black Bread which is almost a entire feast all by itself. The herring overpowered the flavours somewhat, but the caviar works very well indeed.


 throw in the dessicated coconut and Bob's your uncle you've made coconut custard!")


