68. Speculoos Kransekake Christmas Tree Cake – Norwegian Ring Cake

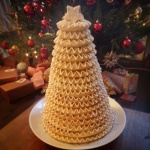
Vanilla Shortbread Kransekake recipe

Vanilla Shortbread Kransekake


Traditionally Kransekake (Norwegian Ring Cake) is eaten at Christmas or on special occasions.  It’s a stack of about 18 almond ring shaped biscuits held together with lashings of ornate royal icing.

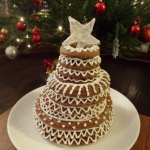
Speculoos Kransekake

Speculoos Kransekake

Now as I can never leave a recipe alone I had to switch this up and make it even more festive with a (Speculoos Kransekake (recipe below) and Vanilla Shortbread Kransekake (recipe below) instead. The sweet spices blended together makes a moreish fragrant biscuit. I loved it so much I kept going and for Christmas day made an enormous shortbread version, which is closer in colour to the traditional almond version.

Although I’m straying from the Norwegian almond tradition my Speculoos and shortbread versions are much cheaper to make and meant I didn’t have to make another trip to the shop for expensive ground almonds. You can buy Speculoos spice already mixed but I enjoy grinding and blending my own fresh spices for an extra punch.

I always have an abundance of spices in my cupboard so this is a perfect Christmas bake for me. And as we just put our tree up. The combination of  pine needles and freshly baked Speculoos floating through our house is like a piece of Christmas Heaven.

The Kransekake is baked in a special set of tins, called Kransekake pans. I couldn’t get my head around how it would all fit together so ploughed on rolling out on the work top as many long Speculoos sausages by hand to press into the tin as i could eek out of the dough. You can make this without the special tin, if you feel like shaping the circles yourself and bake them directly on a baking sheet instead, but the tin makes it a bit easier. Each tin holds 3 biscuit rings.

Roll the dough into smooth sausages and place carefully in to the pans. Press the ends together to seal the ring.

Roll the dough into smooth sausages and place carefully in to the pans. Press the ends together to seal the ring.

The dough is a little crumbly and took a bit of perseverance to roll it long enough to fill the larger rings, but it’s worth the effort. It’s best to make thin sausages to get more out of your dough and also the dough puffs up as it bakes. If the rings are too thick they will merge, making it difficult to get them out of the tins and also leaving you with rough dishevelled edges.

Kransekake pans hot from the oven

Kransekake pans hot from the oven

In hindsight I should have doubled the dough recipe as I ran out so had to make do with 11 rings rather than 18. This meant that the rings didn’t quite taper off in size as they should and I had to employ some clever royal icing layering to get the rings to fit together.  So don’t look too closely at my piping skills please! (I’ve doubled the recipe for you at the bottom of this page so you’re good to go!)

Glue the rings together with a good slick of royal icing

Glue the rings together (starting with the largest ring on the bottom!) with a good slick of royal icing

I also probably should have decided on my piping pattern before launching headlong into the design on the kransekake. But I got a bit carried away as per usual and ad libbed. I think my favourite pattern is the zig zags as I wanted to make it look like a Christmas tree. I love the contrast of the stark white snow icing against the brown Speculoos hues.

I got a bit carried away with the icing patterns... zig zags, stripes, and polka dots

I got a bit carried away with the icing patterns… zig zags, stripes, and polka dots

My original plan was to use white chocolate to fuse the rings together to add to the decadence of the bake, however I forgot to buy any, so royal icing it had to be. Having only used royal icing to glue together the tiers of my wedding cake before (when I used the pre mixed merriwhite powder available from cake decorating shops) I wanted to try powdered egg whites to avoid using raw egg whites to bind the icing together. It worked really well, so well in fact I went on to ice a gingerbread house and my goddaughter’s christening biscuits with it too. (I used sachets of Dr Oekters powdered egg whites so pregnant ladies and children can eat as much icing as they like without the worry of salmonella.)

I also think dark chocolate icing would be stunning against the spiced biscuit. perhaps dusted with a little gold lustre powder/spray for extra festiveness.

When I made Speculoos last time I made a soft dough so it could be piped in shapes directly onto the baking sheet. This dough needed to be firm and malleable so it would hold it’s shape and support it’s own weight. I didn’t add any liquid to this dough and left out the treacle to make sure it wouldn’t spread too much during baking. Although a little treacle might help to roll it out as it is quite a dry dough and had a tendency to crumble when molding it.

To add to the depth of flavour and darkness of the biscuit I used a combination of light and brown sugars.  Feel free to use your preferred sugar to reach the colour biscuit you prefer.

Things I used to make Speculoos Kransekake

Speculoos Spice Blend

  • 4 TBS ground cassia (or cinnamon if you can’t get cassia)
  • 4 TSP ground ginger
  • 8 cardamom pods (discard the pods and grind the seeds)
  • 2 star anise (grind the seeds only)
  • 1/2 TSP white pepper
  • 1/2 TSP pink Himalayan salt (or any salt will do)
  • 1/2 TSP black pepper
  • 6 cloves (ground)
  • 1/2 TSP nutmeg

Speculoos Dough

This is double the quantity from my previous version of Speculoos biscuits so it should be enough to make 18 rings!

  • 220g butter
  • 400g light brown sugar
  • 100g dark brown sugar
  1. Beat the butter and sugar together until light and fluffy. Bearing in mind you’re using brown sugars so the colour change won’t be as dramatic as when using white sugar. It looks more like a big lump of soft sugar…
Beaten brown sugars and butter

Beaten brown sugars and butter

2. Then beat the rest of the dry ingredients and speculoos spice mix in until it comes together into a ball. It is a slightly dry crumbly dough so it will take some work to bring it together.

  • 600g plain flour
  • 1/2 tsp bicarbonate of soda
  • 2 eggs
  • splash of almond extract
  • splash of vanilla extract
Slightly crumbly spicey speculoos biscuit dough

Slightly crumbly spicey speculoos biscuit dough

3. Chill in the fridge for an hour.

4. Roll the dough into 18 smooth sausages and arrange in the greased kransekake tins. Gently pressing the ends of the sausages together to seal the rings. If you have any dough left over you may want to cut a little star out and bake to adorn the top of your stack.

5. Bake for 10 -12 minutes at 190 degrees c until slightly puffed up and firm to touch.

6. While the biscuits are baking beat together the royal icing as described below.

7. Allow the biscuits to cool in the tin before coaxing gently out of the tin. You may need to separate some rings that have merged as they bake with a knife.

8. Starting with the biggest ring on the bottom apply a thin line of royal icing to the underside of each ring, gluing it in place. Stack the rings one on top of the other working your way from the largest to the the smallest ring.

Glue the rings together with a good slick of royal icing

Glue the rings together with a good slick of royal icing

9. Once the full stack is glued together and fully assembled take a deep breath and with a steady hand and fine nozzle on your piping bag slowly pipe your chosen design directly onto the rings. Maybe throw some (edible) glitter on it as you go for extra pazzaz.

10. Stand back and admire your creativity.

11. If you can bear to eat your creation depending on how many people it needs to feed… You can either pull a ring off the stack with a knife or cut straight into it with a sharp knife.

Back to the top

Things I used to make Vanilla Shortbread Kransekake

  • 250g butter
  • 110g sugar
  • 360g plain flour
  • splash of vanilla extract

1. Beat the sugar and butter together until light and fluffy.

2. Beat in the flour and vanilla until the dough comes together into a shiny ball.

3. Roll into 18 thin sausages and arrange in the greased kransekake tins as before. Gently press the ends of the sausages together to seal the ends.

4. Bake in the oven at for 15 – 20 minutes at 190 degrees c until slightly golden brown. (Keep an eye as you don’t want the biscuits to take on too much colour as they will look burnt and be dry.
Back to the top

Royal Icing recipe

  • 250g icing sugar
  • 5g powdered egg white (one sachet of Dr Oekter’s powdered egg white)
  • 45 ml of cold water

*optional* you can add food colouring at this stage if you like but be gel or powdered colour would be best so it doesn’t add to much liquid. If using liquid colouring supplement some of the water with food colouring instead.

1. Beat the sugar powdered egg white and and water together for about 5 minutes on medium speed and then increase to high for 4- 5 minutes. The icing will be glossy and thick. If it is too wet or runny it will not set or be strong enough to support the weight of the kransekake.

Thick royal icing

Thick royal icing

2. Scoop your icing into and icing bag with a fine nozzle for piping your decoration. It’s handy to sit your piping bag inside a tall glass for this job to support the bag.

3. If using a plastic icing bag don’t forget to cut the end off the bag when you’re ready to start icing.

4. Put the largest Kransekake ring onto your plate/cakeboard first. Apply a thin layer (or pipe a ring) of royal icing on the under side of the biscuit to hold it in place on the board.

5. Pipe another ring of icing on to the top side of the biscuit so the next layer will stick to it. Repeat until you have assembled all of the biscuits in a tower, from the largest to the smallest. Don’t worry if any of the ring have break! You can sneakily glue them back together with a little icing. Once you stick the next ring on top no one will notice!

6. Apply even pressure to the bag with your hand and keep the nozzle about 1-2cm away from the biscuit. Squeeze the bag gently and with a steady hand pipe your chosen pattern directly on to the assembled Kransekake.

7. Whilst the icing it still wet sprinkle with a little edible glitter.

8. Allow the icing to harden and the Kransekake will become very sturdy and easier to transport. The biscuits will start to soften after a couple of days so cover it with tin foil if you’re making it in advance.

9. Impress all of your friends and family with the great reveal of your Kransekake. I liked using mine as a Christmas table centre piece before inviting everyone to removing a ring at a time to eat.

Back to the top

45. Rosca De Reyes – Spanish Three Kings Cake

Rosca de Reyes - 3 Kings Cake

Rosca de Reyes – 3 Kings Cake

I’m so excited! I’ve been invited to join an online bake off with 4 amazing bloggers, including the wonderful Yasmin Lambert from the Great  British Bake Off! We’re all baking the Spanish festive bake, Rosca de reyes and the baker with the most votes will win £500 worth of holiday holiday vouchers! (which would come in very handy for our honeymoon which are still yet to arrange following our wedding in less than 3 weeks…) I’m so happy to also be able to offer you the chance to win  £50 of vouchers to spend on the very.co.uk Christmas Shop, perfect for finding those last minute Christmas gifts! My first ever competition on aroundtheworldin80bakes! 

If you would like to enter this competition all you need to do is vote for my Rosca de Reyes (aroundtheworldin80bakes) on the Cosmos Holidays website by leaving a comment at the bottom of the article and a 5 star rating. This would be very gratefully appreciated! You can see the full Rosca de Reyes in all it’s glory over on the Cosmos holiday website. The closing date is Wednesday 19th December. Then please let me know that you have voted by leaving me a comment on (any or all!)

This means I can then contact you if you are the lucky winner. I will choose one winner at random from all of those who vote for me. You could tweet something like “I’ve voted for @laurenprince #roscadereyes  to win£50very.co.uk vouchers http://aroundtheworldin80bakes.com #bakeoff #competition Vote to enter”

Now for the bake itself! I hope you like it!

Rosca de reyes  (Kings’ Cake) is a traditional Spanish  cake with an amazing story. It’s eaten on 6th January, the day that the 3 Kings (or wise men) reached the stable to visit Jesus.  This is also known as the religious holiday the Epiphany, a day where Christians celebrate the Son of God taking on human form as baby Jesus. In some countries this is the day that children open their presents rather than Christmas Day so this day definitely needs a special cake to celebrate!  A little figurine or a bean is usually hidden inside the cake to represent baby Jesus fleeing from King Herod who was trying to kill Jesus. Whoever finds the baby bean/figurine is blessed  as ‘King’ or ‘Queen’ of the banquet and should take the figurine to church with them on February 2nd. In Mexican cultures this person also has to throw the Epiphany banquet party for their families and friends the following year!

I’ve never eaten a Rosca de reyes despite all of our family holidays in Spain as a child. We always visited Spain in the Summer holidays where we contented ourselves eating ice cream and custard filled donuts whilst basking in the sun on the beaches instead. Some of our best family holidays were in Spain, so this recipe intrigued me. I’ve never attempted to hide things inside my cakes before and was unable to find a figurine in my house small enough, or that wouldn’t poison us all so I decided to make one out of sugar paste instead and hope that it doesn’t melt in the oven!

My marzipan interpretation of the baby Jesus...

My marzipan interpretation of the baby Jesus…

Looking for a suitable recipe I discovered there are quite a few variables. The Rosca de reyes is usually a ring shape or it could also be an oval (depending on how many people you’re baking for!). The festive dried fruits usually include wonderful reds, greens and oranges so you could use cherries, apricots, figs, cranberries, or mixed candied peel. The choices are endless.

This is essentially an enriched dough, shaped into a bejewelled festive wreath. It’s a bit of a cake/bread/pastry hybrid and stuffed with beautiful dried fruits.

Whizz up the flour and yeast

Whizz up the flour and yeast

If you’re using instant dried yeast you can throw it straight into your flour and mix it evenly through the flour. Using my Russian Doll measuring cups makes life a bit easier than weighing things out on the scales.

As it’s almost Christmas (we’re celebrating on 15th December this year as our wedding is just around the corner…) I wanted to make light work of this recipe. I struggle to knead dough for a long time, I’m simply not tall enough to put enough weight into it! So I whacked it all into my food processor to ease the process. If you don’t have a food processor you can mix it together by hand instead.

Grind up a star anise

Grind up a star anise

I whizzed the yeast and the flour together first to make sure the yeast is evenly distributed throughout the flour. Then while the food processor was running I added the dry ingredients first, the sugar, salt, cinnamon and ground star anise.  The spices really enhance the colour of the dough giving it a wonderful brown hue.

Rub in the butter

Rub in the butter

Once this is combined I popped the butter in and rubbed/blended it into the flour.

Rub in the butter until it looks sandy

Rub in the butter until it looks sandy

Followed quickly by the  beaten eggs, vanilla pod seeds and water. In the future I probably wouldn’t add any water as this made an extremely wet and sticky dough which meant my food processor went into over drive and actually caught fire! The poor food processor didn’t make it but the dough was thoroughly kneaded!


Beat in the eggs

Beat in the eggs


The food processor may screech a bit in protest but it can (usually!) knead the dough (using the dough hook) for a good 3 minutes before it starts to rock out of control and dance off the work top.

I had to add a little more flour in order to knead the dough by hand as it was more of a paste at this stage.

It was rather a sticky dough...


Once it becomes a firm dough it’s ready for a final knead on the work surface for 5 minutes or so until it bounces back when pressed lightly with a finger.

I had to bring out the cavalry to sort out this sticky mess - dough scraper!


Then to rest the dough for 2 hours in a greased and covered bowl in a warm place until it’s doubled in size. Or if like me you like to do things in stages feel free to let it rise slowly over night in the fridge and shape it at your leisure the next day.

A nice firm brown dough


When the dough has risen, punch it down and knead it thoroughly before starting to shape it into a ring or wreath. This really reminds me of my Swedish Tea Ring attempt. Roll it into a rectangle  about 30cm by 20cm. I oiled the board to stop the dough from sticking rather than dusting it with flour.

Roll it out to an even rectangle about 5mm thick

Roll it out to an even rectangle about 5mm thick

Spread the melted butter all over and give a generous coating to the outside edge of the dough.

Spread a generous coating of melted butter all over


I found I had an extra bit of dough which I trimmed off to make my rectangle extra straight. I used this to make another plaited version of Rosca De Reyes later on.

My second plaited Rosca de Reyes


Line the dough with an even covering of candied fruits, cinnamon and sugar.

Coat with sugar and spice and all things nice


Take your figurine/bean (or in my case a hand crafted marzipan baby Jesus) and hide him amongst the fruit.

Hide your figurine inside the fruit


Then roll it up into one long sausage, from the longest edge to the longest edge.

Roll roll roll your dough


Once you have you sausage shape you can add a smattering of melted butter to one end and coax the 2 edges together to form a ring. Feel free to pop a small greased pudding dish in the centre of the ring to ensure the ring has a hole in the middle as the dough rises.

The final sausage shape


A final egg wash and decoration with your chosen candied fruits, I used glace cherries and mixed peel, and it’s ready for the final proving.

Using lazy egg wash in a can (!) and dotting with cherries


Cover your ring with greased cling film to prevent it sticking and leave it for an hour to double in size on a baking tray greased and lined with greaseproof paper.

Bejewelled and ready to prove itself


After 40 minutes in the oven at 170 degrees C the Rosca De Reyes will have taken on a golden tinge and be firm to the touch. You can check it’s cooked through by tapping the bottom, of the ring, it should sound hollow.

Straight from the oven


Once it’s cooled completely I carried on decorating my Three Kings Cake. I’ve been saving my gold lustre spray for a special occasion and this seemed to be the perfect time to use it! I thought the gold would add a regal touch to the ring and additional symbolism as one of the 3 Kings brought gold as a present for baby Jesus. So I’m presenting a very gold Rosca de Reyes to you!

Then it seemed a bit too gold… so I added a sprinkling of marzipan stars with a dab of brandy on the back of each star to hold it in place. The original plan was to add just the one star, as the 3 Kings followed the star to Bethlehem to find baby Jesus in the stable, however I got a bit carried away with my cutters and made an entire starry night of marzipan instead. Resulting in a very decadent Rosca De Reyes!

A very decadent Rosca de Reyes - 3 King's Cake


With my left over dough I created a plaited Rosca De Reyes and smeared cinnamon, butter and sugar in between the plaits and dotted a few more glace cherries on the top. I hid one whole cherry underneath and tucked it into the dough.

A golden plaited Rosca de Reyes


Once it was baked I also gave it a liberal coating of edible gold lustre.

This bake feels so festive and is a wonderful cake to share with friends and family. It’s a bit like hiding a silver sixpence inside your Christmas pudding, waiting in anticipation to see who finds the baby Jesus inside their piece of bread. I loved this bake and think it may become a regular festive creation in my house. The egg wash gives the outside a fantastic bite to it. I love warming spices and this definitely packs a punch, with the cinnamon and star anise spices in the dough, carried through to the spicy sugary fruit inside. It is also rather reminiscent of a sticky Chelsea bun but even more festive and sparkly!

Cinnamon swirls - a slice of Rosca de Reyes


Marzipan is not traditionally found inside Rosca de reyes, but I adore it and try to fit it into everything that I possibly can. The addition of marzipan made the rosca de reyes slightly stollen-esque and what’s not to love about stollen? (It’s another of my favourite festive bakes – as if I don’t have enough already?!)  I try not to waste any ingredients  and wanted to put my left over marzipan to good use from icing my Wedding and Christmas cakes. You can adapt this recipe to suit your own favourite ingredients and play around with the shape too. Have fun and hope you enjoy it as much as me!


Things I used to make Rosca De Reyes:

Bake for approximately 45 minutes at 350 degrees F or 170 degrees C

  • 1/3 cup warm water (only add as much as you need)
  • 1 packet of yeast (7g dried instant yeast)
  • 4 cups flour
  • 1 cup sugar
  • 4 large eggs, beaten
  • 3/4 cup butter, room temperature
  • 1/4 teaspoon salt
  • 1 1/2 teaspoons cinnamon
  • 1/2 teaspoon ground star anise
  • 4 teaspoons vanilla extract

Filling

  • 2 tablespoons unsalted butter, melted
  • 1/2 cup sugar
  • 2 teaspoon cinnamon/mixed spice
  • A marzipan baby Jesus (or you can use a small figurine or toy or a bean)
  • Dried/candied fruit (about 2 cups of assorted fruit cut into small pieces  such as sultanas, orange/lemon peel, mango or cherries)

Decoration

  • Large dried fruits (so they don’t burn in the oven) such as glace cherries
  • Beaten egg (to wash over the whole ring)
  • Edible gold lustre spray (or glitter) if you wish!
  • Marzipan and star cutters

Experimental Chocolate Chip Polvorón – Spanish Christmas Cakes or Mexican Wedding Favours

image

I adore Polvorón and wanted to have a go at creating a nut free version. What other flavours could I incorporate into this delectable sweet treat and not diverge too far from the traditional ethos of the the Polvorón which mainly consists of nuts…? What else but chocolate and cinnamon!

image

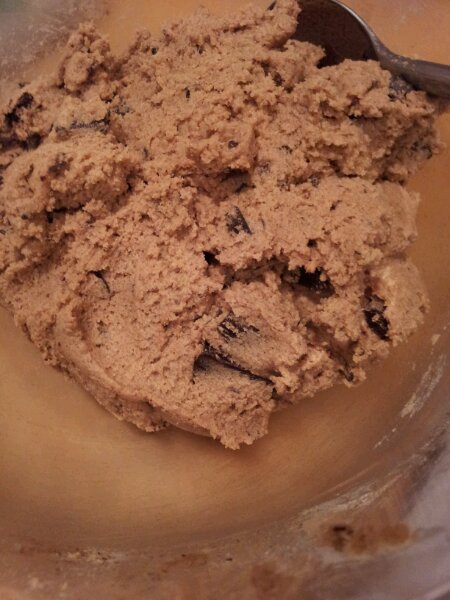
Using the same method as my original Polvorón attempt I replaced the nuts with dark chocolate and added a generous dose of cocoa powder.

And here we have it… a flatter chocolatey and chewier version of Polvorón!

image

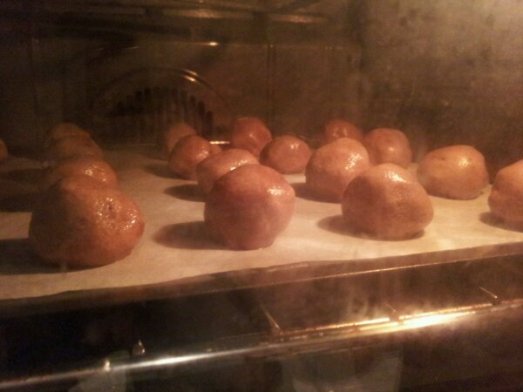
Perhaps because they lack the nuts to hold them together and chocolate (unlike nuts) makes when baked, the little chocolate balls spread into perfectly round chocolate chip cookies.

image

I chose to use caster sugar rather than icing sugar to enhance the crunchy texture. It also added a wonderful chewiness to the cookie, with the sugar and chocolate combining to create a toffee in the centre of the crumbly cookie! Yum! They have been very popular in my house!

image

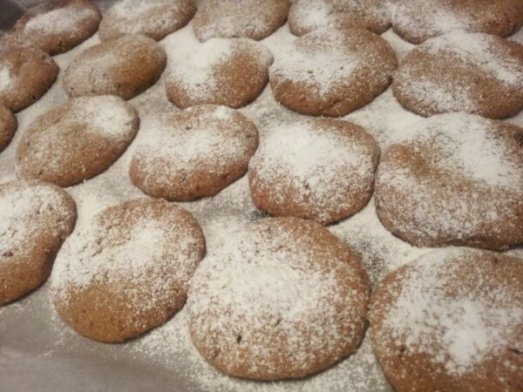
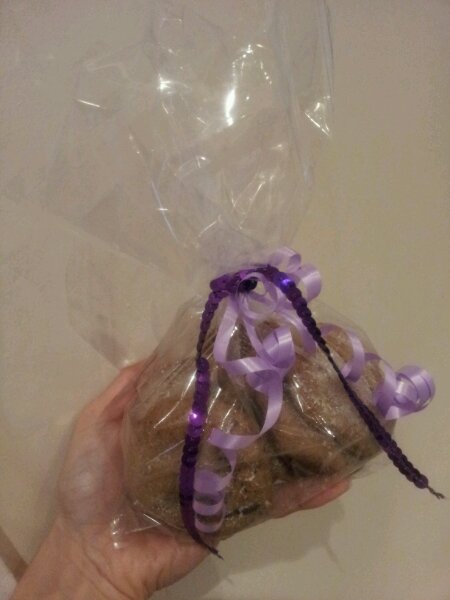
With a light dusting of icing sugar they look very Festive. The hint of cinnamon conquers up Christmas.These are would make a perfect homemade present, or to be eaten by the handful with a large bucket if tea. I really rather enjoyed making this Spanish Christmas cakes/cookie recipe up!

image

I’m looking forward to my further Polvorón flavour experiments!

image

Things I used to make Chocolate Polvorón

Makes about 40 small biscuits

Preparation: 15 minutes

Chilling time: 30 minutes

Baking time: 18-20minutes at 170degrees c

  • 220g butter (1 cup or 2 sticks)  room temperature
  • 250g caster sugar (2 cups or 240 grams) – rather than icing sugar to add an extra crunch that the nuts would normally add
  • 2 teaspoons vanilla extract
  • 250g all purpose flour (2 cups or 240 grams)
  • 100 g (1 cup) dark chocolate coarsely ground/chopped
  • 1/4 teaspoon ground cinnamon
  • 30g cocoa powder
  • icing sugar to dust the biscuits with

image

I’m entering these experimental Spanish Polvores into Chris’s Cooking Around the World Spain Round up. Pop on over to his blog for a round up of some inspirational international cooking! Thanks for reading!

43. Polvorón – Spanish Christmas Cakes or Mexican Wedding Cakes

image

Polvoron – you are always on my mind

I’ve had Polvorón on my mind for some time. I read about these crunchy little biscuits bites, months and months ago and they’ve been sitting patiently in my ‘Things to bake’ pile ever since.

They are quite an unusual discovery, something I had never heard if before. Traditionally Polvorón are eaten as wedding  cakes in Mexico made with pecans or as Christmas cakes in Spain, kind of like a Spanish Shortbread. Now I’m planning my own wedding I thought perhaps now is the time to incorporate an international flair into the festivities. Intrigued I launched into my own interpretation of the traditional recipe, basically determined by whatever ingredients I have in the cupboard.

image

Chopped up dried coconut

I don’t usually buy pecans or walnuts so they had to be substituted for good old almonds (a nut which is ever present in my cupboard and life…) and chunks of dried coconut roughly chopped.

Due to the speedy baking that was necessary (and seems to be happening more and more often in my house) I improvised yet again. No time to assemble to food processor so I grabbed the nearest heavy item (a glass jar), threw the almonds into a sturdy sandwich bag and hammered them with the jar until they were delightfully smushed. Feel free to use a pestle and mortar if you wish to be a tad more refined than I.

image

Beating the butter to a smooth paste

The ingredients are very similar to basic shortbread, with flour, butter and sugar.

image

Thoroughly whipped butter

This is another brilliant biscuit for busy bakers as I managed to whip up the dough first thing on a Saturday morning, chill it whilst I showered. I used my trusty hand held electric whisk to beat the butter and icing (powdered) sugar together. Then to whisk in the flour and vanilla extract.

image

Whisking in icing sugar, vanilla and finally flour

image

My combination of ground almonds, chopped blanched almonds and chopped coconut.

And finally the nuts of your choice.

image

The dough looks a bit scrambled eggy to start with…

image

Take a small amount of loose dough in your hand

I completely misunderstood the recipe which calls for the dough to be chilled. I shapped the dough by hand into about 35 mini golf balls.

image

squash it together and hey presto you have a ball!

I popped them all onto a greased and lined baking sheet covered them with cling film and popped them in the fridge to chill.

image

All the Polvoron lined up in a row – ready for chilling

(I think you’re supposed to chill the whole dough then shape it?!) But this gave me a chance to shower so in effect helped to speed up the process.

image

Delicately golden Polvoron fresh from the oven

I then spaced the little balls out evenly to give them room to spread whilst they baked. I popped the tray in the oven to bake it at 170 degree C for about 18-20 minutes, until they took on a delicately golden hue, whilst I applied clothes and make up.

image

Cooled and ready for a good dusting of spicy icing sugar

Just enough time to then allow the Polvorón to cool on the tray to set their shape for 5 minutes. Then to cool them fully on a wire rack to stop the butter sweating out of them and give them sticky bottoms.

image

Fully coated Polvoron

Once cooled fully I rolled the Polvorón in a bowl of icing sugar swirled with cinnamon giving them a fluffy white coat. As they set the sugar absorbed slightly into the biscuit adding an extra dimension of sweetness to the treat.

image

Happy Birthday Mel!

I then quickly bagged them up, tied with a pretty ribbon and dashed off with my pretty packages of Polvorón to celebrate my friends birthday! With a champagne fueled (10 minute) train journey to Durham. Followed by more food, cocktails and Polvorón.

image

Obviously I had to ensure their quality before sharing them with friends… they passed the test! Crunchy and sweet Polvoron

We declared them a tremendous cocktail accompaniment (and that’s not the frozen strawberry daiquiris talking).

Polvorón are buttery like shortbread but with an added crunch as they are smaller and denser than a traditional shortbread biscuit. The almonds brought a subtle creamy yet crunchy texture along with the coconut. I expect pecans would add even more bite to the biscuit. The Polvorón remind me a little of biscotti or amaretti biscuits which I also adore. What’s not to love about a delicious bite sized treat. Even better, as they’re so small you can obviously eat a whole handful of them in one go!

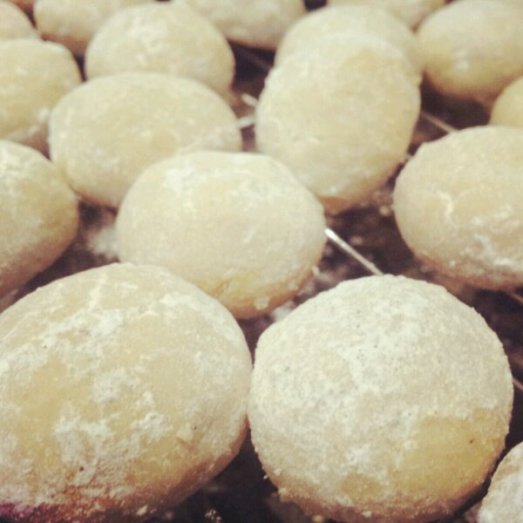
Polvoron – up close

I love the method of shaping these little biscuits into balls as I find rolling and cutting out biscuits a bit laborious  I quite enjoyed this hand made alternative and I’m already inventing my own nut free recipe for my friends who can’t eat nuts as I think everyone needs a bit of Polvoron in their lives!.

Things I used to make Polvorón

Makes about 35 small biscuits

Preparation: 15 minutes

Chilling time: 30 minutes

Baking time: 18-20minutes at 170degrees c

  • 220g butter (1 cup or 2 sticks)  room temperature
  • 250g powdered sugar (2 cups or 240 grams)
  • 2 teaspoons vanilla extract
  • 250g all purpose flour (2 cups or 240 grams)
  • 120 g (1 cup) almonds/pecans/coconut coarsely ground/chopped
  • 1/4 teaspoon ground cinnamon

Thank you to Sourdoughtheangrybaker for inspiring me to bake Polvoron! I had not heard of these wonderful cakes until you told me about them. Brilliant blog if you haven’t had a look already, I recommend reading.