Indonesian Thousand Layer Cake
I’ve had my eye on this gorgeous Indonesian Thousand Layer Cake (Spekkoek) for quite some time. With it’s perfectly symmetrical stripes of spice interwoven with ribbons of vanilla. Spekkoek or lapis legit is a rich layered cake and is very expensive to buy due to the amount of time it takes to create it, so it’s normally eaten at special occasions and celebrations such as Christmas, weddings or festivals in Indonesian.

Layers and layers and layers
It requires a bit of planning and preparation and a lot of hitting the pause button if you choose to watch a film whilst trying to bake it, as each layer is baked individually for 11 minutes precisely. But it’s well worth the effort.
Most recipes for a Thousand Layer cake ask for up to 30 eggs! I thought this was a bit extreme and not the most healthy of cakes so scaled it back to a mere 10 eggs. Much more affordable too. It’s definitely a special cake lavished with lots of love and attention it had to taste wonderful.
If you’re going to attempt this cake I recommend
- You own an electric whisk – this would be quite an ordeal to whisk by hand!
- You have at least 2 large bowls to whisk the eggs in
- You add lots of spice!

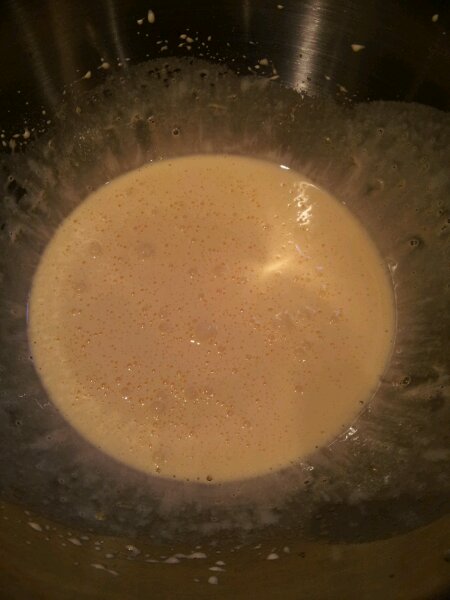
Beat the egg yolks and 100g sugar together
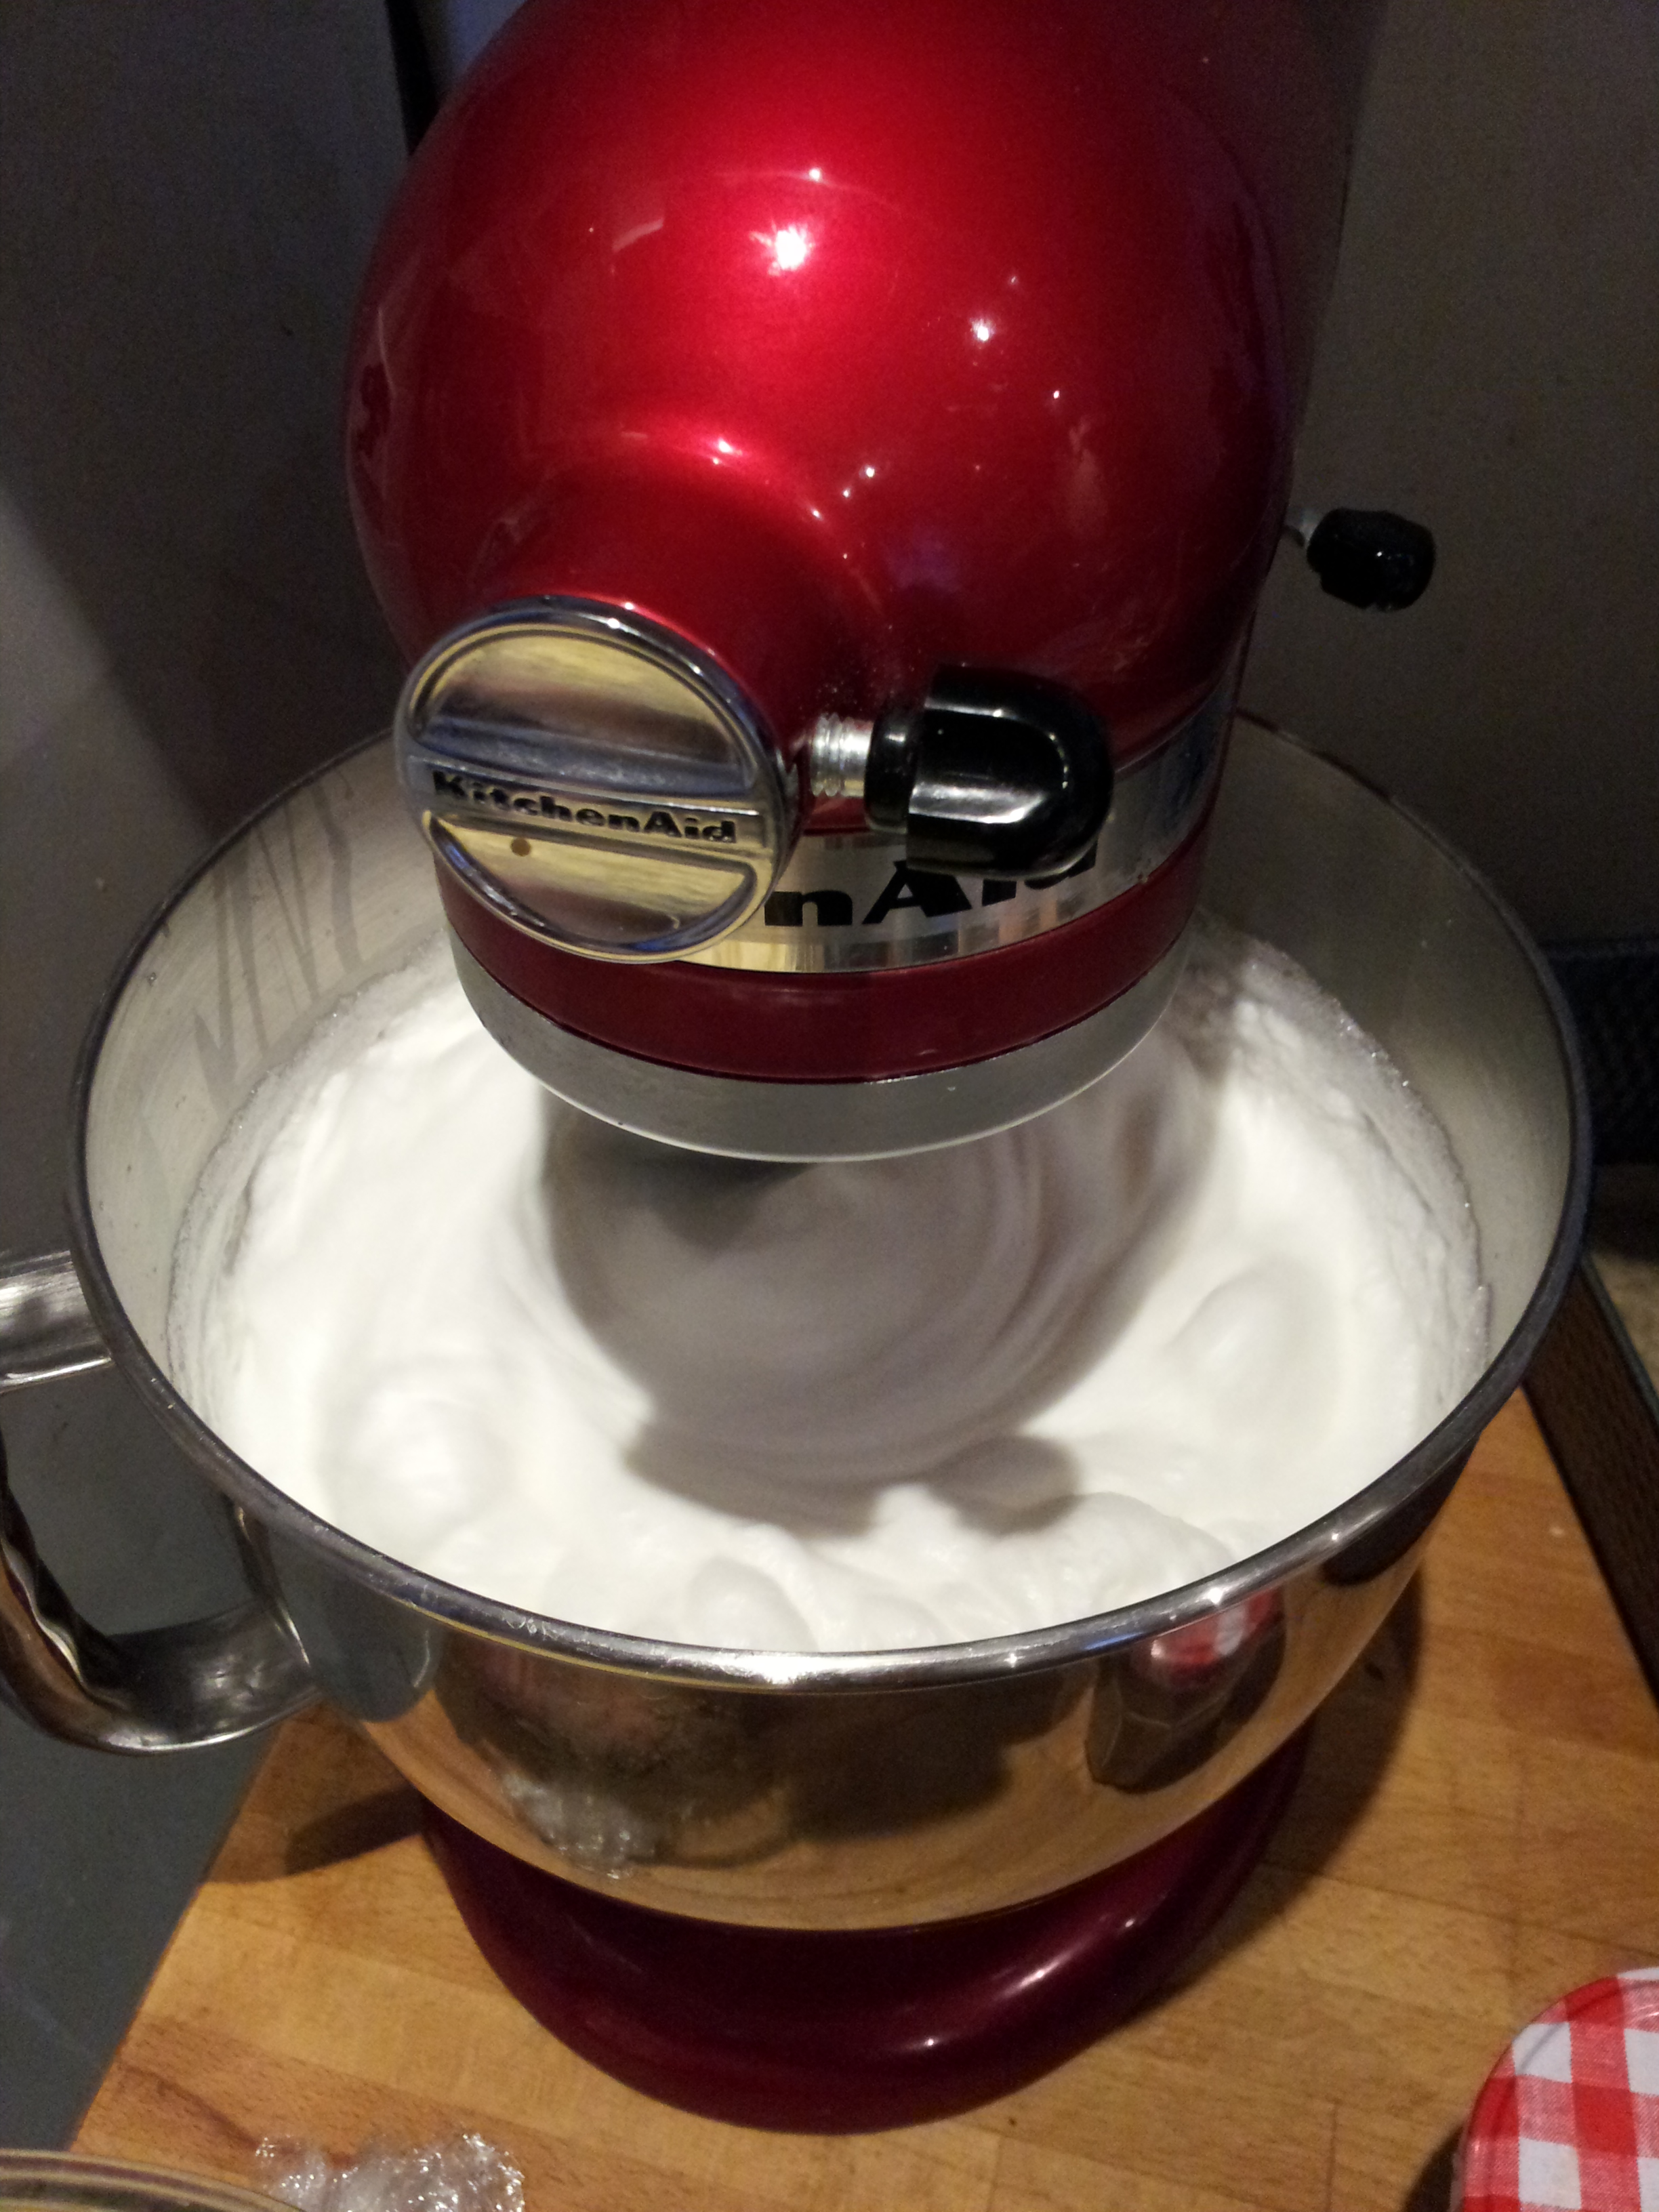
I’m lucky that I own a Kitchenaid and it could take the strain of whisking the egg whites for me whilst I busied myself whisking the yolks. But you could do it in 3 separate stages if you like. You don’t have to multi task to the extreme if you don’t want to. Me, I enjoy adding a bit of danger to my bakes. Doing everything at once. I’ll balance my bowls on top of many ingredients on the work surfaces and hope for the best, like spinning plates, but in my case it’s batter.
Whilst whisking the egg whites with about 100g of the sugar with a hand held electric whisk I set the Kitchenaid away to whisk the egg whites until fluffy.

Whisking the egg whites until they start to stiffen
Once the whites start to stiffen add 100g of sugar (bit by bit) and continue to whisk until they reach stiff peaks and look glossy.

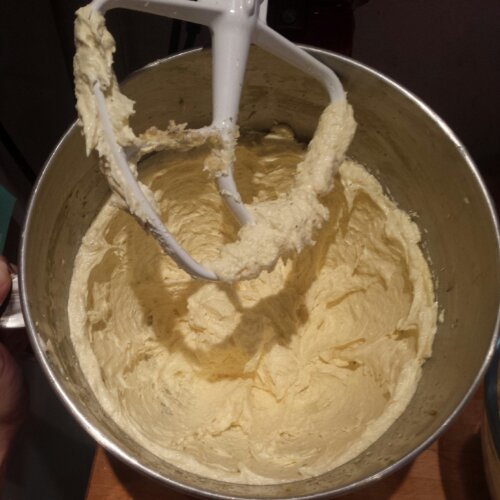
Beat together the butter, vanilla and sugar
Then as if you’re not busy enough, beat together the remaining sugar, with the butter and vanilla extract until light and fluffy.

Mix together the butter and egg yolk mixtures in one large bowl
You’re going to need the biggest bowl that you own to incorporate all of the ingredients together. Start with mixing the egg yolk batter and the butter/sugar paste together.

Butter, sugar, and egg yolks batter all together
Once all of the ingredients are mixed well (I used my electric hand whisk) the delicate process of folding in the egg whites to the batter can begin. Using a metal spoon fold in gently the egg whites to preserve the air in the batter.

There’s a lot of egg whites to fold in!
It will start to look like scrambled eggs but persevere until the batter looks smooth.

Yum scrambled eggs! Keep going with the folding
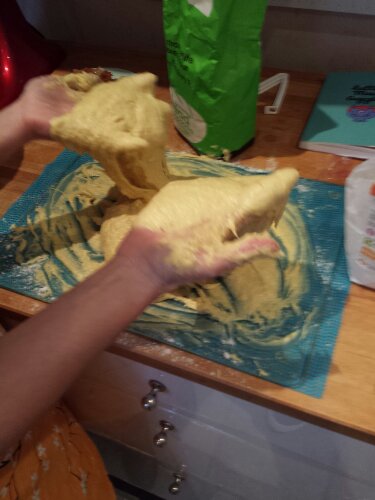
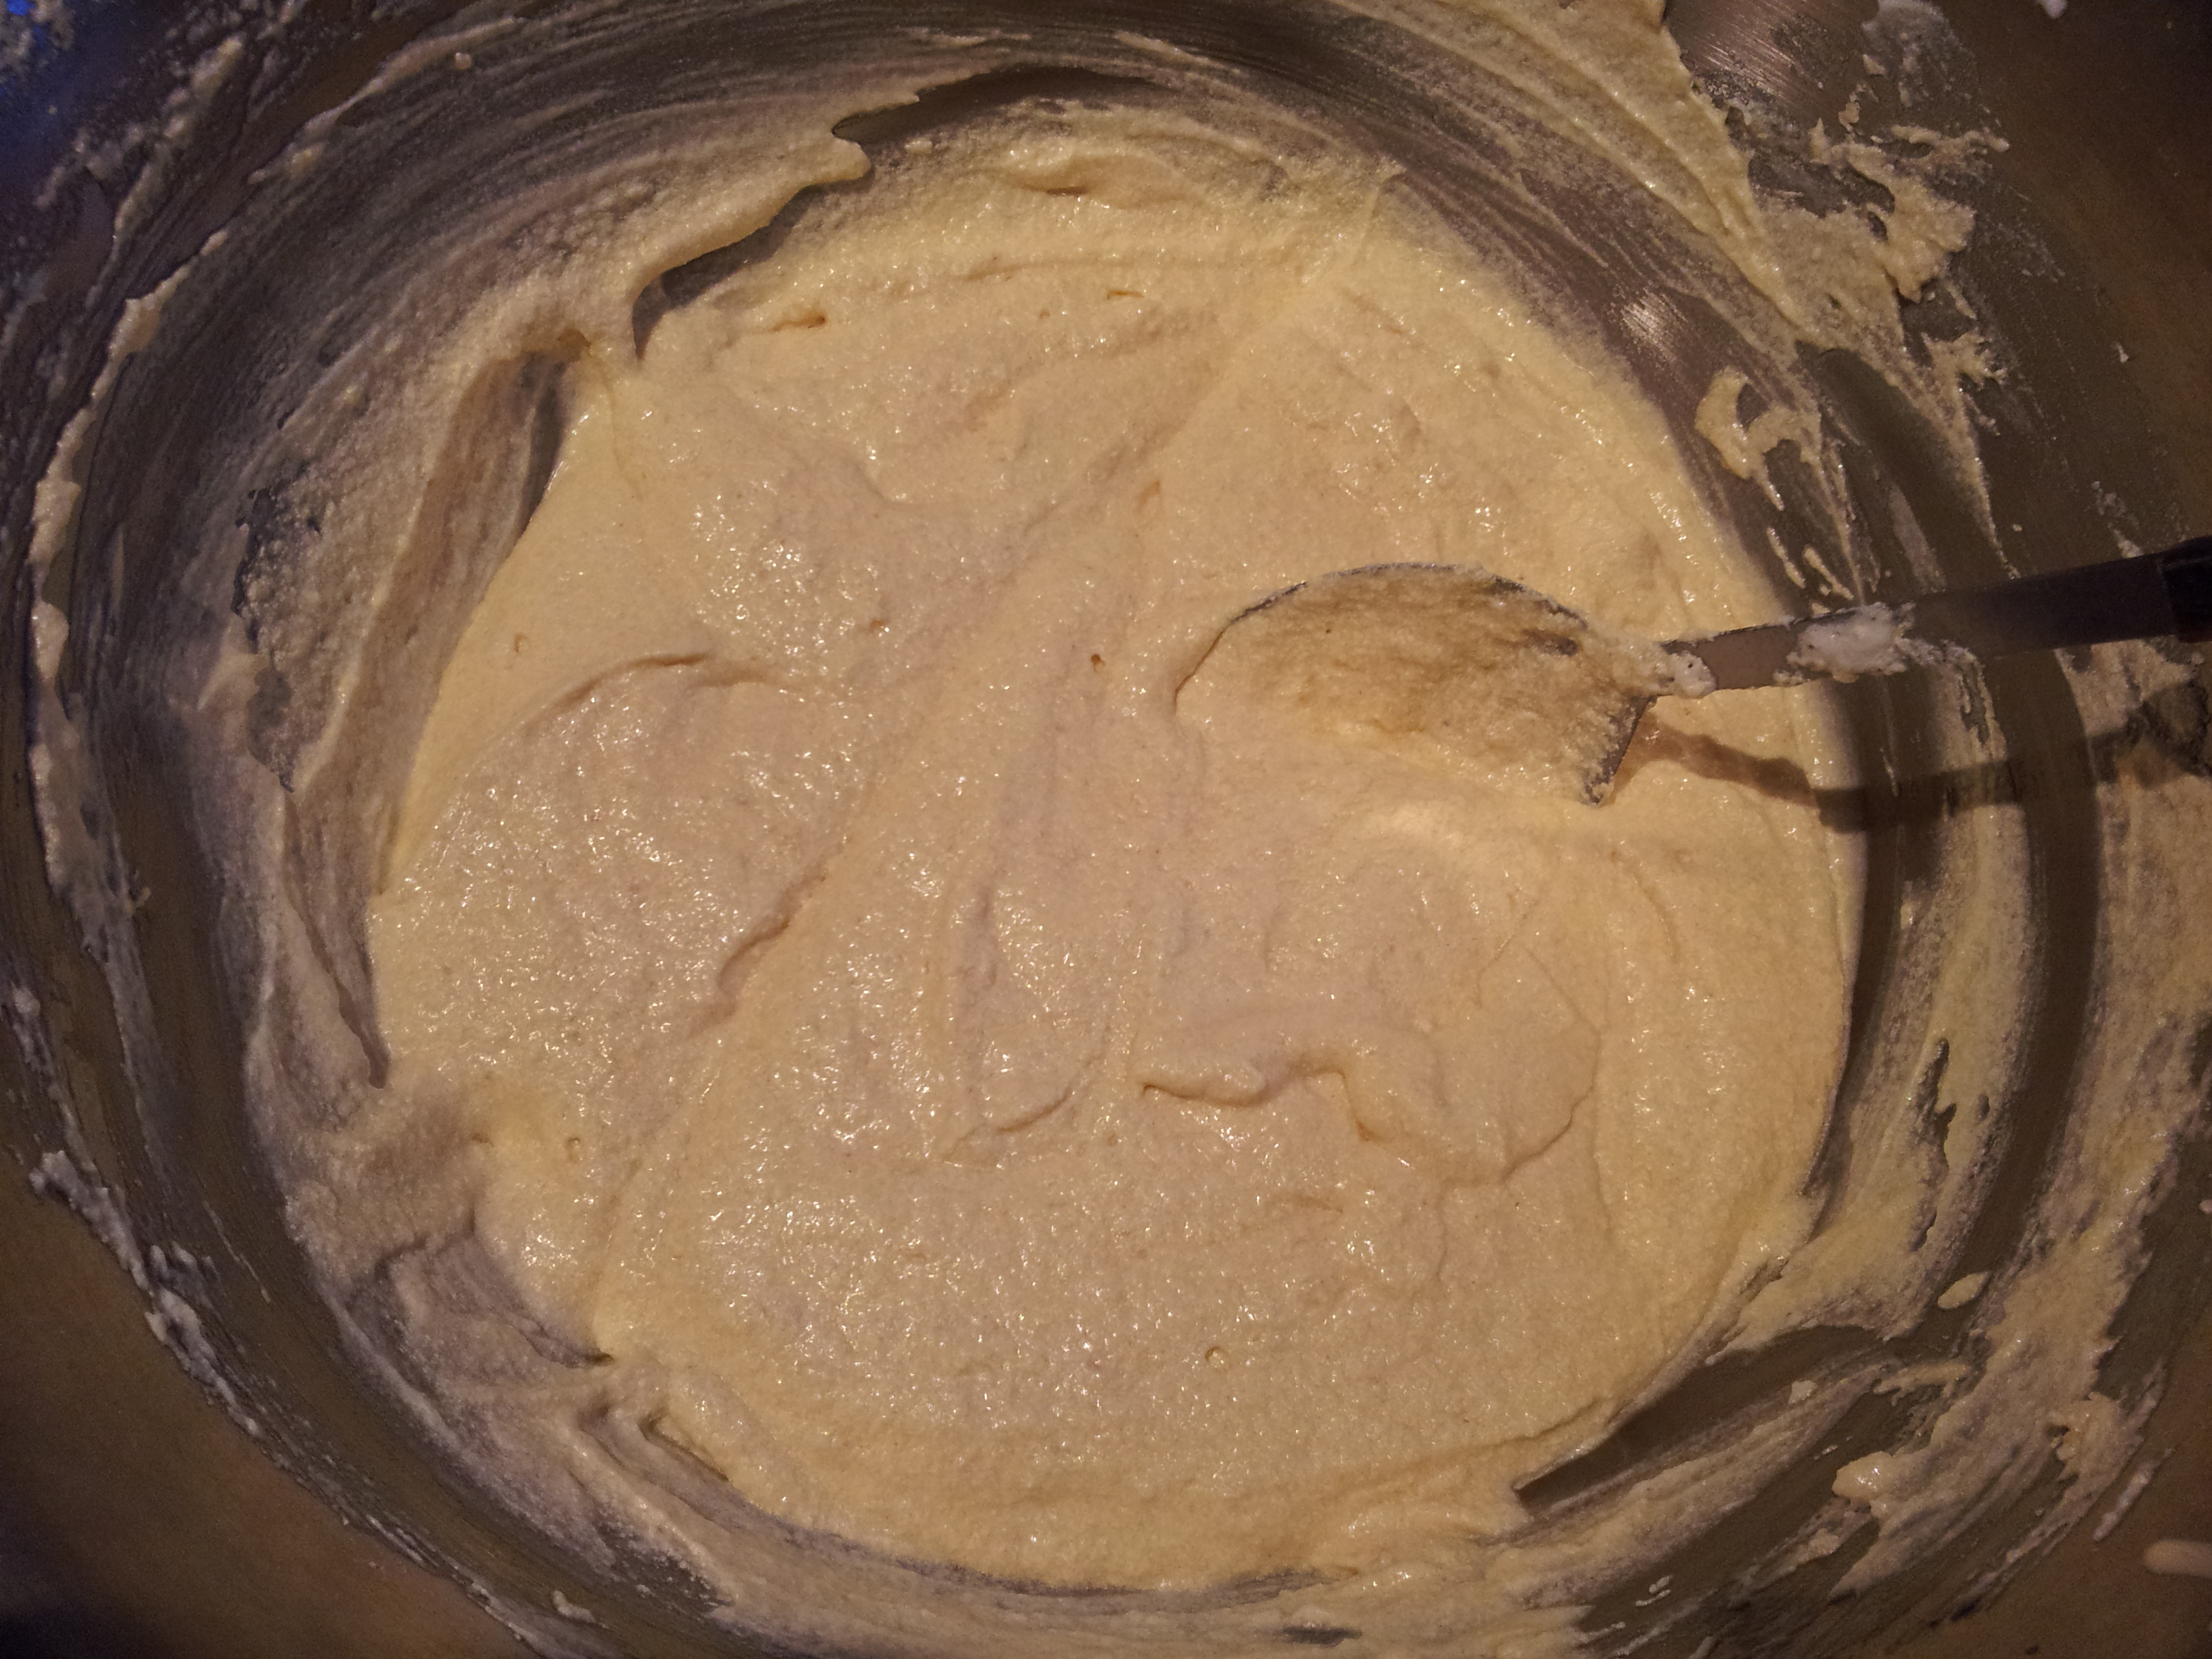
Next up is the relatively small amount of plain flour considering how much egg and butter is in this cake! It also needs to be folded in carefully to the batter with a metal spoon.

Fold in the flour
To achieve the two tone and two flavour effect half of the batter needs to be flavoured with spices and the other half left to be as it is, with a hint of vanilla.

Fold in a vast quantity of spice to half the batter
Split the batter in half (you’re going to need yet another bowl here!) and fold the spices into half of the batter.

Vanilla batter – Leave the other half of the batter as it is in a separate bowl
The spiced batter should look slightly browner in colour. this will help you to remember which layer you’re up to when it comes to cooking the cake!

Spiced batter
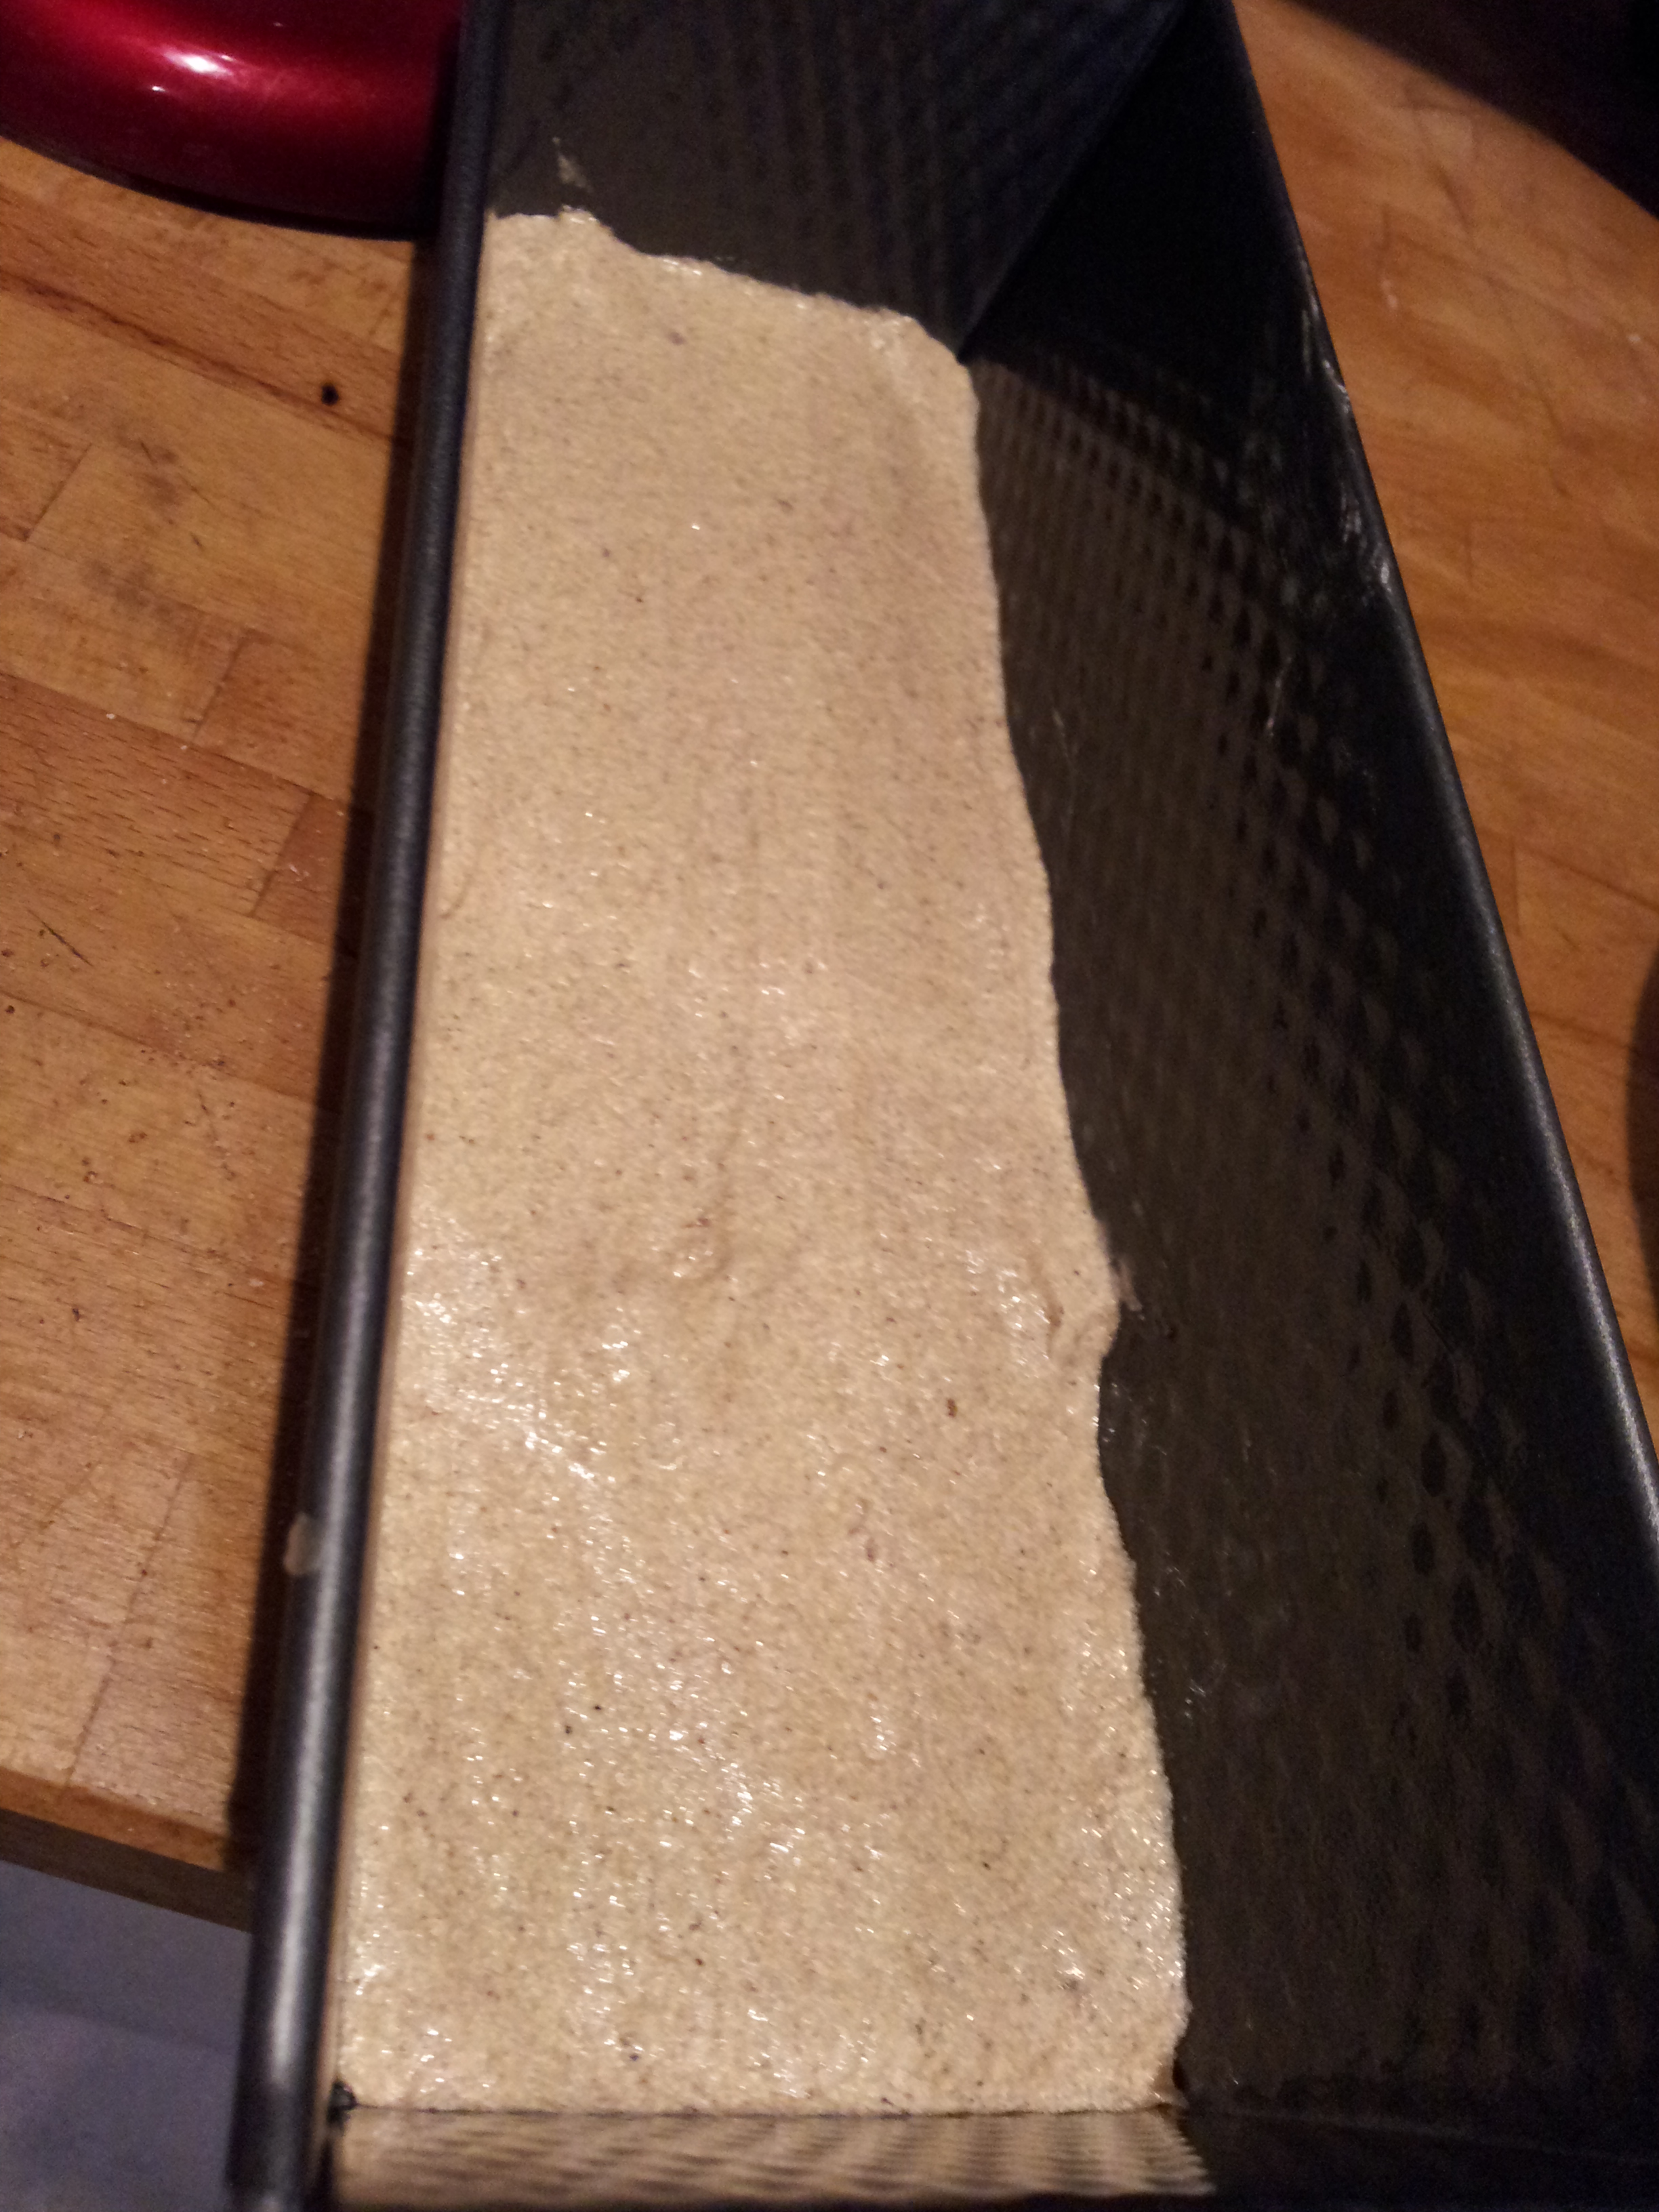
With your two bowls of batter ready, it’s time to spoon a thin layer (about 5mm) into greased and lined baking tin. I used my new extra long German loaf tin 30cm x 10cm. Make sure you push the batter into all of the corners and smooth it down. Give it a very gentle tap on the worksurface to remove any air bubbles and pop it in the oven for 11 minutes. Some recipes say to follow this bake with a minute under the grill, however my oven doesn’t have a separate grill and oven. The grill would have to be warmed up each time which to me seemed a bit too laborious. Instead I added an extra minute to the baking time to compensate for the lack of grilling and it worked a treat.

The first vanilla batter layer in the extra long loaf tin
It’s a bit tricky to get the first layer into all of the corners as the batter is quite stiff. I wiped the inside edges of the tin round with a clean finger to remove any extra batter to avoid any smudging of the layers later on. The last thing you want is a smear of burnt batter up the sides your beautiful layer cake.

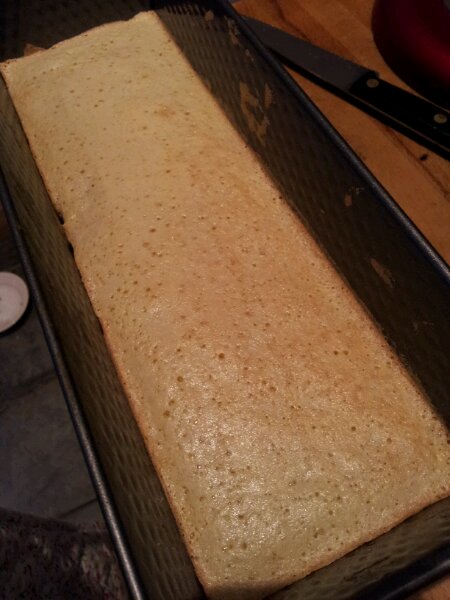
The first baked layer in the extra long loaf tin
After 11 minutes in the oven the first layer should be slightly golden brown and evenly baked. Ready for the addition of the next layer straight on top of the hot cake. The heat from the first layer helps to melt the butter and spread the batter evenly around the tin. Remember to alternate your batters! One layer vanilla, one layer spice and repeat.

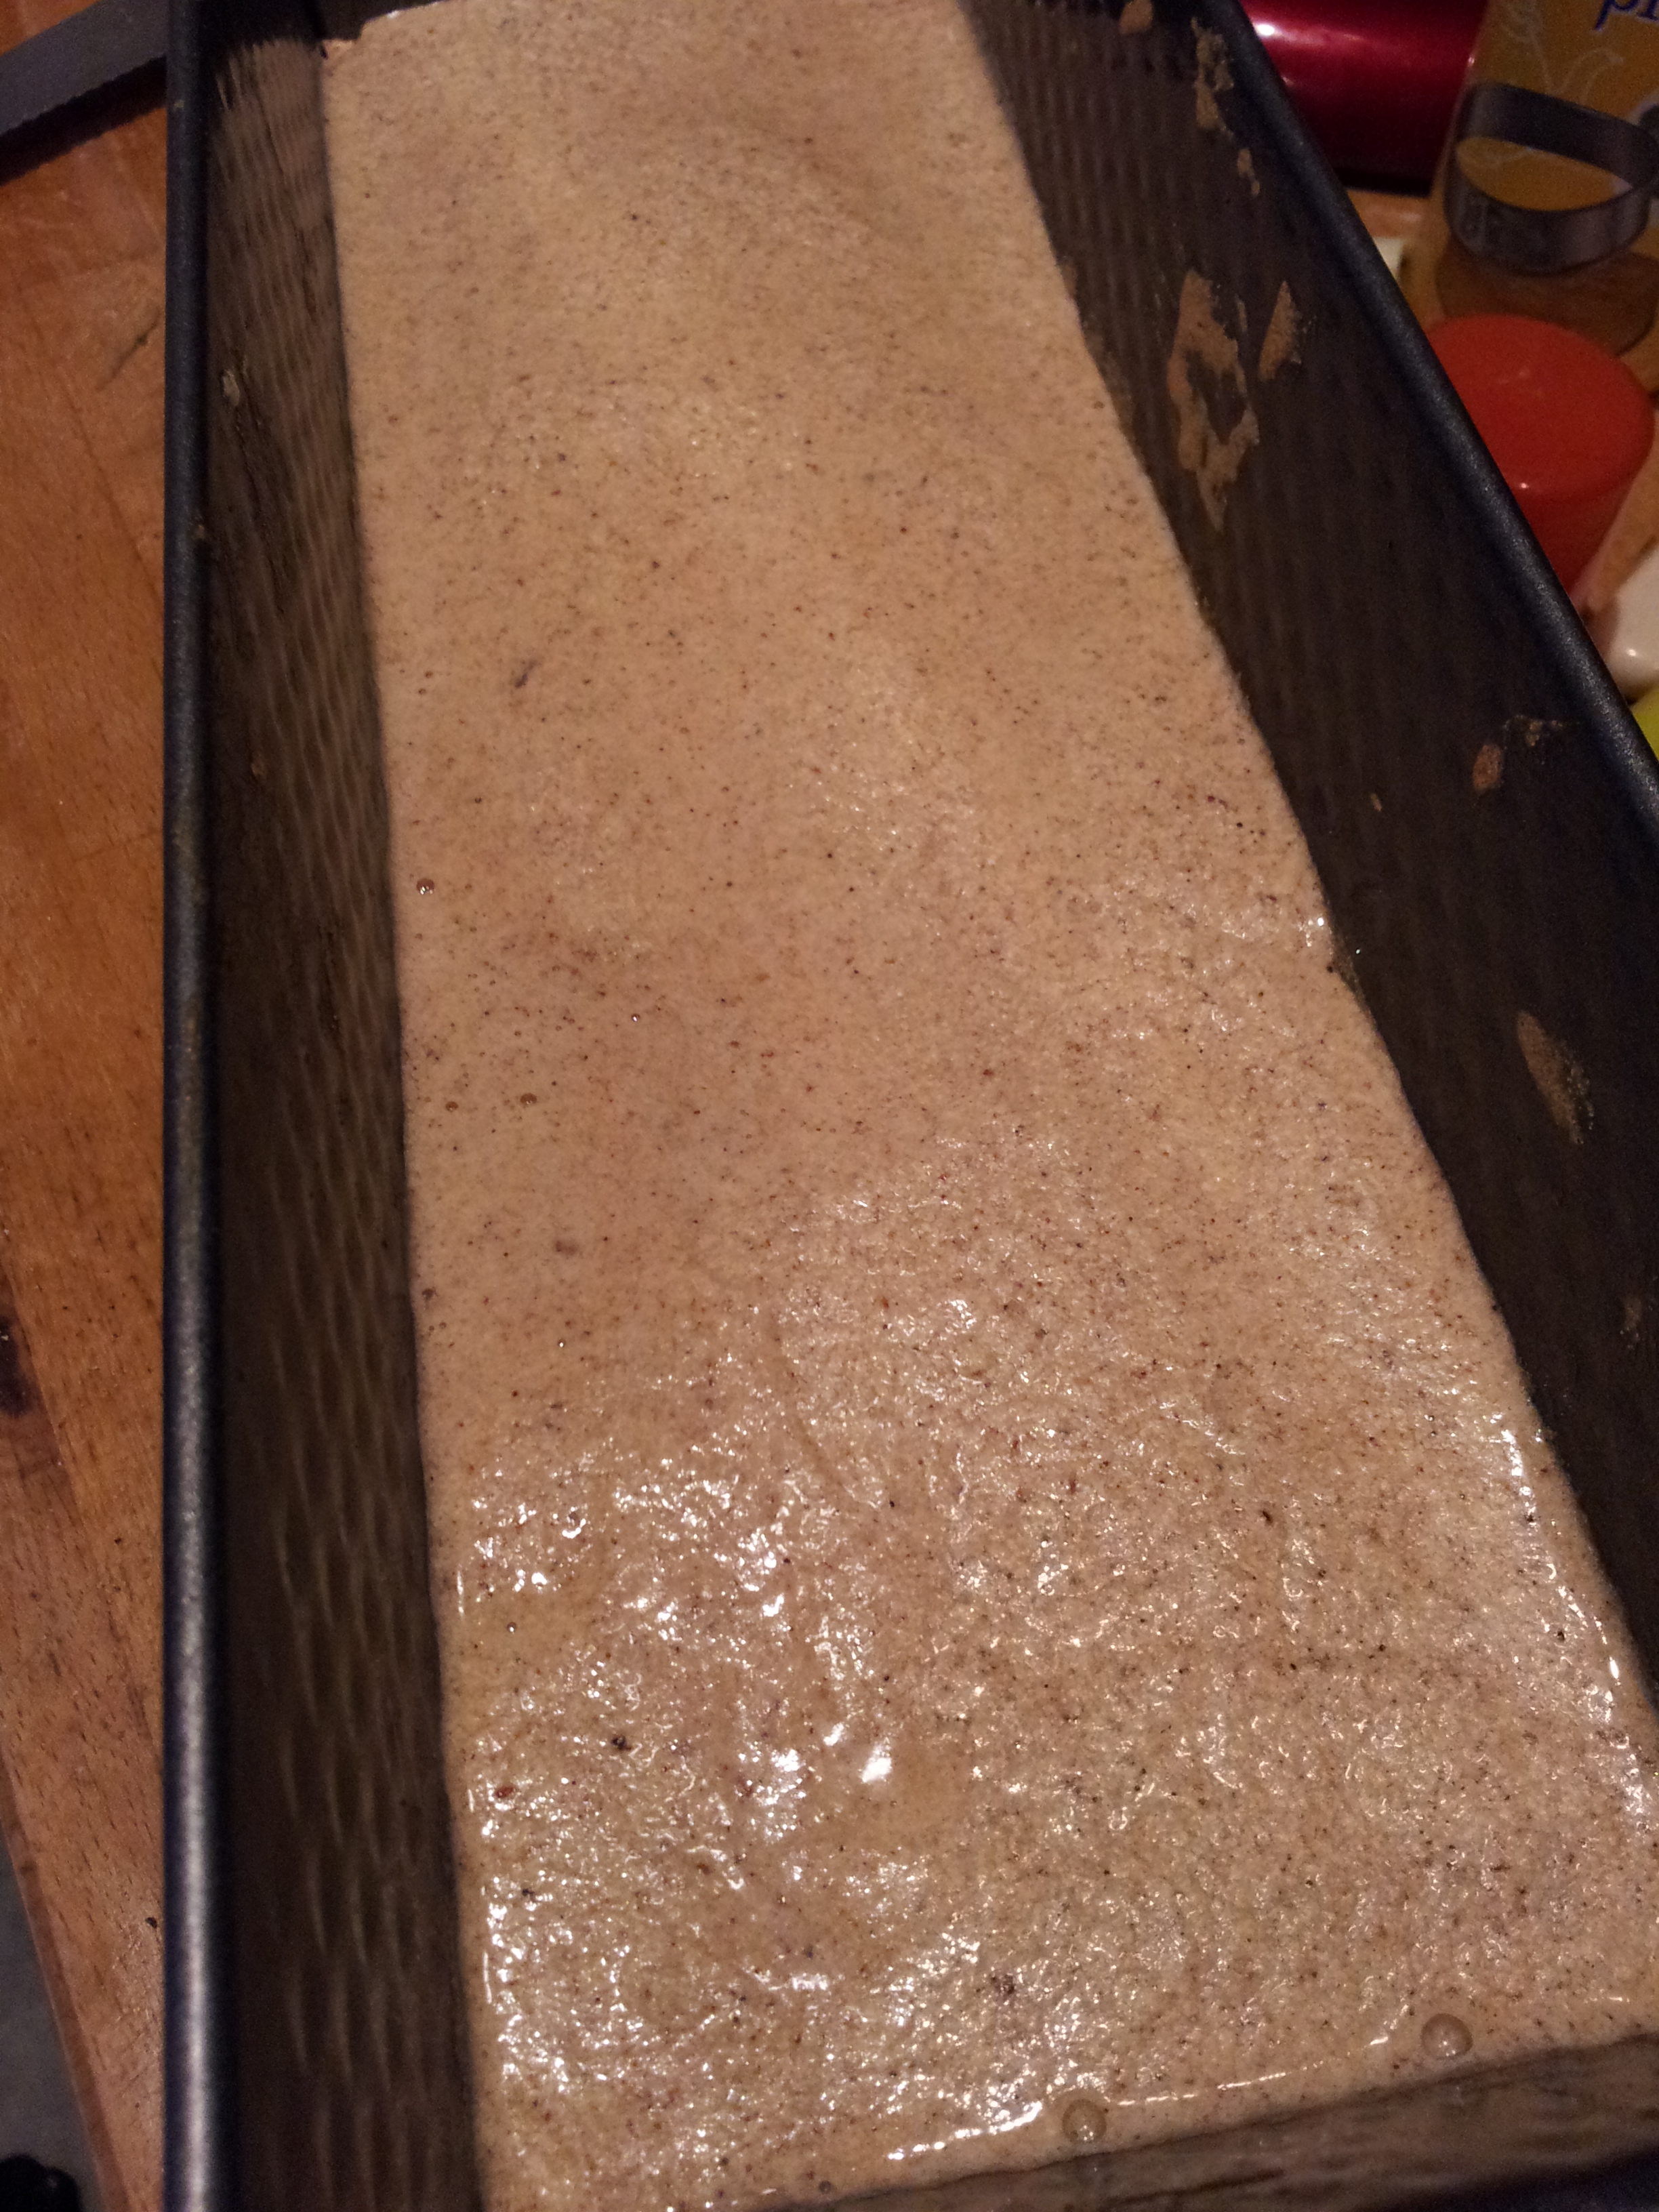
Raw spiced batter straight on top of the cooked cake below
As your cake bakes it will probably shrink back from the sides of the tin a little, so don’t be alarmed if some of the raw batter disappears down the sides of the cake and into the layer below. A liberal dusting of icing sugar hides all manner of mishaps to a finished cake!

The second spiced layer, smooth and ready for the oven
Keep alternating the batters. Repeating the layering, spreading, baking and even more layering until you’ve no more batter left. This process is not for the time restricted or feint hearted. Baking the cake took at least 4 hours, but it’s almost like a work out, leaping up off the sofa to take the cake out of the oven every 11 minutes.

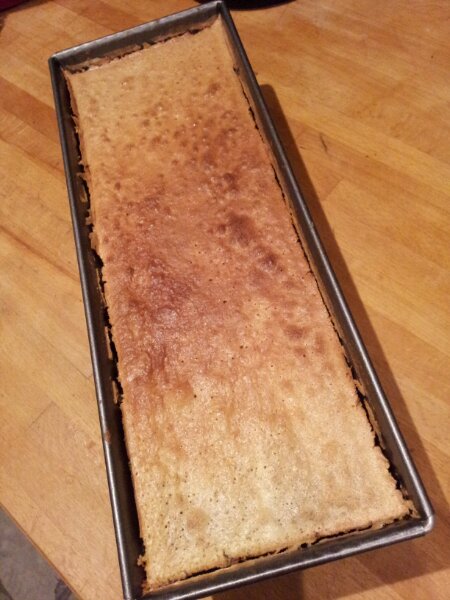
I grilled the final layer a bit for extra authenticity… It looks a bit burnt but tasted good!
Let the cake cool in the tin for about 2o minutes before gently loosening the cake from the tin with a palette knife and attempting to remove it from the tin. I grilled the final layer a bit for extra authenticity… It looks a bit burnt but tasted good!

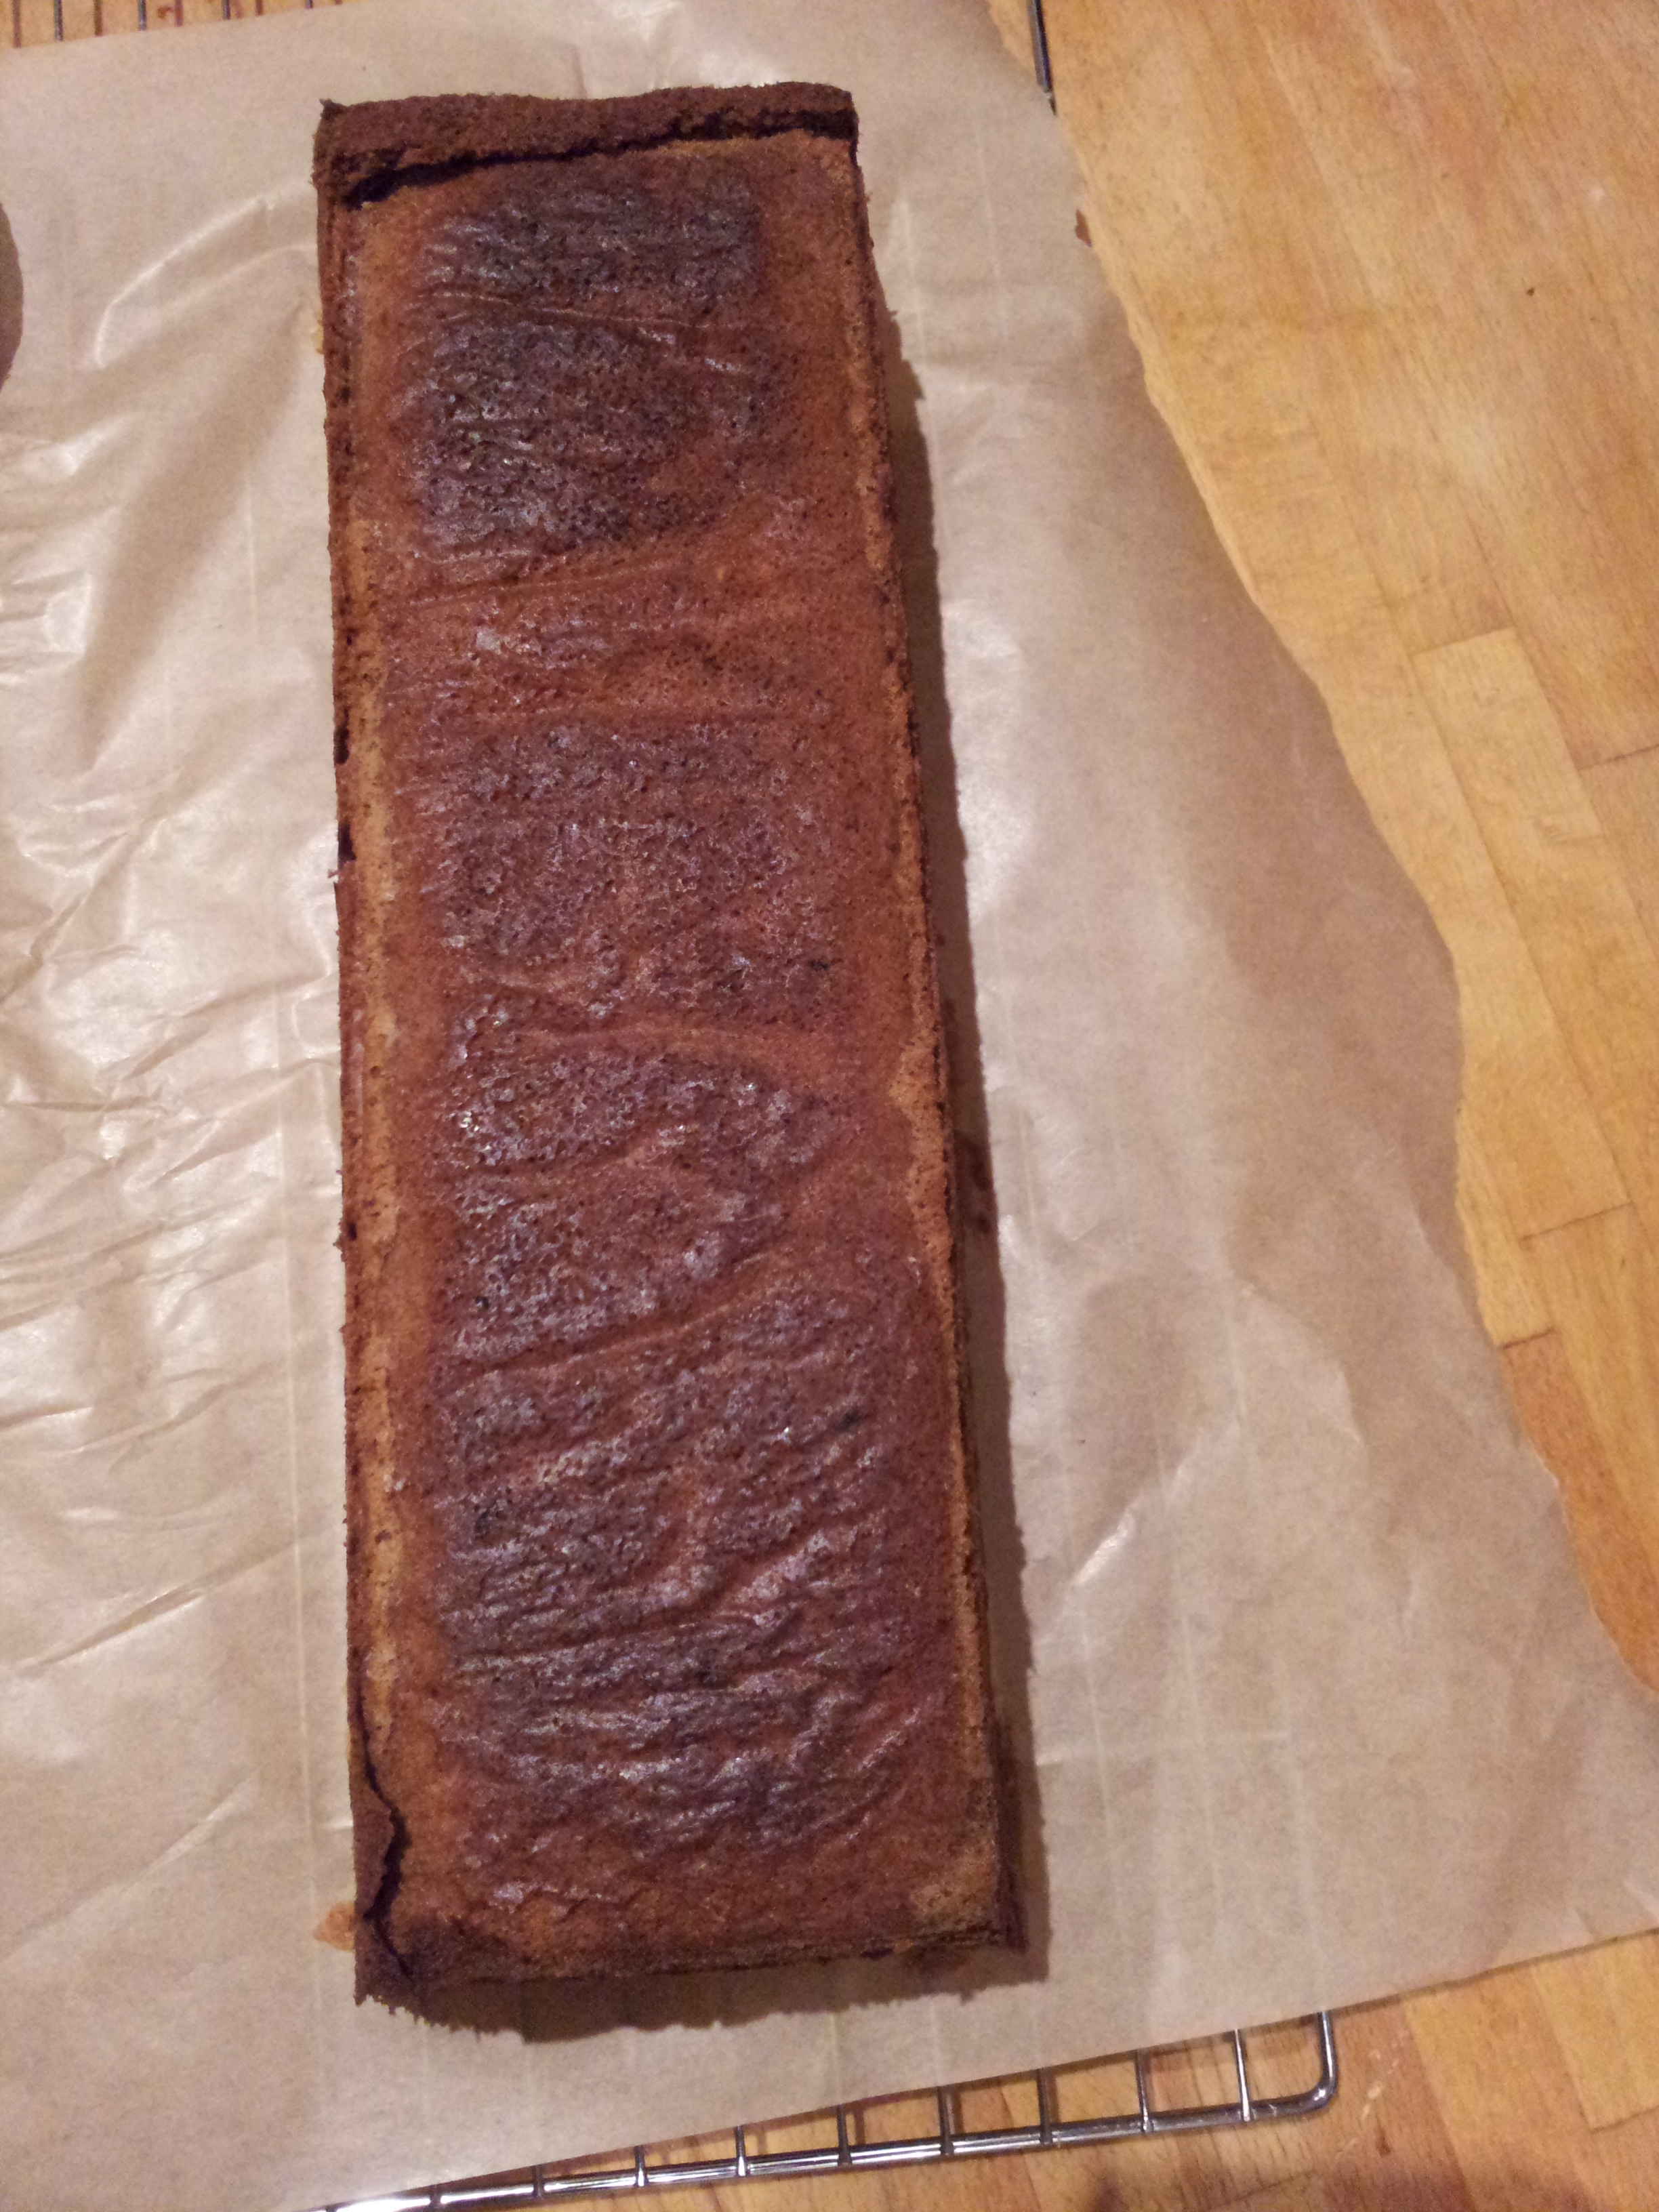
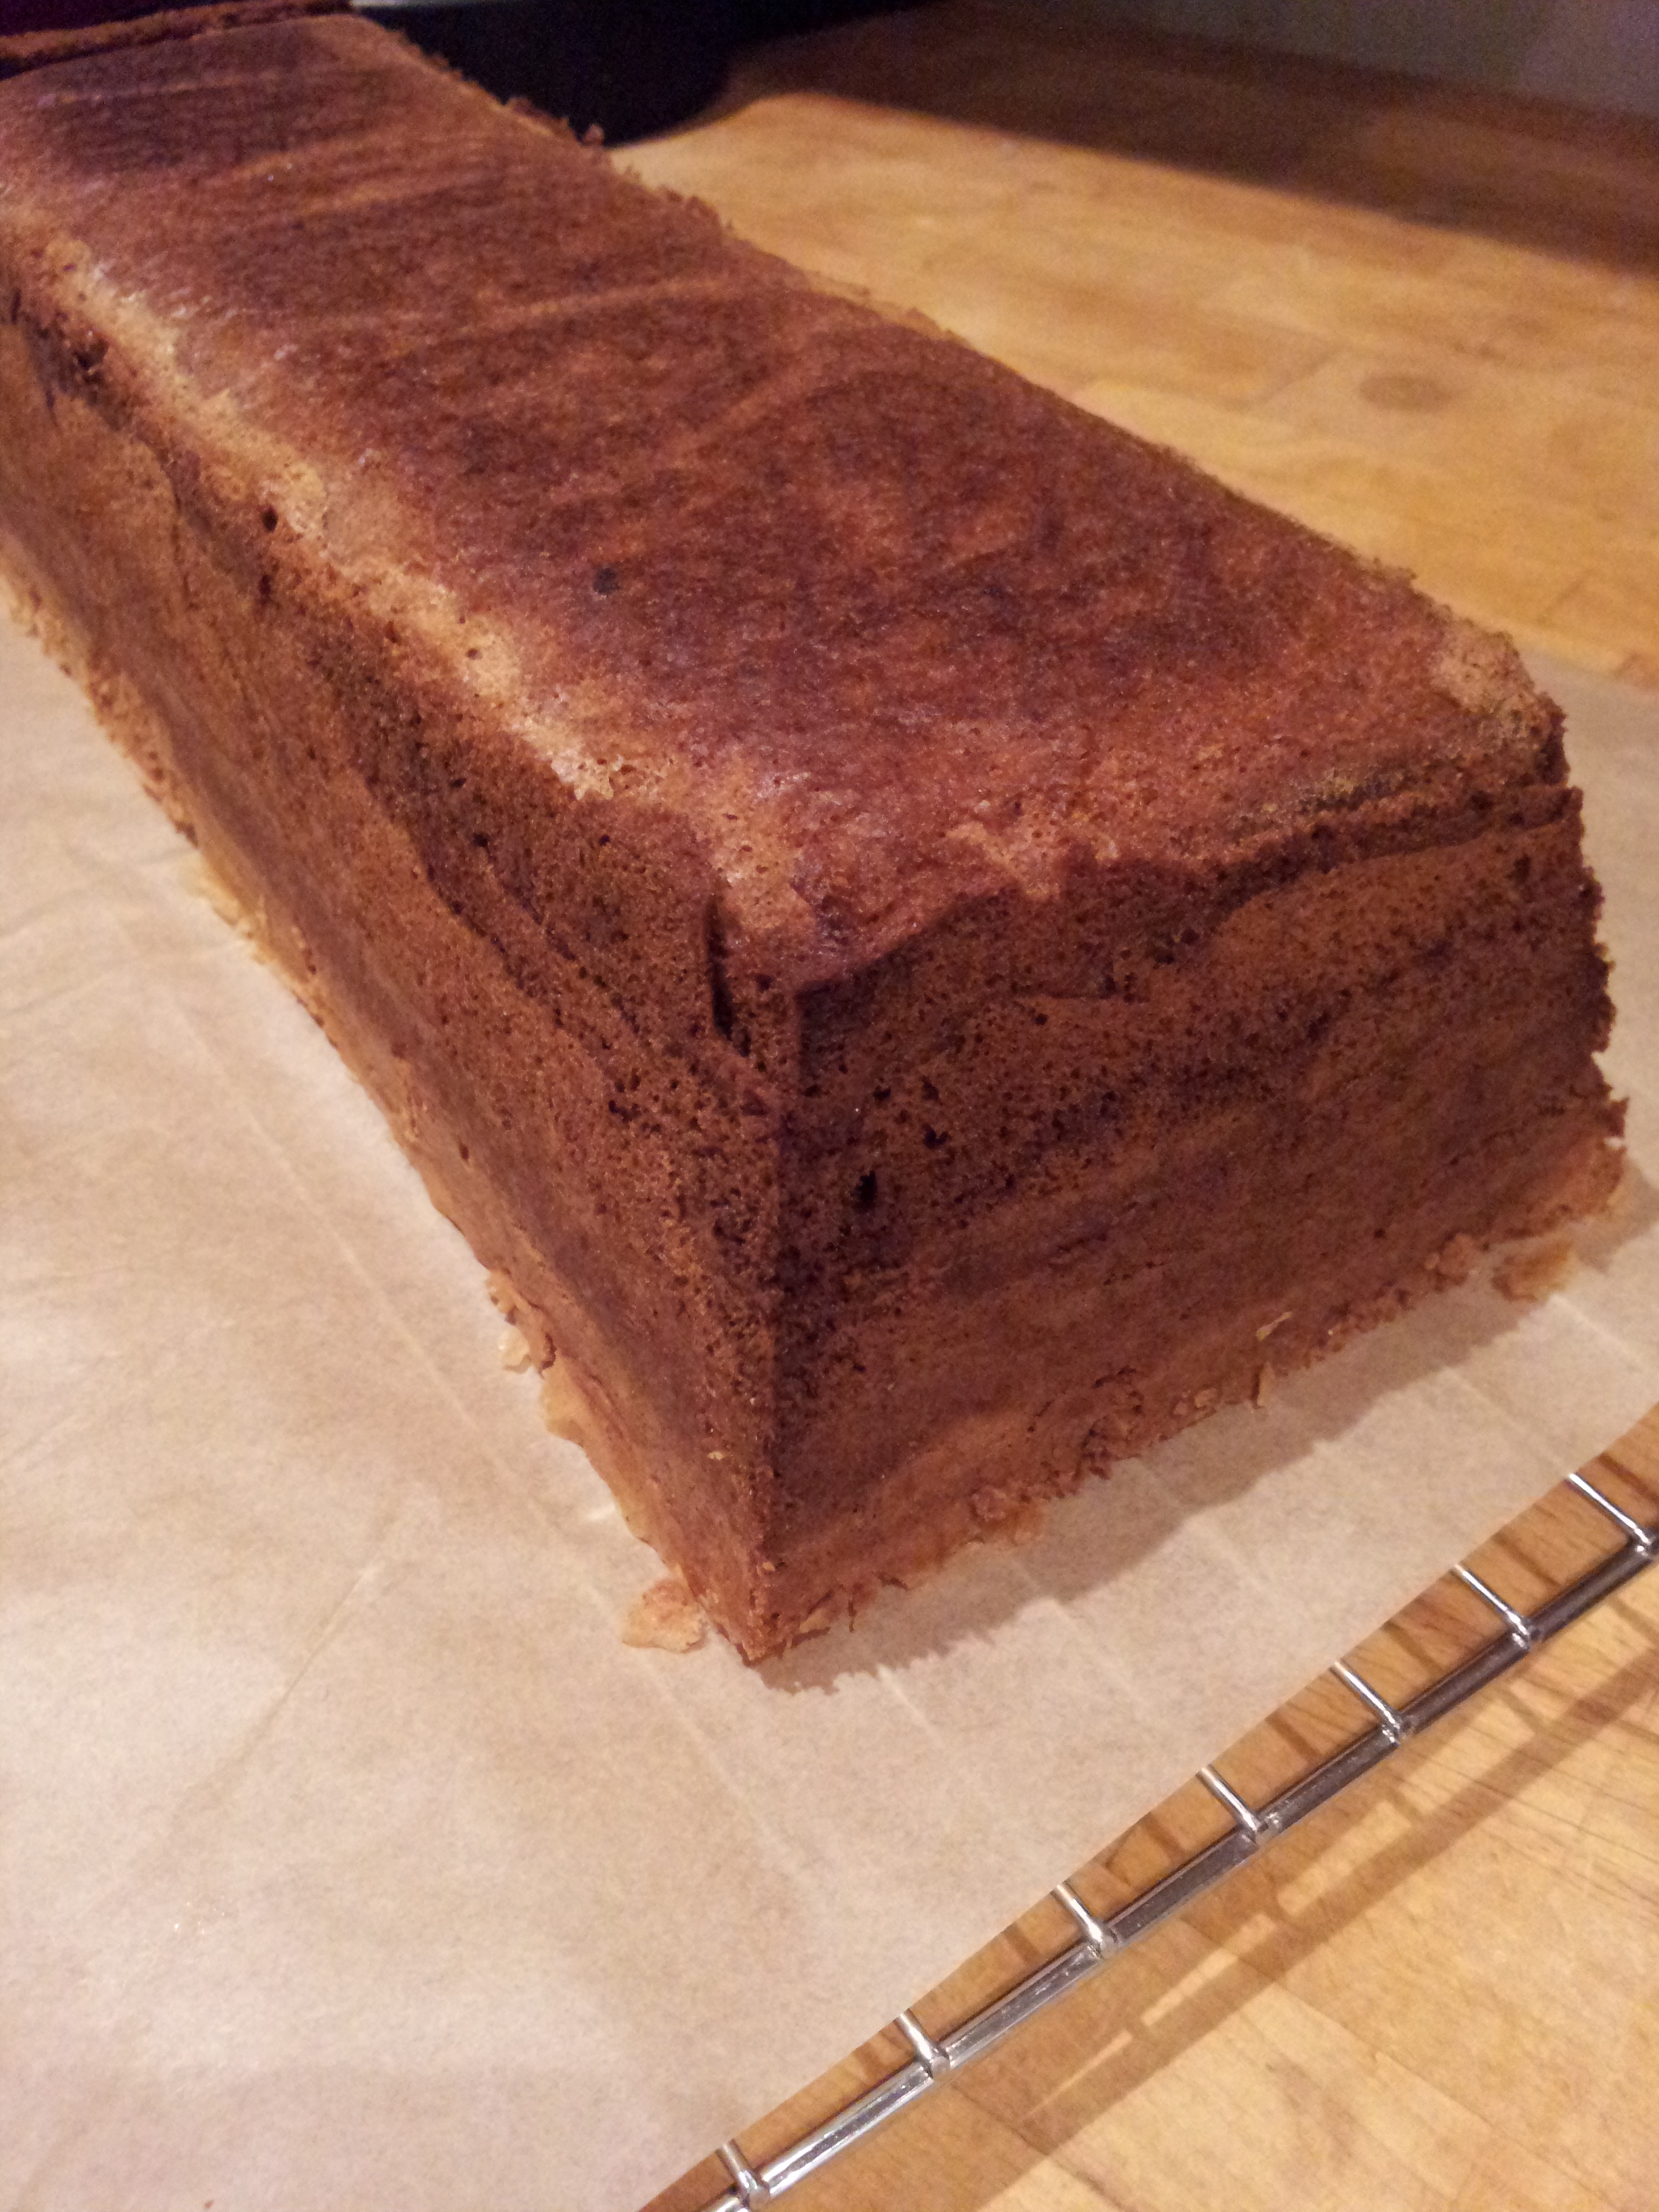
The final long layered cake out of it’s tin
I must admit I was a tad alarmed at how dark the cake was when I removed it from the tin. I did wonder how the initial layers would hold up after being baked time and time again. Would they be burnt and tough? I baked at least 18 layers into my cake, that’s a whole lot of oven time for the first few cms of the cake.

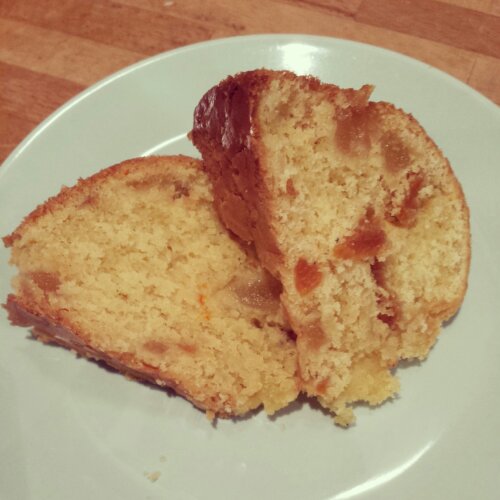
Indonesian Layer Cake
The liquid batter did seep under the greaseproof paper inside the tin. The cake had baked around the paper which made it a his made it a bit difficult remove, but not impossible. However this meant the top was a little uneven, so I trimmed it slightly and dusted it with icing sugar! (shh no one will know!)

Trimmed and dusted to reveal the lovely layers inside
The white icing sugar gave the layers an extra lift against the contrasting spice. I baked my Indonesian Thousand Layer Cake for a special Clandestine Cake Club ‘Here comes the sun’ themed event. I was hurrying along to the cakey gathering but just had enough time to slice up some homemade candied orange and lemon citrus peel (Thank you Sharyn at The Kale Chronicles for the how to!) in long thin strips to create my very own sunburst effect, adding a trio of star anise (one of the key spices in the cake) to bring the summery spicey cake to life. As Mary Berry always says, you should include a bit of what’s inside the cake, outside the cake to whet people’s appetites.

Here comes the sun – Indonesian Layer Cake
As the tin that I used is supposed to be for bread, I don’t own a cake stand or plate big enough to house such a lengthy cake. I resorted to carrying the cake ,open topped on a chopping board instead. Note to self, icing sugar sitting on a cake will not stay there for long on a windy day. Precariously seated on my passenger seat and me also liberally coated in icing sugar we made our way to the Clandestine Cake Club!
Indonesian Thousand Layer Cake
I’m so pleased I took the time to attempt the Indonesian Thousand Layer Cake cake although technically not exactly 1000 layers it feels close enough! A challenge of the patience and my washing up ability it may be but this cake promises so much more than a frustrating time in the kitchen. It is such an unusual tasting cake, quite delicate and surprisingly light, I guess due to the sparse amount of flour and the endless whisking.
Layers and layers and layers
This cake is magic. There must be something in the enormous amounts of eggs that go into the batter that prevent the layers from burning or drying up to a miserable shrivelled mess. It’s moist, spicy and sweet, although not too sweet. It’s a proper grown up cake, sophisticated in it’s beautiful layers and exotic taste. It also improves with age. I had half a piece left from the Cake Club which I shared with Chris 4 days after baking it and it was delicious not dry in the slightest. I think spice cake always deepens in flavour with time. If you want to savour the cake you can even peel each individual layer and eat them separately. I enjoyed devouring it with a strong coffee. I will be baking this again when I have an afternoon to spare and maybe attempting more stripey cakes in the future. I think I’m hooked!
Things I used to make my Indonesian Layer Cake
- 375g sugar (100g added to egg whites, 100g added to egg yolks, and 175g added to butter mixture)
- 10 egg whites
- 8 egg yolks
- 2 tsp cinnamon
- 1 tsp ground cassia bark
- 1 tsp ground cardamom
- 1/2 tsp ground star anise
- 1/4 of a grated fresh nutmeg
- 250g butter
- 185g plain flour
- 2 tsp vanilla extract
- In separate bowl – Whisk egg whites til fluffy add 100g sugar gradually. Whisk til shiny and stiff
- In separate bowl – Cream 175g sugar and the butter together til light and fluffy
- In separate bowl – Whisk egg yolks and 100g sugar together til fluffy
- In a big bowl – Whisk egg mixture and butter mixture together
- Fold in egg whites
- Fold in flour
- Split the batter in half
- Fold the spices into one half of the batter
- Pour a thin 5mm layer of vanilla batter into tin
- Bake for 11 minutes at 160 degrees C.
- Pour a thin layer of spiced batter onto cooked layer
- Bake
- Repeat alternating the batters until all the batter is cooked.
- Cool, remove from tin, decorate and eat!