My slightly dishevelled Latvian Golden Coffee Cake
You can be excused for assuming this cake contains coffee. That’s the first of many surprises that this rather unusual cake bestows. It contains NO coffee but incorporates saffron, cake and a yeasted dough. It’s part cake part bread and mainly liquid!? Golden Coffee cake has intrigued me for months, with it’s promise of a saffron scented pretzel shaped traditional Latvian birthday cake. (I do love a good pretzel) I have been saving this recipe for a special occasion and didn’t realise until I began, just how unusual and complicated it really is.
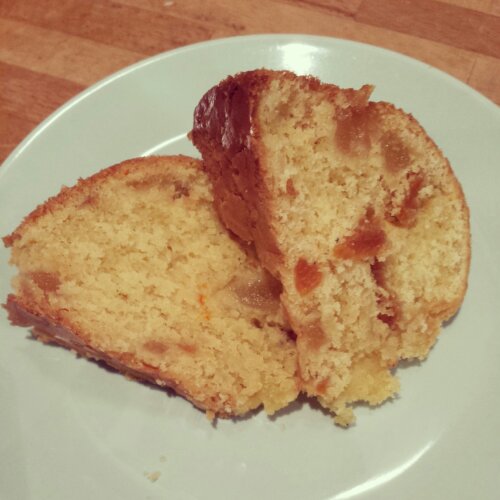
Golden slices
Not many recipes measure flour in litres or require you to combine an enriched dough with creamed butter and sugar. It was a test of my baking skill and intuition as every part of my brain questioned each step of the recipe. I fear I made a right mess of the recipe and something definitely got lost in the translation. Nevertheless I carried on regardless and produced one very interesting cake…

Is this how it’s supposed to look?
The Latvian Golden Coffee Cake begins life as more of a bread dough than a cake. Kneading together flour, yeast and milk together to create a supple and springy dough.

A supple dough
Whilst your busy kneading the dough together steep the saffron threads in a little boiling water to infuse the liquid with the lovely golden hue and save it to one side for later on.

Steeping saffron strands
Then to cream together butter and sugar until light and fluffy, whilst the dough rests and proves. Once the butter and sugar are fluffy you then beat the egg yolks in gradually one at a time. I did wonder if I had misread the recipe here as a whole block of butter seems like rather a lot to try to fit into one bread/cake…
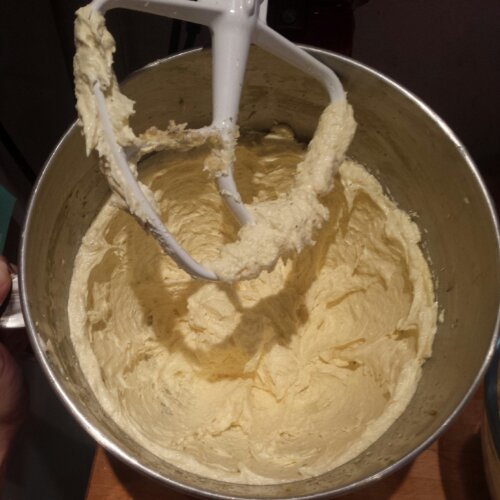
Creamed butter and sugar
This is where I think it all started to fall apart. In an attempt to save on washing up and effort I used my Kitchenaid to knead the dough and creamed butter together. I also forgot to buy cream so substituted it for milk, which is far more liquid than cream. I adjusted the recipe slightly hoping to compensate for this substitution, but I’m not convinced I did! It took a long time to knead the butter into the dough. They just didn’t want to combine! After a good 10 minutes of kneading the gloopy mess smoothed out into a very fluid (!) and smooth bread/cake dough.

Gloopy mess of dough and butter
It took a good 10 minutes of mixing to get the dough to smooth out and look more appealing. And just when it was all going so well the recipe called for the the juice of 1 lemon and (I guessed as it wasn’t mentioned) the saffron and infused water. All this liquid along with the ground cardamom and zests of 1 orange and 1 lemon made for an even wetter dough…

The proven dough
Leaving the liquid dough to prove in the bowl for a couple of hours, it quickly increased in size and almost overflowed the bowl! The yeast was definitely working. The next tricky stage was to attempt to knead the chopped golden cherries (I didn’t have golden raisins but had randomly picked up some golden cherries on a whim, which were a good alternative) and apricots (the only other golden-ish dried fruit that I had in my cupboard).

Chopped dried golden fruits
I could clearly see that this dough was destined to never blossom into a beautiful pretzel shape despite the instruction to knead it on a floured board. There was not enough flour in my house to get this into a malleable dough state. Yet I found myself pouring it onto my worksurface and racing to catch it before it ran onto the floor. It was more like kneading treacle than bread dough. I resorted to stirring the chopped fruit in on the worksurface and scooping the mixture into a well greased bundt tin instead.
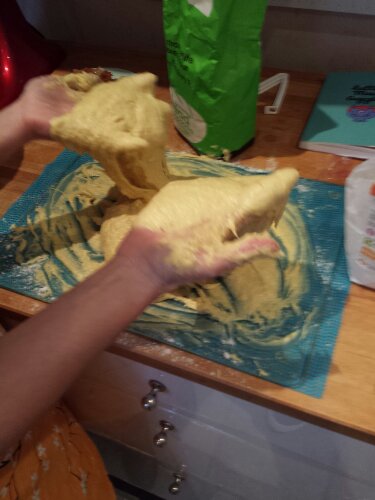
What do I do with this?
Covering the budnt tin with greased cling film I left the dough to prove for a full hour to allow the yeast to do it’s magic. Then into the oven for a good bake 35-45 minutes at 180 degrees c.

resorting to a budnt tin to encase the Latvian Golden Coffee Cake instead…
The bundt tin worked surprisingly well to bake the Golden Coffee Cake in. I think having the hole in the middle helps to ensure a cake is cooked all the way through. It expanded so much during baking, you could hardly see the hole in the middle any more! It sure is a yeasty cake.
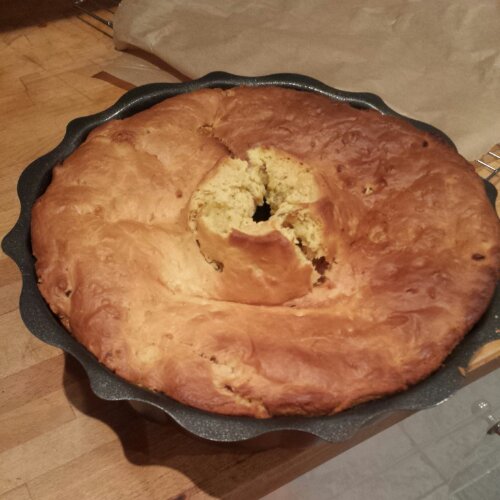
The ever expanding Golden Coffee Cake
I still managed to make a hash of it however, tipping the cake out too soon, whilst it was still hot. I panicked as it sank further into the tin as it cooled. In my haste to turn it out the cake collapsed even further and bits broke off… I did check that the cake was cooked thoroughly by using a cocktail stick. The dough seemed to be evenly baked as the skewer came out clean, but I felt the cake was still a little too moist to hold it’s own weight. Perhaps 5 more minutes in the oven and 10 more minutes cooling in the tin afterwards would have given it the extra strength to hold it’s own shape a little better.

Tipped out too soon…
My Golden Coffee Cake has a slightly rugged edge to it which isn’t necessarily a bad thing. As the cake had expanded enormously there were bits of overhang, that had to break off to get it out of the tin. This means that you get to sample the cake before everyone else! Super Hans and I shared the scraps. He thoroughly enjoyed it which is always a good sign,
The opened cake
I was a bit nervous about presenting this cake to my friends at the Clandestine Cake Club. It really hadn’t gone to plan, despite the many hours of planning and preparation that had gone into this cake. Saffron tends to also be an acquired taste especially when combined with the strong yeast, it’s quite the unusual flavour combination.

The beautiful collection of cakes at The Clandestine Cake Club – my emergency blackberry heart is on the right
The original recipe called for icing too, which frankly I couldn’t be bothered to make as I decided to bake an emergency alternative blackberry and almond cake to take to cake club instead. I didn’t want to waste my Golden Coffee Cake, I still took it along repeatedly apologising for it’s dishevelled appearance.

The Golden Coffee Cake
The verdict? Golden Coffee Cake reminds me of a stronger flavoured Hot Cross Bun. A spicy and fruity bread rather than a traditional sponge cake. It’s similar to an Italian Panetonne, so would be a lovely Christmas bake. The taste definitely improves with age so it’s best baked in advance to allow the flavours to develop and mellow. On the third day, it tasted pretty good! The wet enriched yeast dough gave the cake the moisture it required to create a light aerated texture, with an even crumb I’m sure Paul Hollywood would be proud of.

Golden and fruit filled
It was a rather moist cake, so a slightly longer baking time wouldn’t do it any harm. It may have been even better if I had got round to icing the cake too! The feedback from my cake club friends was very positive too. Perhaps I had been too hasty in my judgement of this cake, dismissing it as a failure.
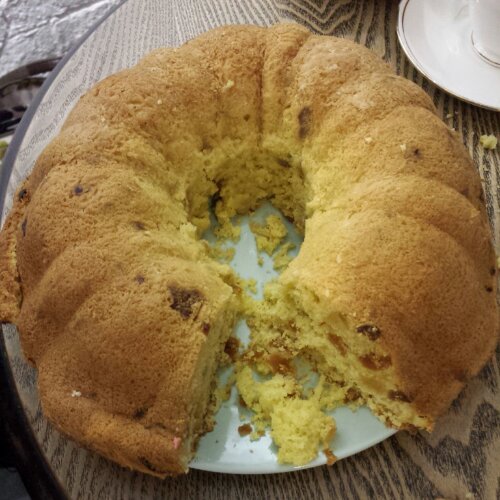
Golden Coffee Cake
The Latvian Golden Coffee Cake is an exotic cake that I’m very pleased I got to experiment with. I love the defined bundt shape of this bake. The dough really holds the grooves of the bundt well and once you slice into the cake it’s beautiful golden saffron interior is revealed. You get a lovely waft of cardamom from the cake too with every slice, bringing it’s own festive cheer to the table. The sharpness of the citrus fruits cuts through the yeast and spice and gives the cake a light tang. This cake isn’t a cheap to make, once you’ve purchased your precious saffron, cardamom, butter and eggs so I can see why the Latvians save it for special occasions. I fear I may never learn my lesson and continue to substitute ingredients on a whim, so I take the blame for my own additions to this recipe! Don’t add too much liquid if you do try this at home and you may actually get to shape it into a pretzel!
Things that I used to make my Latvian Golden Coffee Cake
- 1/2 tsp Spanish saffron – steeped in
- 1/4 cup boiling water
Knead together
- 570g strong white flour
- 20g instant dried yeast
- 400ml warm milk ( I would use much less! maybe 300ml if using milk or 400ml of double cream)
- 1 tsp sugar
- 1 tsp salt
- The water infused with saffron and the strands
Cream together in a separate bowl
- 250g butter
- 3/4 cup sugar
Then beat in
- 3 egg yolks
- zest of 1 orange
- zest of 1 lemon
- 1/2 tsp ground cardamom
Knead the butter mixture together and dough
Prove dough for 1 hour
Knead in
- 300g of dried chopped fruit (golden cherries/raisins/apricots)
(Shape like a pretzel if you can! and bake on a greased sheet.)
Pour into a greased bundt cover and prove for 1 hour
Bake for 35-45 minutes at 180 degrees C
Allow to cool in the tin for around 30 minutes
Ice with a sugar glaze if you like! (Mix icing sugar and water together until gloopy and pour over your cake) or leave plain if you prefer.
Golden slices
Enjoy a slice with a nice strong coffee, hence the name Golden Coffee Cake!
This recipe was adapted from the www.latvianstuff.com/Kringel.html. Thank you for the inspiration and my apologies if I’ve ruined your recipe! Any tips on how to improve my technique would be very welcome.