

Hot Pot Sourdough
Since my first Sourdough success I’ve continued to experiment and tweak my recipe (which is now mainly in my head and variable) I change it every time I bake, depending on what flour I have to hand and how healthy I’m feeling…
BUT I think I may have cracked my staple sourdough recipe now using quite an ingenious method. Hot Pot Sourdough!

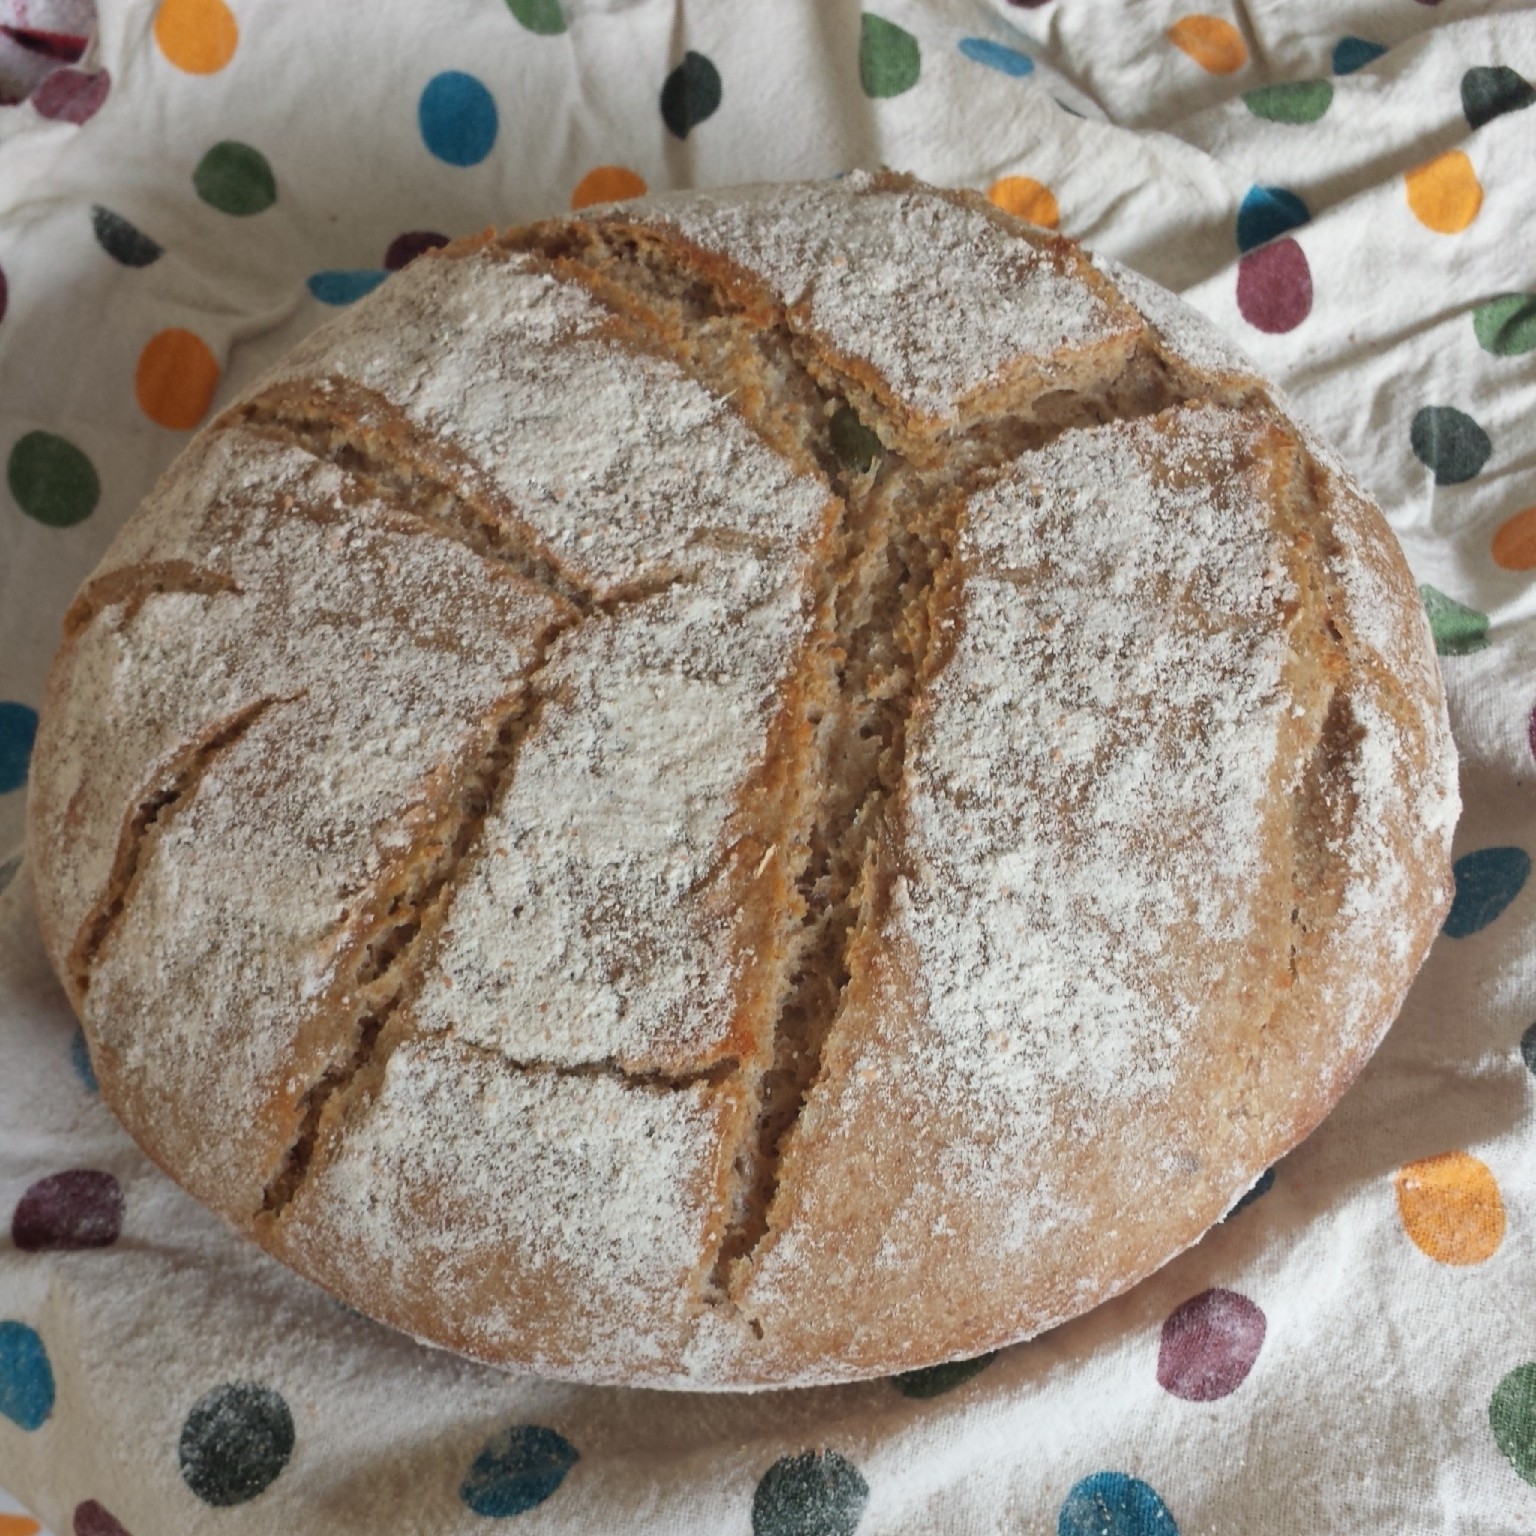
Seeded Sourdough Boule
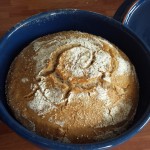
I realised that the sourdough strength (how active it is) and thickness (or rather the ratio of flour to water if you want to get all technical about it) plays a massive part in how successful a loaf is.

It’s all about the hot (casserole) pot
Making a true sourdough loaf (not adding any instant yeast at all) can be a bit hit and miss. But after a lot of experimenting (or disasters) I seem to have cracked it! Here’s how…
1. Pour most of your starter away before you feed it. Leaving one quarter of your starter to add flour and water to. (As I explained in my last Sourdough post.)
2. Feed your starter at least 8 hours before you want to use it!
3. Feed it a lot! You need a lot of sourdough starter to make this loaf so feed it 400g flour and 400g water (about 2 cups)

Feed me: Stir in your flour and water til smooth
4. Leave the rubber seal on the jar of sourdough starter. This means when you close the jar lid it’s airtight. (It seems to help keep it more active and fresher for longer.) BUT you will need to open the lid to release the built up air once a day (especially after its been fed as its most active!) to stop the jar exploding.

Frothy Sourdough starter ready to use
4. Wait until the starter is frothy (8 to 24 hours after feeding it).Then you know it’s ready to use.

Oh so hungry and unhappy sourdough starter
5. If your sourdough starter starts to split and gather a layer of water/black liquid on top it’s hungry! Pour most of your starter away and give it a good feed.

Hungry Sourdough has a layer of darker (smellier) water on the surface
6. I give my starter a good (400g flour and 400g water) feed once a week, the day before I want to begin my bread. I leave it at room temperature everyday and try to remember to feed it when it’s starting to look hungry/spilt (usually once every 2 to 3 days). I would feed it every day if I was baking a lot of bread. But half a cup of flour and half a cup of water will suffice as a mini feed to keep it active in between big feeds. Try to feed it a small amount every couple of days.

Just fed sourdough starter – smooth and thick
7. Invest in a banneton (proving basket) or two – I have a rectangular and a round one for different style loaves. When working with a wetter sourdough loaf the proving baskets help the loaf to keep its shape.

Proving in my round bannetone basket with a cotton liner to prevent it sticking. You can place it directly into the basket if you prefer to get the pretty swirls imprinted on your loaf
8. Flour the banneton with an even and thick layer. (It helps to leave the pretty swirly patterns). Or if using a cotton liner inside your basket, flour the liner to prevent the dough sticking. Use a shower cap or cling film to cover the top. Prove the loaf in the basket over night in the fridge.
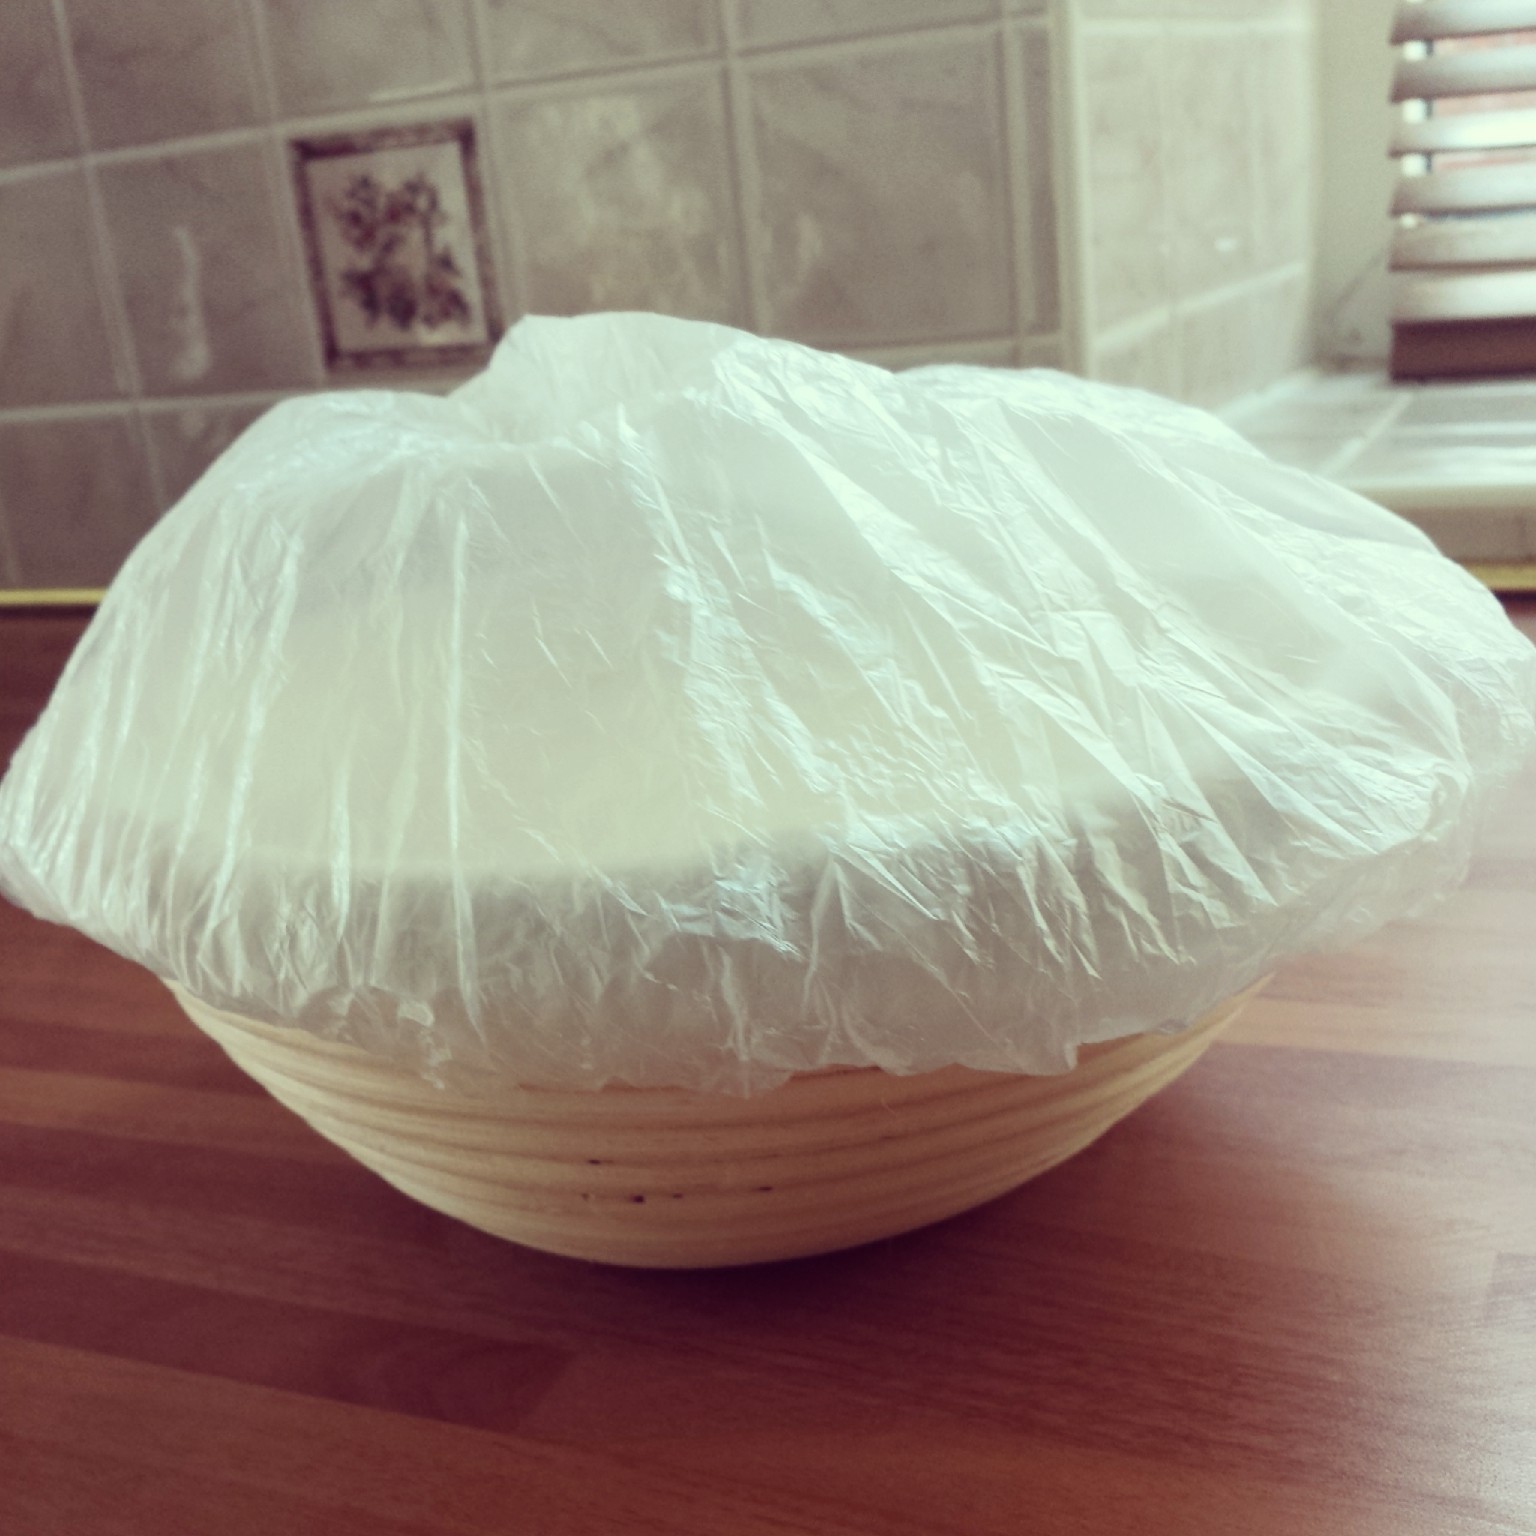
Ready to prove in the fridge over night
9. Score it with a razor blade – Get creative with your patterns, creating swirls and slices to help the loaf expand in all the right places as the yeast reacts to the heat of the oven. Scoring your loaf will prevent it splitting and it looks so pretty too.

Score your proved loaf with a razor blade (and a chopstick)
10. Bake in a hot pot! When warming the oven put a casserole pot with a lid in to heat through. I whack my oven up to the hottest temperature for 30 minutes. Sprinkle an even layer of ground semolina on the bottom of your pot and gently tip your proven loaf into the pot from the banneton basket. Careful not to knock all of the air out of the loaf as you do so and not to burn your hands on the very hot pot. (Unfortunately you cant bake the bread in the basket so the loaf needs to be removed). I use a round banneton to prove my loaf in and a round pot to bake in.


- Pop the lid on the pot and place it in the oven at the hottest temperature for 15 minutes, then turn the temperature down to about 220 degrees C for the final 15 minutes. I use a glazed terracota casserole pot which can take the heat and protects the bread from scorching.
One corn ear patterned sourdough boule
Keeping the lid in place means all of the steam is retained in the bread, which adds extra moisture and softness to the bread AND results in the most amazing ‘oven spring’ you will ever see in your bread. I guarantee it! It will double in size.
Play around with your recipe until you get it just how you like it! Here’s some of my attempts so far…
My Sourdough Family
-

- Thin slices of white sourdough
-

- Corn ear seeded rye and spelt sourdough loaf
-
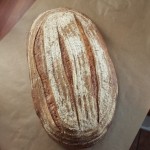
- Scoring the loaf lengthways helps it retain it’s shape
-

- Long slices help the longer loaf keep it’s shape
-

- Hot Pot Sourdough
-
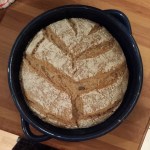
- It’s all about the hot (casserole) pot
-

- Seeded Sourdough Boule
-
- After: Look at that oven spring! It expanded so much it was touching the lid of the pot
-

- One corn ear patterned sourdough boule
Staple Sourdough Recipe
- 500g flour (I usually use 250g ish of white flour 150g rye 100g spelt or wholemeal)
- 250g water (You may need slightly more water if using a drier flour such as wholemeal, rye or spelt.)
- 400g frothy sourdough starter
- 10g salt
- A splash of olive oil (approx 1-2 tbs depending on the flour, enough oil to bring the dough together into a shiny ball but not to much making the dough wet and sticky).
- 1 tbsp barley malt extract (optional)
- 50-100g mixed seeds (optional: linseed, flax, poppy, chia, sunflower, pumpkin)
How to make Hot Pot Sourdough
- Pour the salt, flour, sourdough starter, barley malt extract (if you’re using it) and water into a mixing bowl.
- If using an electric mixer, put it on a low speed for 10 minutes, pouring a splash of oil in as and when required to bring the dough together into a smooth and shiny ball. (Or if doing it by hand, mix together with a wooden spoon until it comes together. Adding a drizzle of oil to help it along. Then knead for 10 minutes.)
- Cover the bowl with cling film/shower cap and leave to prove overnight in the fridge or for 2- 3 hours at room temperature.
- Knead and shape your loaf on a lightly floured surface to knock out the air bubbles. If you want to add seeds, now’s the time to knead them into the dough.
- Place into a floured banneton (or loaf tin), cover with a shower cap and prove over night in the fridge or for 2 hours at room temperature.
- Pre heat your oven and hot pot at the hottest temperature for 30 minutes
- Sprinkle ground semolina on the bottom of your hot pot
- Gently tip the proven loaf from the banneton, moving he basket as close to the hot pot as possible. Don’t worry if you’re slightly off centre, the loaf will sizzle as it hits the hot surface, firming the base of the loaf up. It can then be gently slid around the pot if you tilt it to one side. Don’t try to move it with your fingers as you’ll knock the air out and probably burn yourself!
- Score the loaf with a sharp knife or razor blade.
- Pot the lid on the pot and bake it at your oven’s highest temperature for 15 minutes. (250 degrees c) Turn it down to around 220 degrees c for the final 15 minutes. You can check the bread is cooking by taking the lid off.
- Remove from the hot pot when it looks fully risen (30-35 minutes of baking should do it, but check it sounds hollow when you tap it’s base. If not, leave it in for a few more minutes.)
- Looking for a soft crust? Wrap your hot loaf up in a clean tea towel to hold in the moisture and soften the crust. Leave it to cool fully in the tea towel.
- Looking for a crisp chewy crust? Take the lid off the hot pot for the final 5 minutes in the oven. Leave your loaf to cool on rack.
- Slice it up and enjoy! I often eat this bread without any butter at all, as it’s so moist it really doesn’t need anything to liven it up. Just pure unadulterated sourdough joy!
- Once cooled I pop the loaf back into my pot to keep the air out and keep it fresh. It lasts for at least a week.
- If I’m not going to get through a whole loaf I like to slice it up thinly and freeze half. Then I can defrost a slice at a time as I need it.
- Eat and repeat!
P.S. My original sourdough experiments can be found over on my post ‘Starting Sourdough with James Morton’.


