
Jamaican Black Cake
Officially the most alcoholic cake that I have EVER baked. Jamaican Black cake is most definitely not for the faint of heart or soberest of people. Containing 2 bottles of dark rum and a half bottle of Brandy, the fumes emanating from the cake are enough to make you slightly squiffy, never mind devouring a full slice!
")
Dark Rum (not just any dark rum but Marks and Spencers Dark Rum)
I happened upon the idea of a Jamaican Black cake when looking for Christmas cake recipes and I spotted it for sale at the continental Christmas markets. I required a wonderful cake recipe to bake for my first ever venture into the world of Clandestine Cake Club where the theme was cakes with beverages and also something luxurious for my mam’s mothers day present too. This is how I ended up scouring shops for a ridiculous amount of prunes, raisins, booze and Angostura Bitters. Did you know that they are difficult to find despite their 47% volume and are rumoured to be poisonous in large quantities… Good job this only needed 2 tablespoons of the pink stuff!

rum soaked fruit
I soaked the mammoth amount of dried fruit in an entire bottle (1 litre) of rum for about 2 weeks. I had to split the fruit into 2 jars as I simply did not have a vessel large enough to contain the copious amounts of booze and fruit.
I probably should have read the recipe more carefully as I would then have discovered that this recipe is enough to yield 3 or 4 cakes. I had produced a Jamaican Black Cake factory!! [I’ve revisited this recipe and reduced it down to Just the one Jamaican Black Cake here if you want to bake fewer cakes.]
The recipe also did not specify the volume of the bottles of booze so I shall let you know what worked for me (and as per usual I did end up substituting something for things that I like better. I hope that doesn’t detract from its Jamicanness? (or Trinidad – ianness origin also).

Rum soaked fruit… how much can I cram in to the food processor?
I figured that soaking fruit in this sheer amount of rum as well as being highly decadent is enough to ensure a good result (or get you very drunk so you no longer care what the cake actually tastes like). The idea behind such a long soak is to help macerate the fruit and also creates a much denser and moist texture than traditional fruit cake/Christmas Cake. I also think that it might make a wonderful Christmas pudding.

Maybe a bit more…
Following the long rum soak the fruit required mushing up. My weapon of choice was my food processor. Rather dangerously I crammed the entire fruit and rum mix into the bowl and forced the lid on. It took rather a lot of whizzing to get the mix to condense down into a fruit paste but it’s a determined little processor and did a wonderful job. Adding the Angostura bitters left a pink hue to the mixer bowl for future Jamaican Black Cake memories.

Eeek! Full to capacity but valiantly managed to macerate the fruit fully
With the food processor chugging away I had a chance to get on with ‘browning the sugar’. This is a new technique for me and undoubtedly adds to the depth of the final cake colour. Light brown sugar is heated in the pan until it melts to create a caramel. Adding a little water (in total half a cup) at a time. I struggled to get the sugar to melt and in frustration tipped all the water in, which wasn’t a good idea as it crystalised into chunks and required a much more vigorous heat and stir to get a smoother caramel. And even then it was still on the crunchy textured side for my liking. But I figured the heat of the oven would help to incorporate the crystals into the cake, I’m pretty sure I was right too! No sign of crunchy sugar lumps in the final cake.

Bubbling and browning the sugar to a caramel
Perhaps I was multi tasking to the extreme as I then attempted to beat the butter, sugar and eggs together whilst macerating the fruit and drowning/browning the sugar. But hey I have 2 hands, why not use them?!

Creaming the butter and sugar
After a short while I realised I don’t own a bowl big enough to house all of the cake ingredients in. I now had 3 separate and extremely full bowls which were already overflowing!! Once I stirred the browned liquid sugar into the beaten eggs and sugar I then only had 2 massive bowls of stuff to combine…

Mixing the browned sugar into the mix

Tonnes of butter, sugar, eggs and browned butter!
A spot of logical thinking brought me to the conclusion that this was possible, I just needed to divide the mix in order to conquer it.

Emmmmm how do I combine all of this???
I poured roughly half the beaten eggs, butter and sugar into one large mixing bowl. I then decanted half of the mushed up fruit and rum on top of the batter. This meant I had some space to fold the mixture together with my metal spoon. Although some ingredients fell over board I feel I salvaged the majority of it.

Hope it doesn’t overflow…
I repeated the process in a separate bowl with the other half of the mixture. Although I’m sure my guess work is highly accurate I couldn’t help but notice one bowl of batter looked a bit blacker than the other which worried me that I had put more fruit in inequality bowl than the other but there was nothing to gain by fretting about it and these monster cakes needed a.good 3 hours in the oven so I had to plough on.

It was a bit of a tight squeeze!!

Fully combined all of the ingredients!!
I had already greased and double lined 2 round springform cake tins with an extra high collar fixed on the outside with string to prevent the cake top from burning. I used a.22cm tin and a 20cm tin and found I still had cake to spare so quickly greased my favourite bundt tin (with a very generous layer of butter as I couldn’t line the moulded tin with paper and wanted to make sure I could get the cake back out again!!) Due to its shape I also couldn’t tie a protective collar of greaseproof paper round the bundt tin so opted for a lid of tin foil over the top. This scrunched up edges to create a seal over the top of the tin and stayed put throughout the baking process.

Doubled lined and dressed in collars – cakes ready for the oven
I smoothed the tops of the cakes as flat as I could as I wasn’t expecting them to rise very much.
I did check on the cakes regularly and turned them slightly so as to avoid burning the edges. But I resisted opening the oven for at least 2 hours to keep the heat in and the cakes rising. No one wants a sunken and heavy cake…

Trio of Jamaican Black Cakes hot out the oven
After 3 hours they were definitely done and the skewer came out clean.
The final touch was to pour half a bottle of rum over the 3 cakes whilst they were still in their tins and warm.

More rum glistening on top
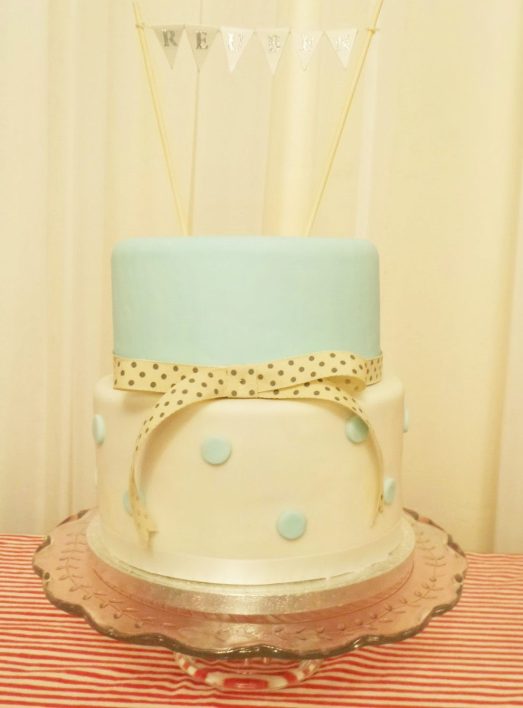
What a wonderful cake! It was definitely worth the extra preparation time and although it’s not traditional to ice a Jamaican Black Cake, my Mam loves marzipan and royal icing so I created a Cath Kidston -esque star design especially for her using the largest of my trio of cakes. This wasn’t the easiest cake to ice as the cake was still rather moist (and full of rum) so I struggled to get the icing to stick. Some say that it is too sweet with the layers of icing, but I actually really quite liked it. It is very similar to a Christmas Cake however it smells so much more of booze and brings a lovely rose to the cheeks.

Cath Kidston Jamaican Black Cake
The second cake which I baked in the bundt tin required some coaxing to remove it from the tin. (I implemented a cocktail stick to loosen the cake around the sides, then I let gravity do the rest of the work, turning the tin upside down on a plate.) I took this to my first ever Clandestine Cake Club and shared the cake with lots of other cake lovers. I will tell you more about this another time 🙂

Jamaican Black Bundt Cake – note the slight cocktail stick indentations… oops but rum hides all sorts of sins

The more traditional shaped Jamaican Black Cake

The Towering Trio of Jamaican Black Cakes
Things that I used to make Jamaican Black Cake…
An insane amount of dried fruit and alcohol! Although I didn’t stick completely to the combinations below I think you can play around with which dried fruits you use depending on what is available provided it all adds up to the same total amount of dried fruit. I also worked from 2 different recipes to make sure I had a good all rounder recipe and that I made it as authentically as possible.
[Since creating this recipe I have revisited it and reduced it so you can also now follow a recipe for Just the One Jamaican Black Cake if you prefer!]
Fruit Puree Base:
Soak the fruit in rum for up to 2 weeks (or at least 3 days) prior to macerating
- 500g prunes
- 500g dark raisins
- 750g currants
- 500g dried cherries
- 250g mixed candied citrus peel
- (Total of 5 and 1/4 pounds of dried fruit or 2.4 kilograms)
- 1 bottle cherry brandy (I had to make do with plain old Brandy and used a 500ml bottle)
- 1 bottle rum and/or Bailey’s (I used a 1 litre bottle of dark rum. I didn’t include Baileys) -Other recipes also suggest using Manischewitz Concord grape wine which doesn’t seem to exist in England so I just opted for adding a bit more rum
- 2 tbsp Angostura bitters
Browning:
Heat the sugar in a heavy based pan until it melts and then add a little bit of the water at a time until it becomes a dark caramel. Careful not to burn it, but it will come very close to being burnt to achieve ‘browned’ perfection.
- 500g brown sugar
- 1/2 cup boiling hot water
Cake:
Beat the sugar and eggs together and then beat the eggs in one by one. (You will need a big bowl as it gets a bit messy with 8 eggs!) Add all the flavours to the egg mix.
Sift the dry ingredients together and then fold it into the beaten eggs, sugar and butter.
Then mix in the fruit puree and browned sugar liquid.
Pour into 3 greased and double lined cake tins.
Bake at 120 degrees celsius (250F) for 3 hours
- 500g unsalted butter
- 500g sugar
- 8 eggs
- 1 tsp lemon essence (I didn’t have this so used lime juice instead…)
- I used the zest of 2 whole limes (but then realised the recipe said 2 tsp lime rind)
- 2 tsp almond essence
- 2 tsp vanilla
- 500g plain flour (I used plain white flour but you could make this cake gluten free by using your favourite gluten free plain flour or a combination of gluten free flours such as 250g cassava flour + 250g rice flour)
- 4 tsp baking powder
- 2 tsp mixed spice
- 1/2 tsp grated nutmeg
The Final Touch:
Pour a generous amount of rum/brandy onto the top of your cake. It should absorb rather a lot of rum at this point. The cake will get darker with the more rum that you force feed it. It may take a day for the cake to absorb the rum but it will get there.
Wait until the cake has cooled completely before removing it from the tin and pop the cakes in an airtight container. I even left one cake in the tin for a week with tin foil over the top while it absorbed the rum (and I had ran out of containers big enough to keep it in!
MORE RUM 1 500ml bottle of dark rum for pouring on the hot cakes
Keeping Your Jamaican Black Cake:
The cake should keep for (at least) a month in an air tight container. Or perhaps even longer if you can resist eating it as it’s almost pickled with that amount of alcohol in it! Tin foil is also a good idea help seal in the rum and prevent the cake from drying out.
I froze my final cake and I think it will keep for at least a month in the freezer before I decide what to do with it.
This recipe was created using inspiration from Auntie Olga’s Trinidad Black Cake and the Naparima Girls’ High School Cookbook.
Thank you for reading!


")


