

Bazlama -Turkish Flatbreads
I’ve eaten quite a few flatbreads in my time. The most memorable being the fresh Moroccan breads purchased from a family’s converted front window along with a couple of mini bananas for essential sustenance for our 13 hour trek and overnight camp in the Sahara. I can still taste that soft fluffy white bread as I devoured it during the extreme heat wave washing it down in between swigs of proper sugary coke. The only thing that helped with the dehydration before we slept out under the stars on the hot sand.

Camel trekking into the Sahara fuelled by flatbreads
I’ve been searching for a recipe that could help me recreate that moment of sheer bread delight. The kind of delicious every day bread that meets every basic need. Versatility is one of it’s many virtues, it could be a meal in itself if required or the perfect accompaniment to any dish.
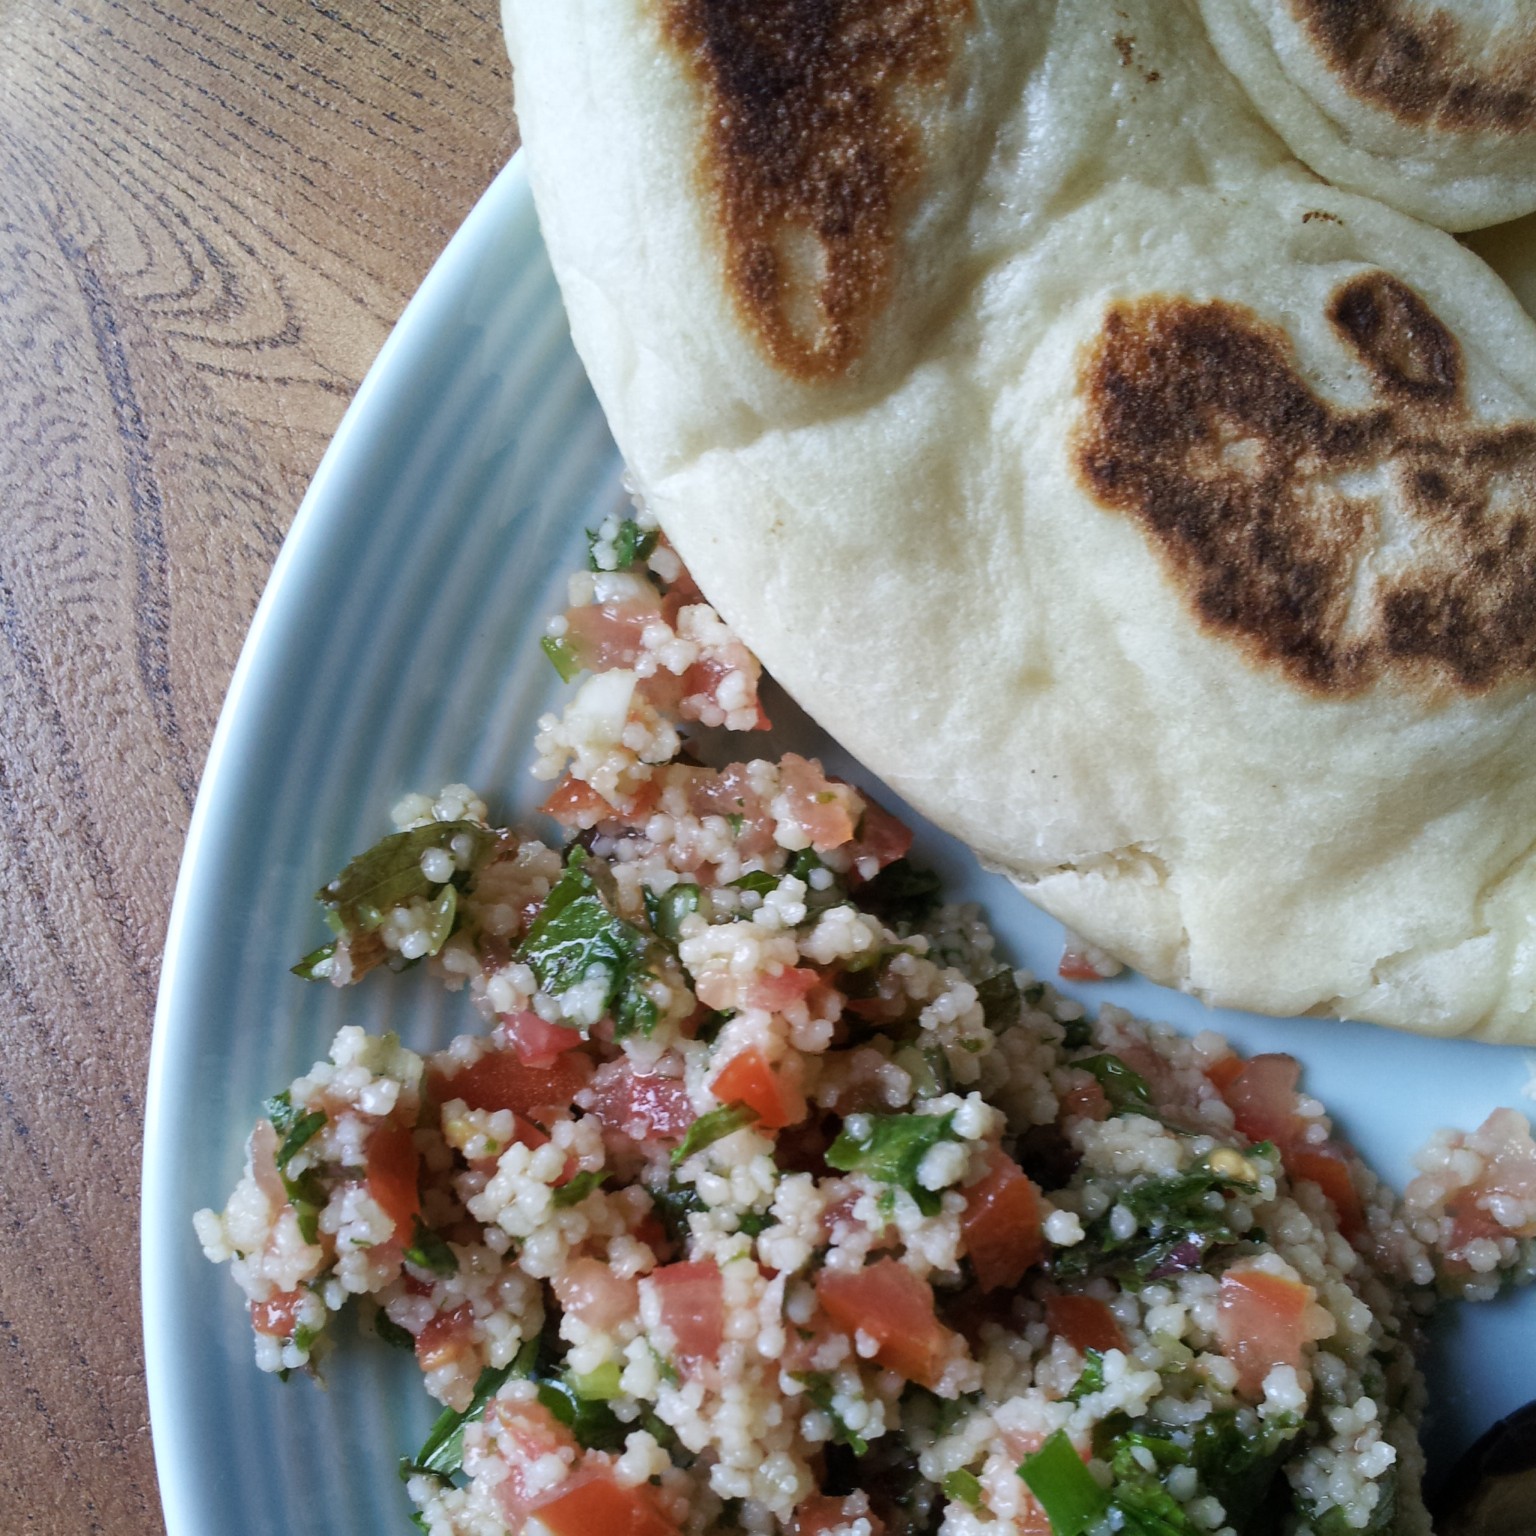
Bazlama the perfect accompaniment to any meal
This recipe originates from Turkey and is an absolute pleasure to make and eat. It’s an enriched dough with Greek yoghurt and oil which helps to retain it’s moisture so it keeps a little longer than it’s Moroccan counterpart which had to be eaten entirely on the first day, especially when it was over 50 degrees C most days!

Beautiful Bazlama
My previous attempts at flatbread making have been a bit hit and miss. (You will not find my hideous chapattis on here yet which were more like sofa cushions than delicate wholemeal wraps.) I blamed my pan, which has lost it’s non stick entirely and adds a beautiful dusting of metal to most dishes.
Cooking in cast iron
I longed for cast iron cooking equipment and discovered a small cast iron frying pan in Oxfam for £3 which is a joy to use. It reaches temperatures that other pans a simply can’t maintain and needs only the tiniest drop of oil to prevent it sticking. Armed with this pan I intend to conquer flat breads once and for all.

Mix all the ingredients together to a shiny dough
This recipe is enough for 6 – 8 hand sized small flat breads. Mix all of the ingredients together into a shiny dough (keeping the salt away from the yeast). Knead the dough for about 10 minutes until smooth and springy. Then leave to prove at room temperature for 1 to 2 hours until at least doubled in size.
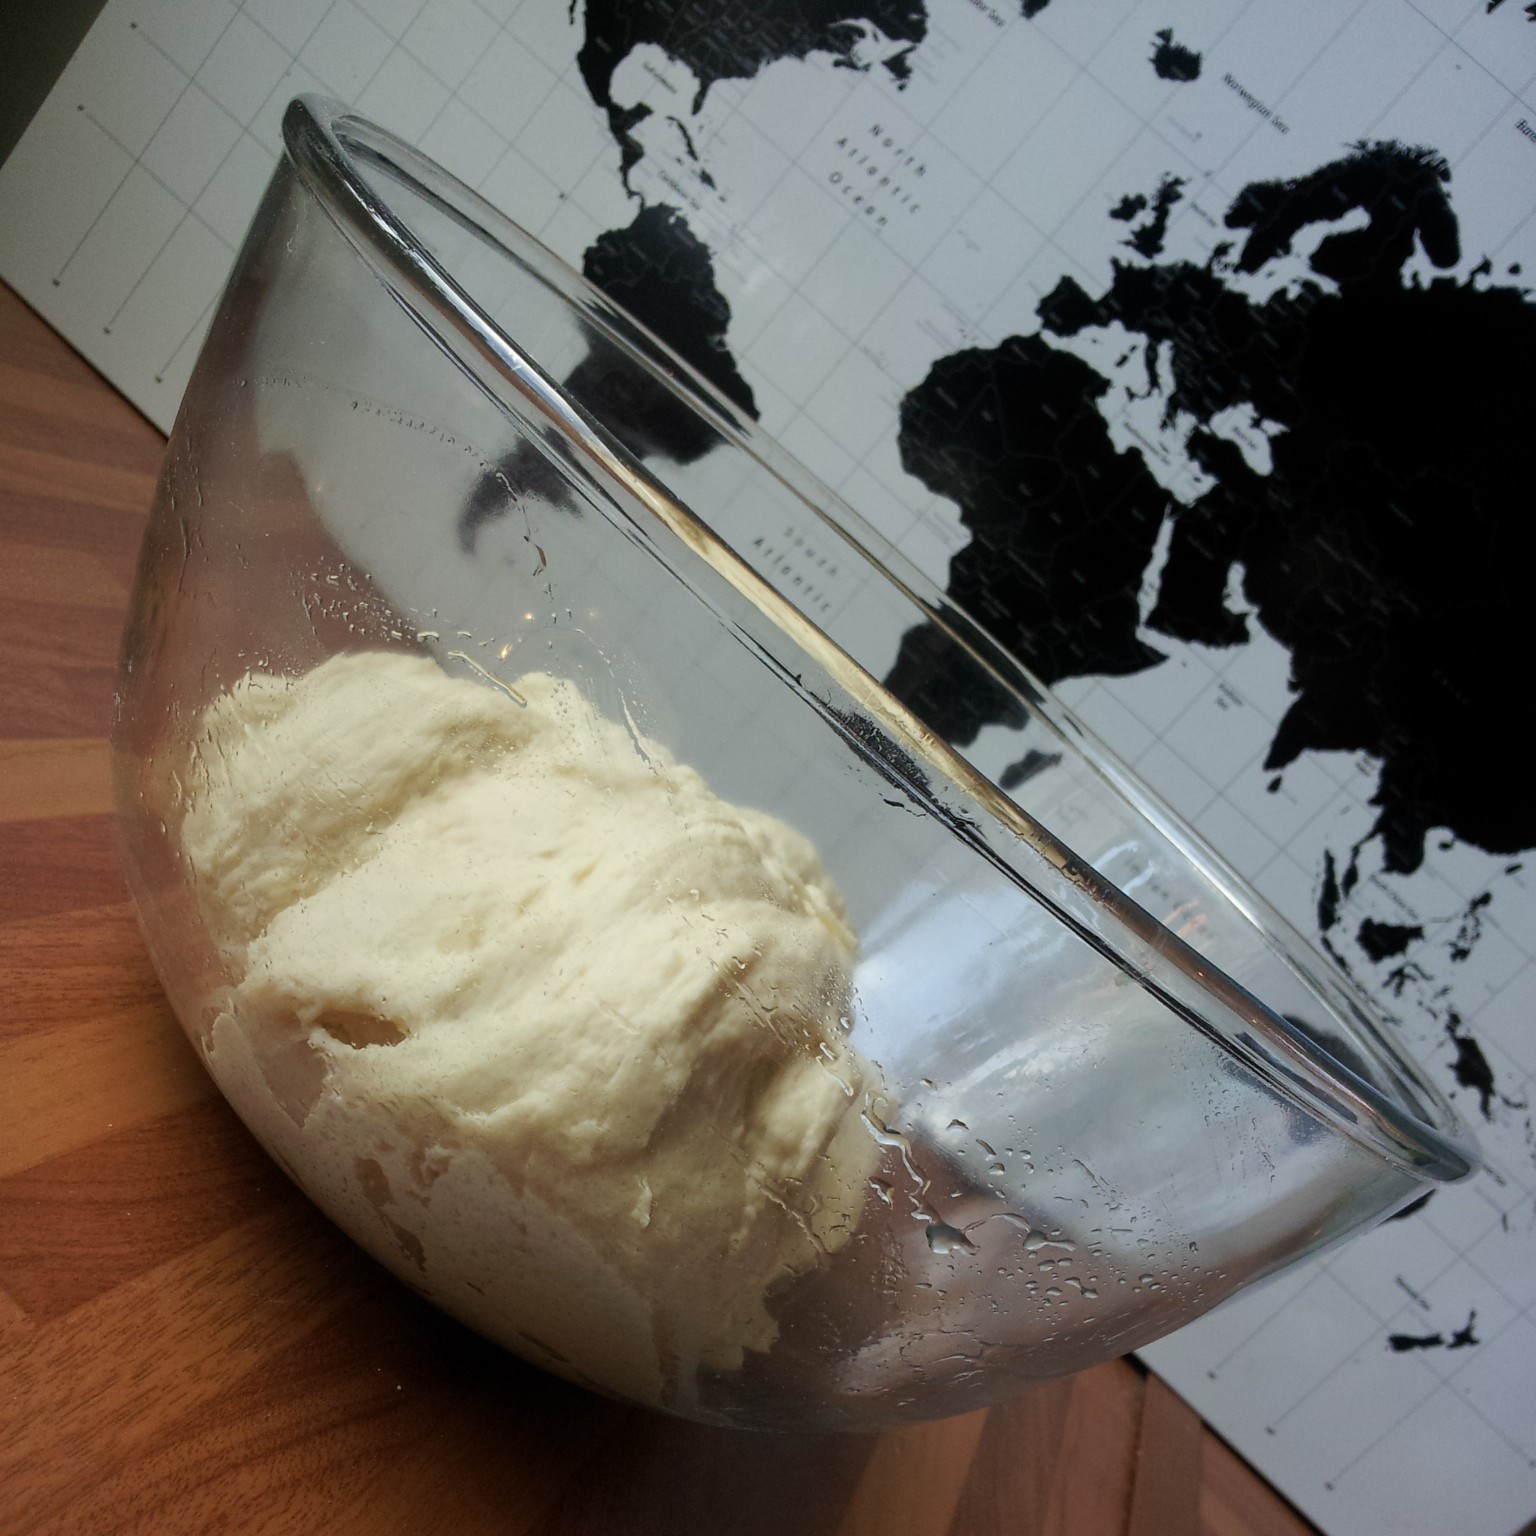
Leave the kneaded dough to prove

Prove the dough until doubled in size
Knead the dough for about 10 minutes until smooth and springy. Then leave to prove at room temperature for 1 to 2 hours until at least doubled in size.

Knock the dough back and knead lightly
Knock the dough back and gently knead it on a lightly floured surface until it comes together in to a smooth ball.

Divide the dough into 8 equal sized balls
Divide the dough into 8 equal portions, shape into a ball and cover with greased cling film.

Roll each dough ball out into a flat circle about 5mm thick
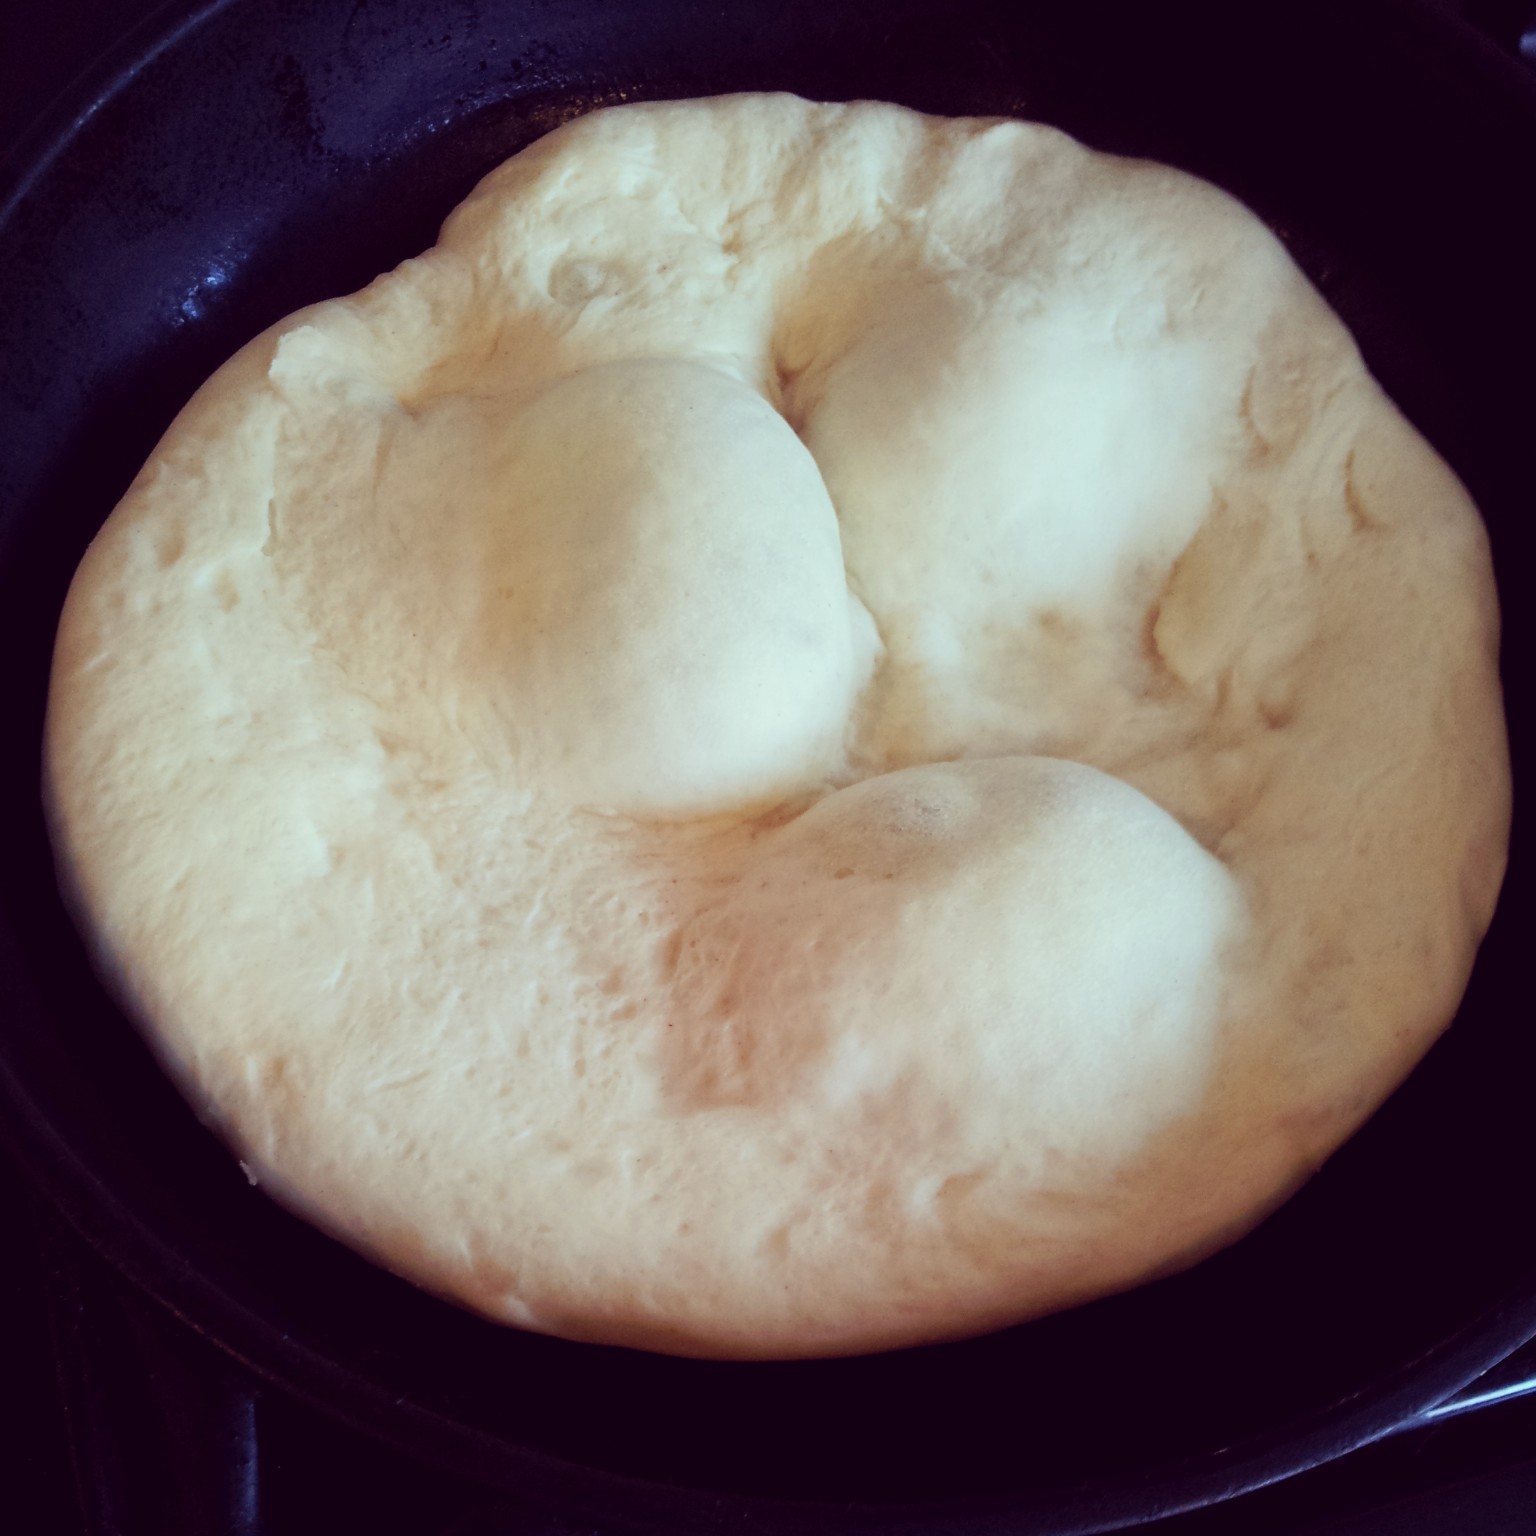
Flatten each dough ball out onto a lightly floured surface . Using a rolling pin roll out each ball into a circle about 5mm thick. Cover again with greased cling film and leave to rest and prove for 15 mins, until puffed up slightly. You’ll see the yeast get to work pretty quickly when these are laid out in a warmish room.

Gently proven Bazlama ready for cooking
Whilst the dough awàits it’s final prove, heat the frying pan adding a splash of olive oil until sizzling hot. Gently place a proven circle of dough into the scalding hot pan. It will sizzle on impact, so watch out for any splashes oil. The Bazlama will puff up even further with the heat from the pan and bubble up in some places.
Bubbling Bazlama hitting the cast iron pan
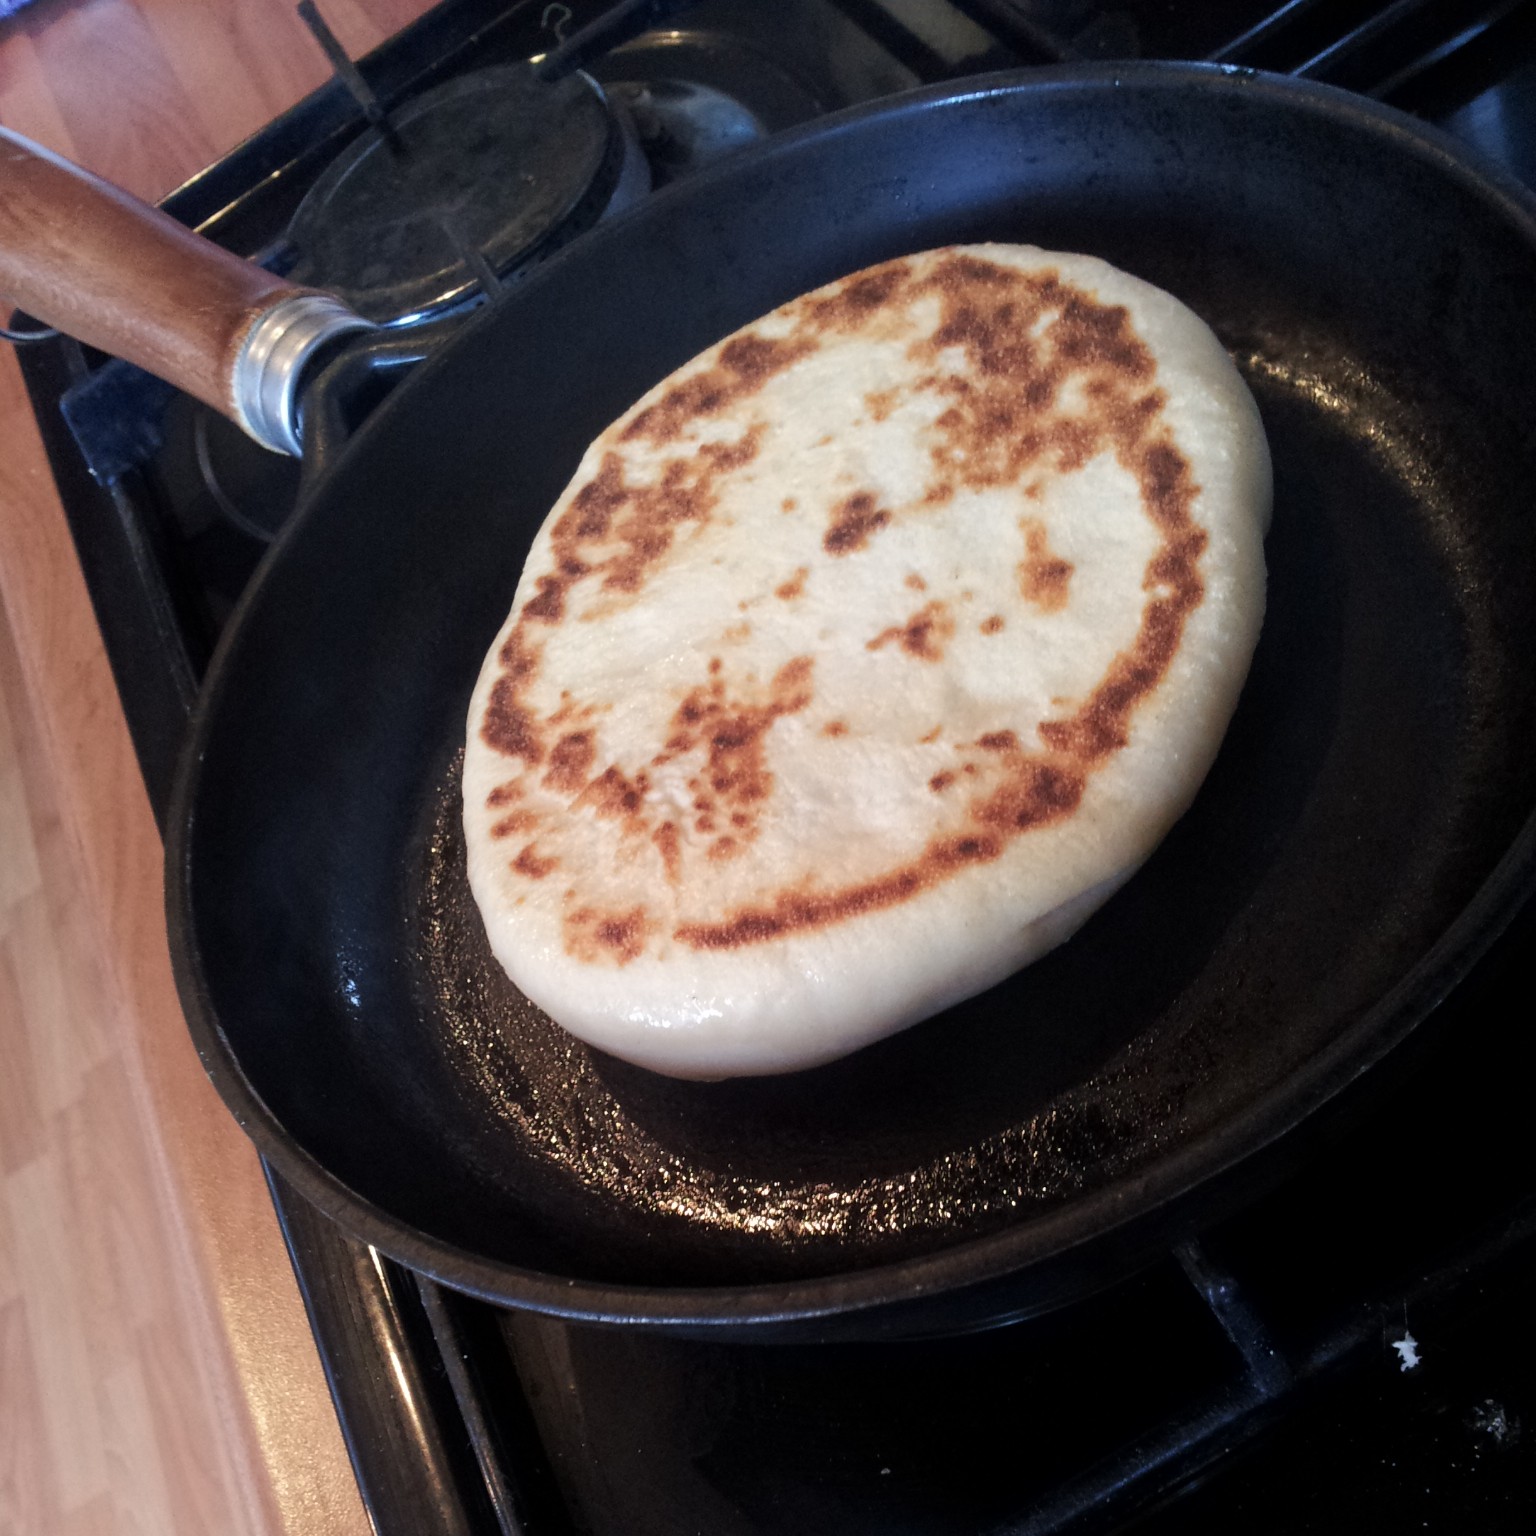
Cook the Bazlama for one minute and flip it over and cook it for another minute on the other side. It should start to turn a golden brown and crisp slightly on the outside.
Cooking in cast iron
You may want to flip it over again to check that the Bazlama is cooked evenly all over and reached your desired degree of brownness. I like a slightly deeper colour on my breads to add to the flavour and texture. Once it’s cooked remove it from the pan and cover with a clean tea towel to keep it warm and soft. Repeat, until you’ve cooked all the Bazlamas!
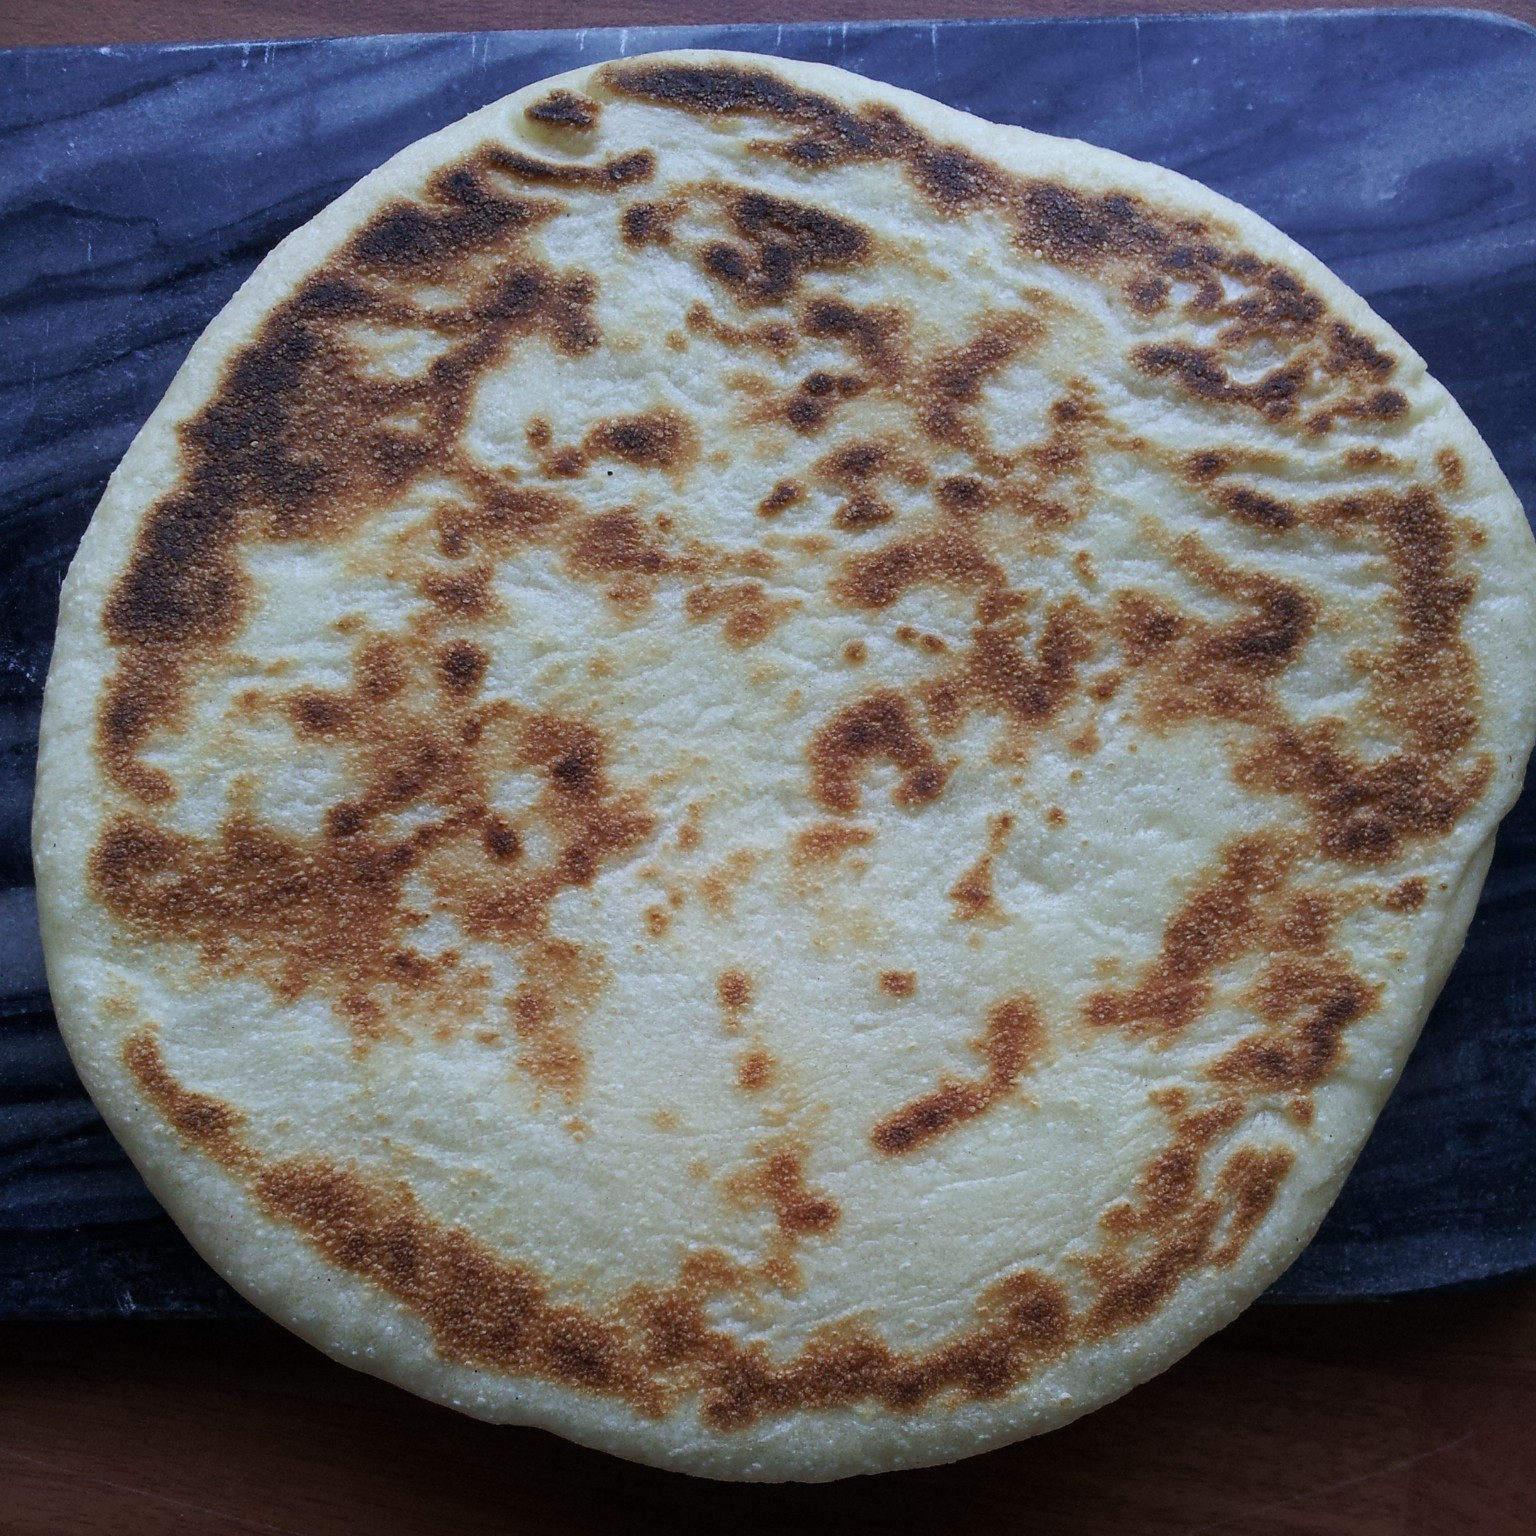
Check out that deep brown sizzle pattern
I love how each Bazlama takes on a slightly different charred pattern as it sizzles in the pan. The beauty of cooking in a cast iron pan means that if it starts to get too hot and you smell burning, just take the pan off the heat and it will continue to cook as the pan retains the heat. Once it’s cooled slightly you can safely return your pan to the heat to continue your cooking.

That pan spring! Pillowy soft Bazlamas
Cooking one side at a time gives the Bazlama the opportunity to spring up fully as the yeast activates fully reacting to the intense heat. You can see how much your Bazlama rises in the pan. Check out that fluffy white mid section at last an inch thick!
Beautiful Bazlama
I adore Bazlamas. They have a wonderful chewy texture almost like a pretzel but much softer. Bazlamas are a perfect comforting addition to any meal or a meal in itself, as they are quite filling. I served my Bazlamas with homemade Tabbouleh and hummus. Delicious! They’re best eaten warm from the pan, but they also freeze extremely well. I defrost them in the toaster on a low setting, as I prefer to eat them warm. However they also make an excellent portable lunch and have eaten many unadulterated Bazlamas straight from my handbag whilst on foot in between meetings.
Things I used to make my Bazlama
- 650g plain flour (not strong bread flour)
- 8g instant dried yeast
- 16g (1 tbs) caster sugar
- 16g (1tbs) salt
- 280g water
- 120g Greek yoghurt
- Mix the ingredients together to form a dough
- Knead for 10 minutes til smooth and shiny
- Cover with greased cling film and prove until doubled in size
- Knock back the dough, knead and divide into 8 balls
- Roll out each ball to a flatbread
- Leave to rest for 15 minutes
- Cook on each side for 1 minute in a hot pan
- Remove from the pan and cover the cooked Bazlamas with a cloth whilst cooking the remaining Bazlama

Looks delicious – I adore flatbreads! Do you think you could achieve the same using a soya yoghurt? My fiance is dairy intolerant.
Hello Becs
Thanks so much for reading! I think it would work well with non dairy yoghurt. I think the yoghurt is included to add a creaminess to the bread rather than act as a raising agent as there’s instant yeast in it. So in theory I think soya yoghurt would be a good alternative. If you give it a go please do let me know how you get on. Enjoy! I absolutely love these so delicious!!
They look lovely. Nice blog. Look forward to reading more.
Andy vegiefoodie.com